4. TM
更新: 2026/8/21 字数: 0 字 时长: 0 分钟
4.1 List Page
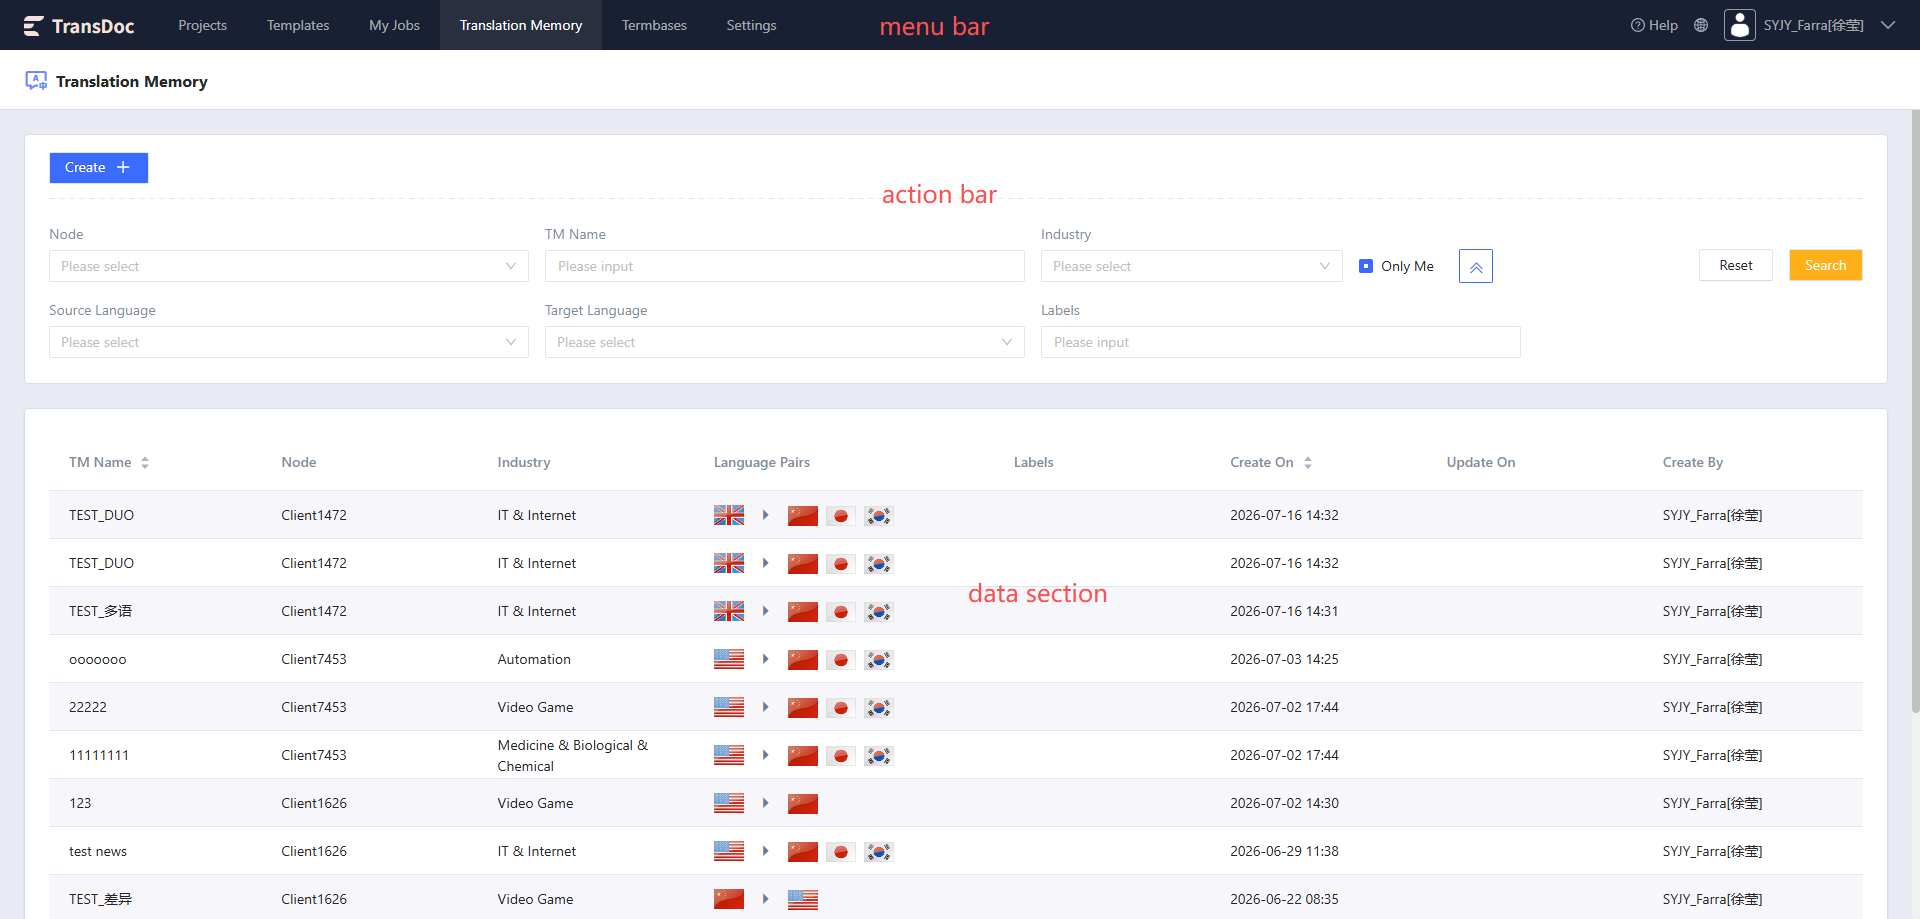
The list page consists of a menu bar, an action bar, and a data section.
Action bar: The action bar provides Create, Search, and Reset functions.
Data section: The data section table paginates the TM list by TM Name, Client, Industry, Language Pairs, Create On, Update On, Create By, etc.

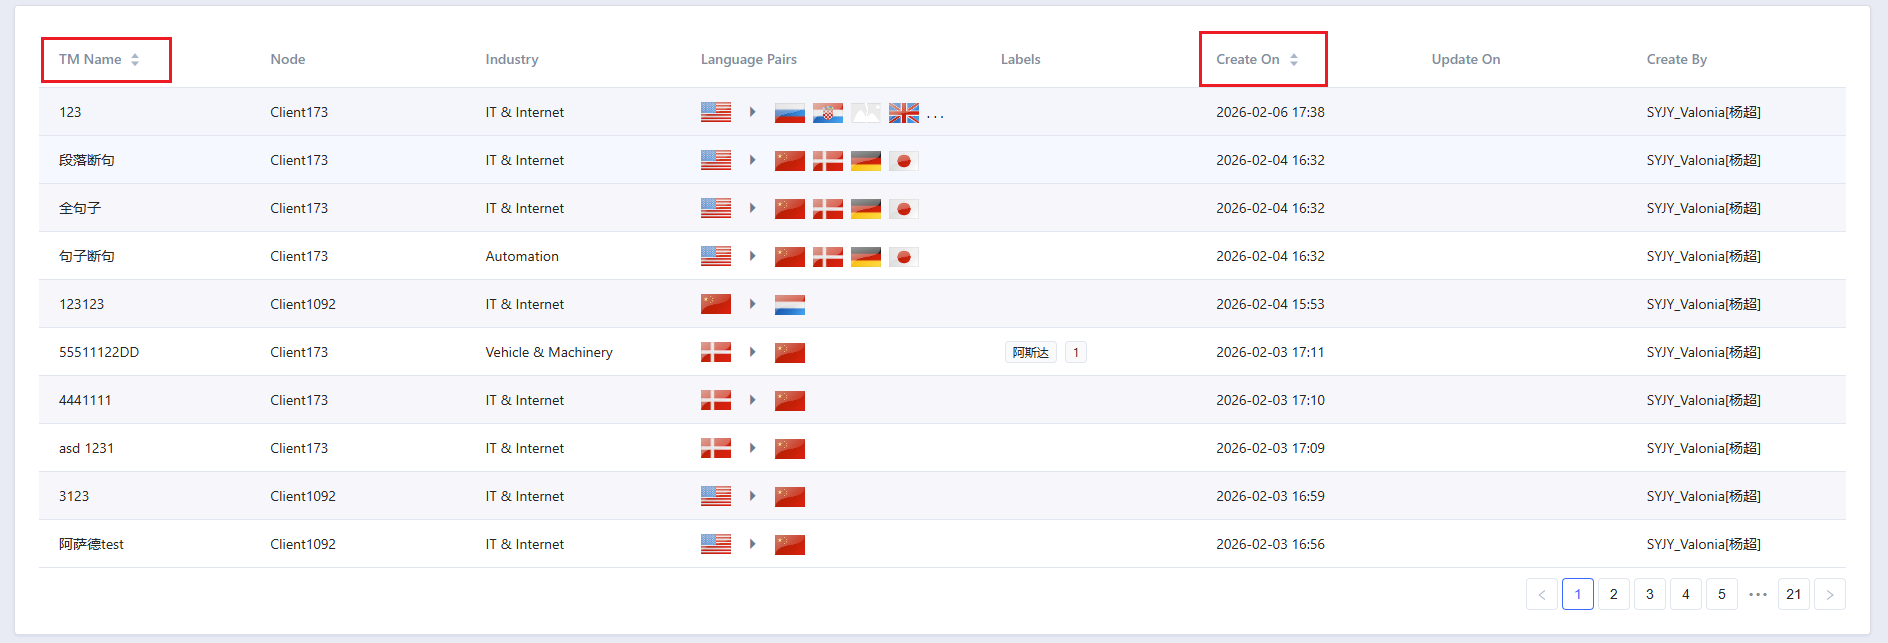
- TM sorting: The table provides sorting functions for the TM Name and Create On columns. Click the button on the right of the corresponding column to apply different sorting rules.
4.2 Create TM
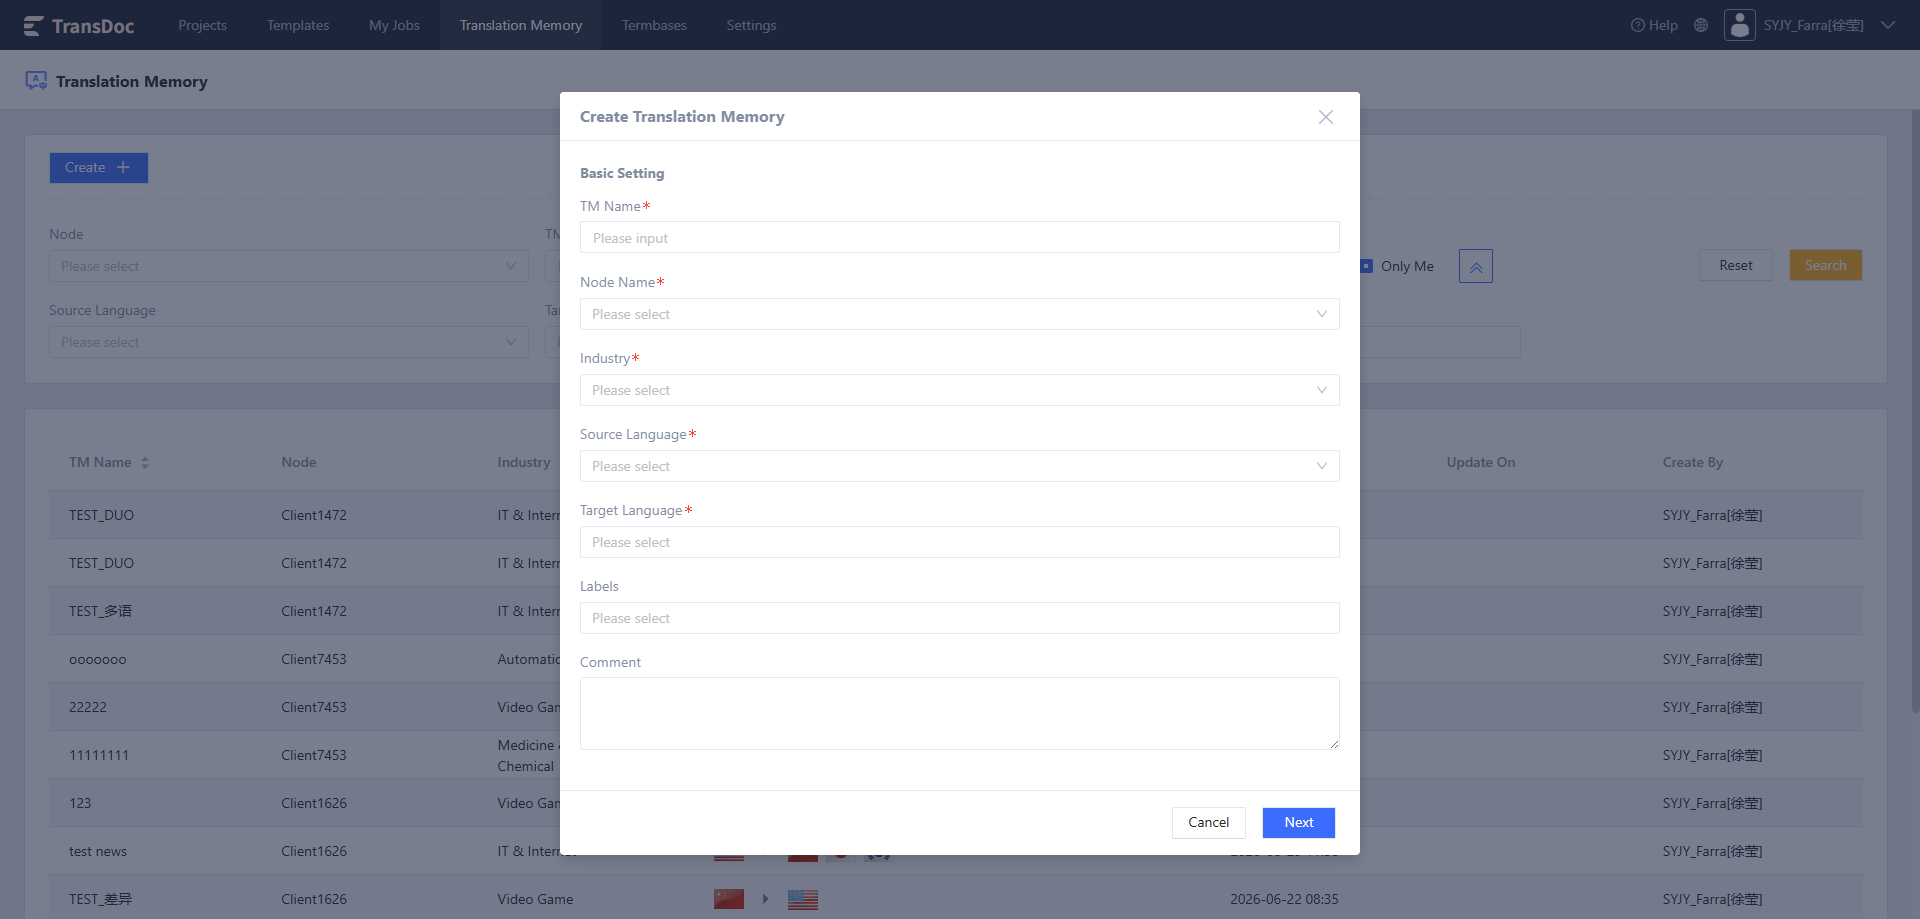
- Click the "New +" button at the top left of the page to open the Create TM window (the window shown in Figure 1 is centered on the page).
- Fill in basic information (modal first page: Basic Settings)
- Window title: Create Translation Memory
- Required fields (marked with a red * on the page):
- TM Name (TM Name *): Please enter the name of this TM (example: Client123_EN-ZH_TM).
- Node Name (Node Name *): Select the node to which the TM belong from the dropdown (e.g., Client1092, Client173, etc.).
- Industry (Industry * ): Select the business domain from the dropdown (e.g., IT & Internet, Video Games, etc.).
- Source Language (Source Language * ): Select the source language (e.g., English).
- Target Language (Target Language *): Select the target language (e.g., Chinese (Simplified)).
- Optional fields:
- Tags (Tags): Tags for quick filtering/classification; both multiple selection and manual input are supported.
- Comment (Comment / Comment): Fill in additional notes.
- Action buttons (at the bottom of the window):
- Cancel: Abandon this creation and close the window.
- Next: After validating the required fields on the current page, proceed to the Advanced Setting page.
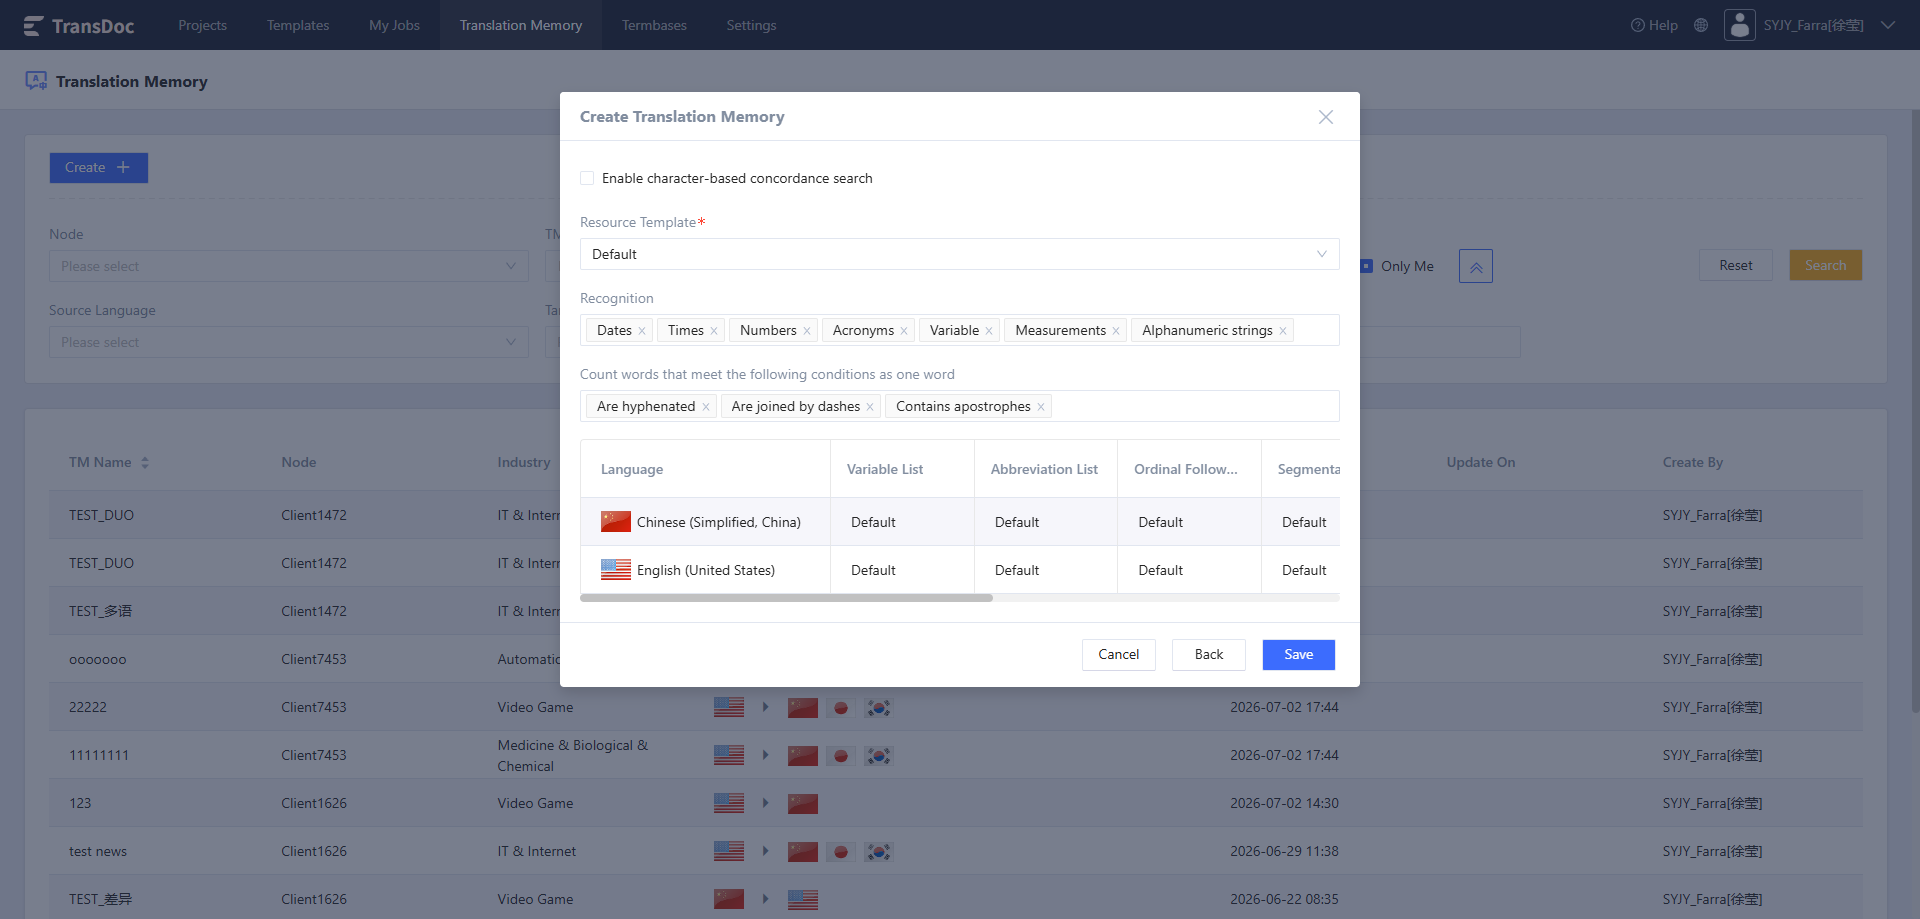
Configure advanced settings (second page: Advanced Setting, see Figure 2)
- Top of the page (checkable options):
- Enable character-based fuzzy search: Whether to enable character-level similarity matching (enable this option as needed; it can improve fuzzy match hit rate but may cause false matches).
- Resource template (Resource Template *): Set the TM resource/template configuration (default settings available). For detailed resource template settings, see #4.6.
- Recognition (Recognition module): Select recognition types, such as date, time, numbers, acronyms, variables, measurement units, alphanumeric strings, etc. Recognition items will affect tokenization and matching logic.
- Count the following characters as a single character: Define rules for handling consecutive characters or hyphenated items (for example “contains hyphen”, “connected by dash”, “contains numbering”).
- Language configuration table (bottom table): lists the currently selected source and target languages by language; Each row can be configured with:
- Language (Language)
- Variable (Variable)
- Abbreviation (Abbreviation)
- Sequence (Sequence)
- Segmentation rules (Segmentation rules) Each column's default value is Default. Click the corresponding cell to edit the specific rules for the corresponding language.
- Action buttons (bottom of the window):
- Cancel: Abandon creation and close the window (same as Cancel on the first page).
- Back: Return to the Basic Settings page to modify the entered information.
- Save: Save and create the translation memory (only after all required fields and validations are met).
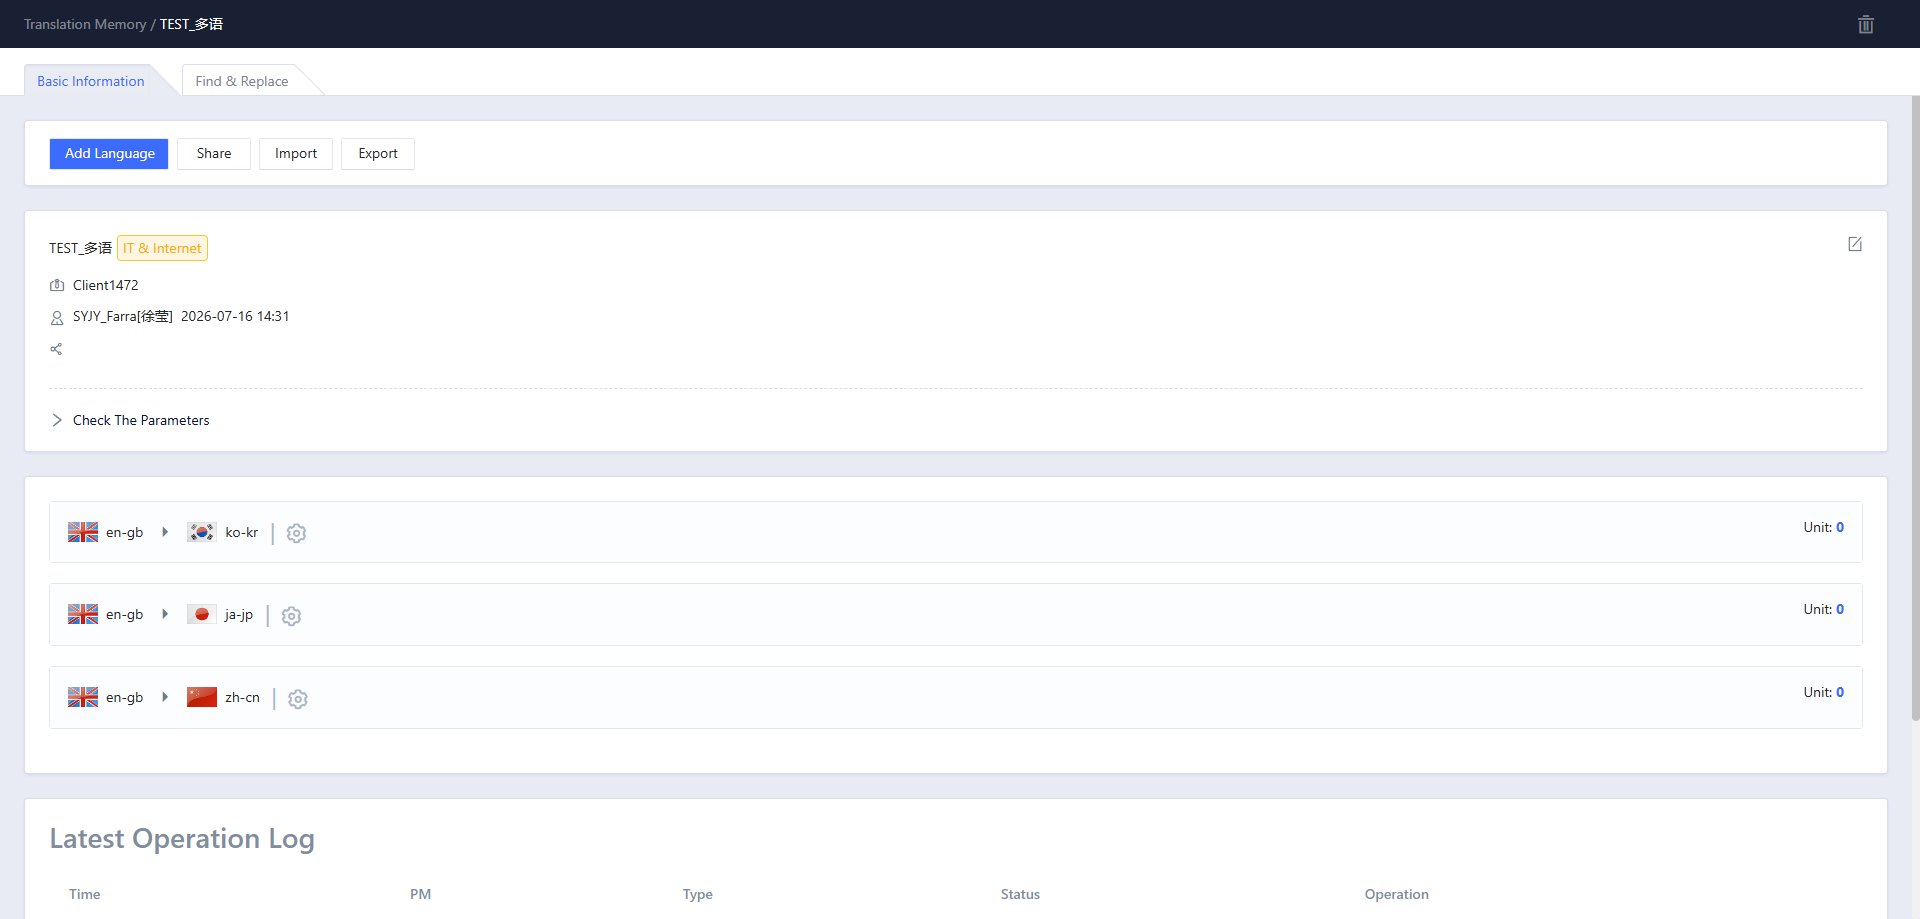
After success, a creation success notification will pop up at the top of the page (for example: Creation succeeded). The system will automatically navigate to the newly created corpus details page (TM details page), where you can view statistics, import/export corpora, edit settings, and perform other operations.
4.3 TM Details Page
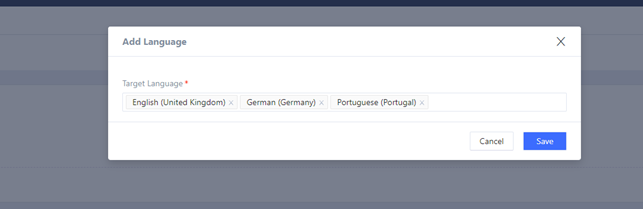
4.3.1 Add Language
- Add Language: Click the Add Language button to open the Add Language window. Select the target language to add Target Language, click the Save button to save, or click the Cancel button to cancel the addition.
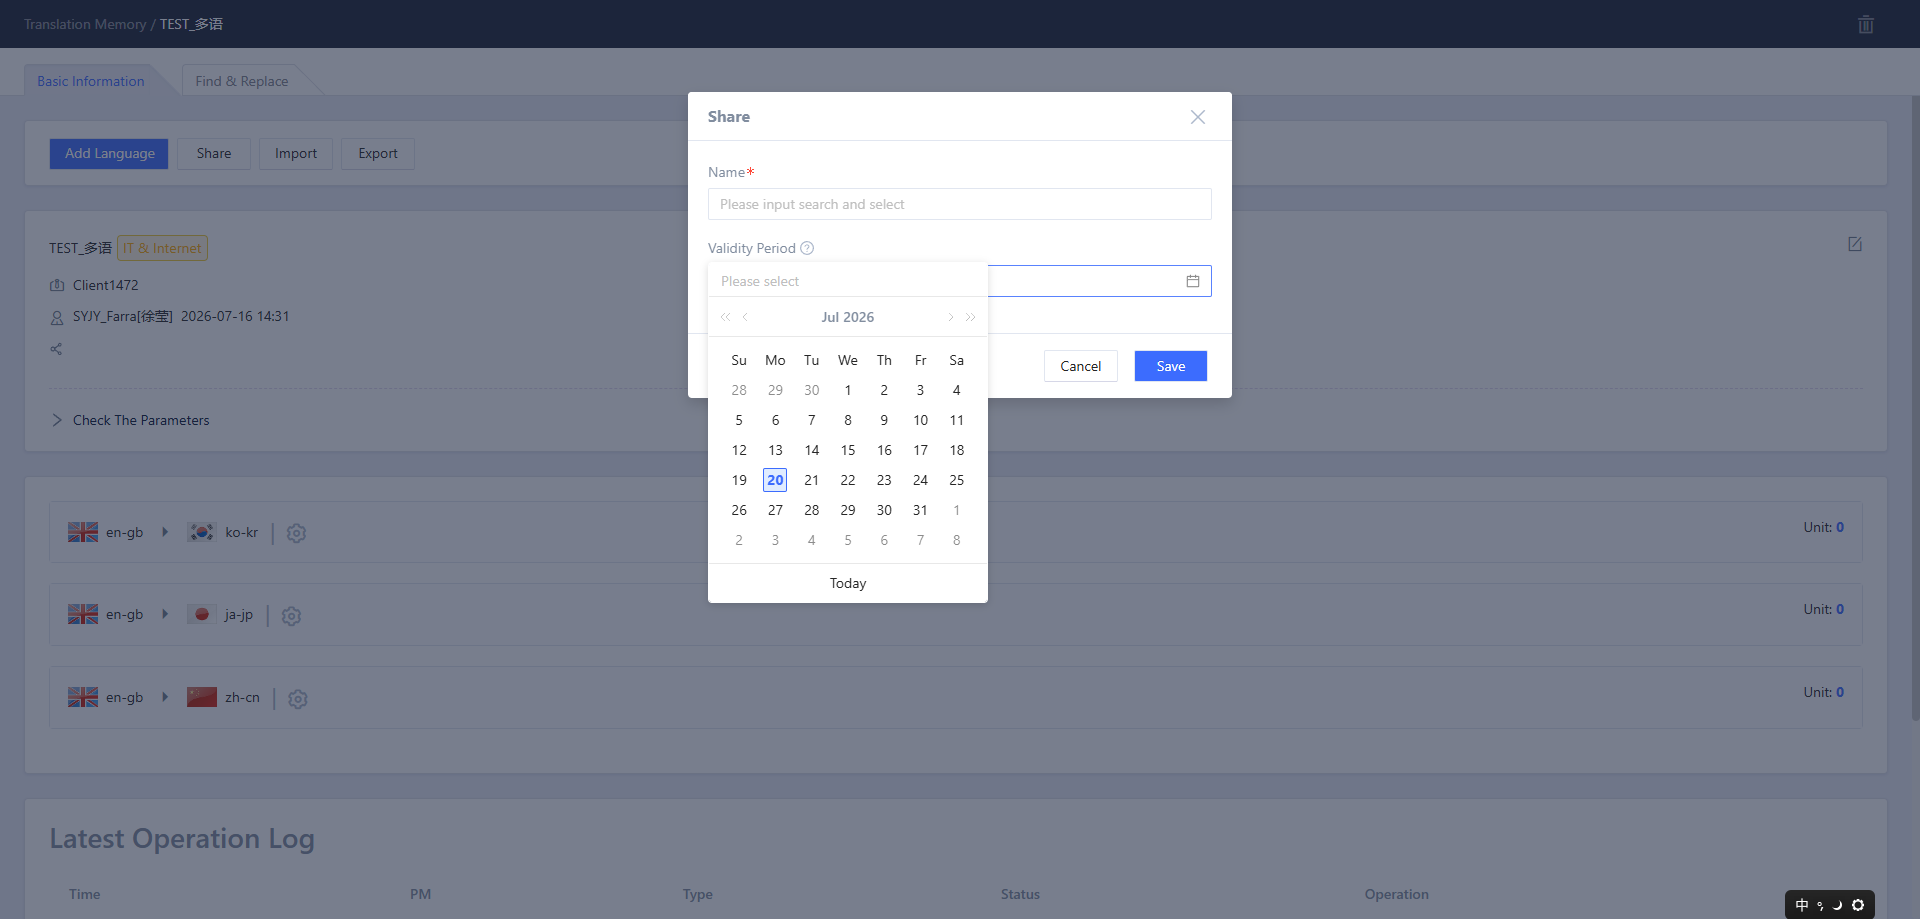
4.3.2 Share TM
Select the user(s) to share a TM with and define the validity period. Users can use the shared TM within the specified period. (When the validity period is left empty, the sharing is permanently valid.)
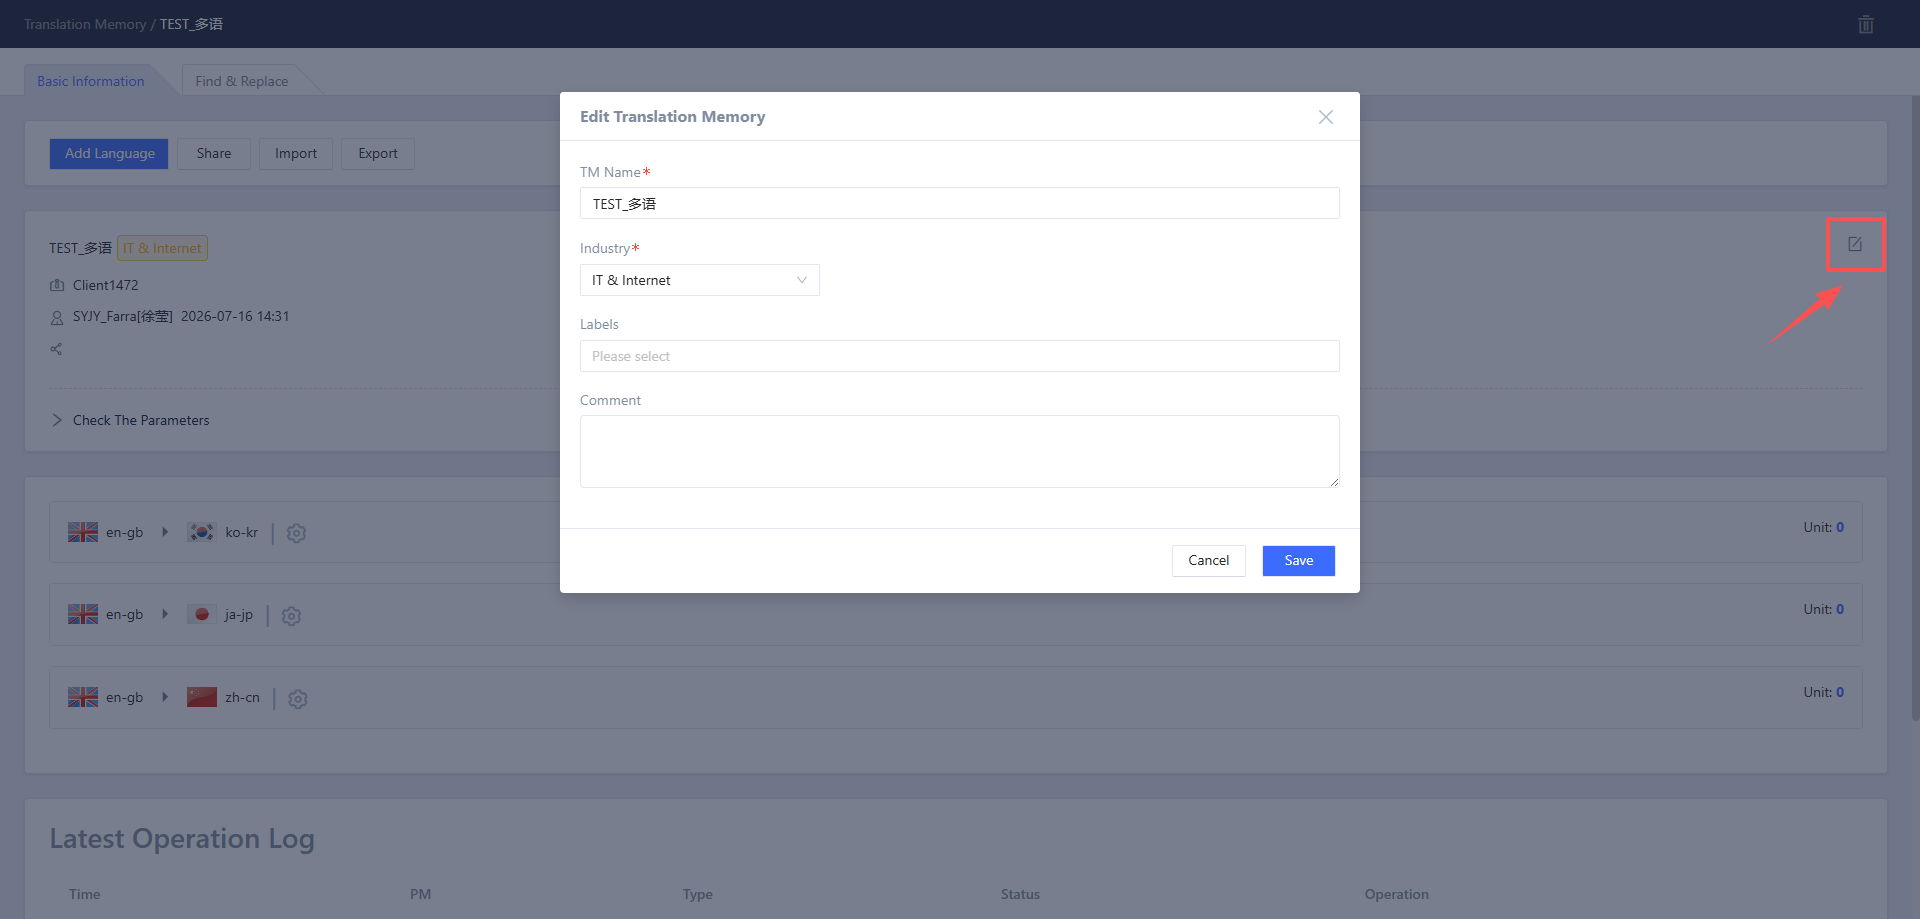
4.3.3 Edit Basic Information
Supports editing of TM name, domain, tags, comments, and other information.
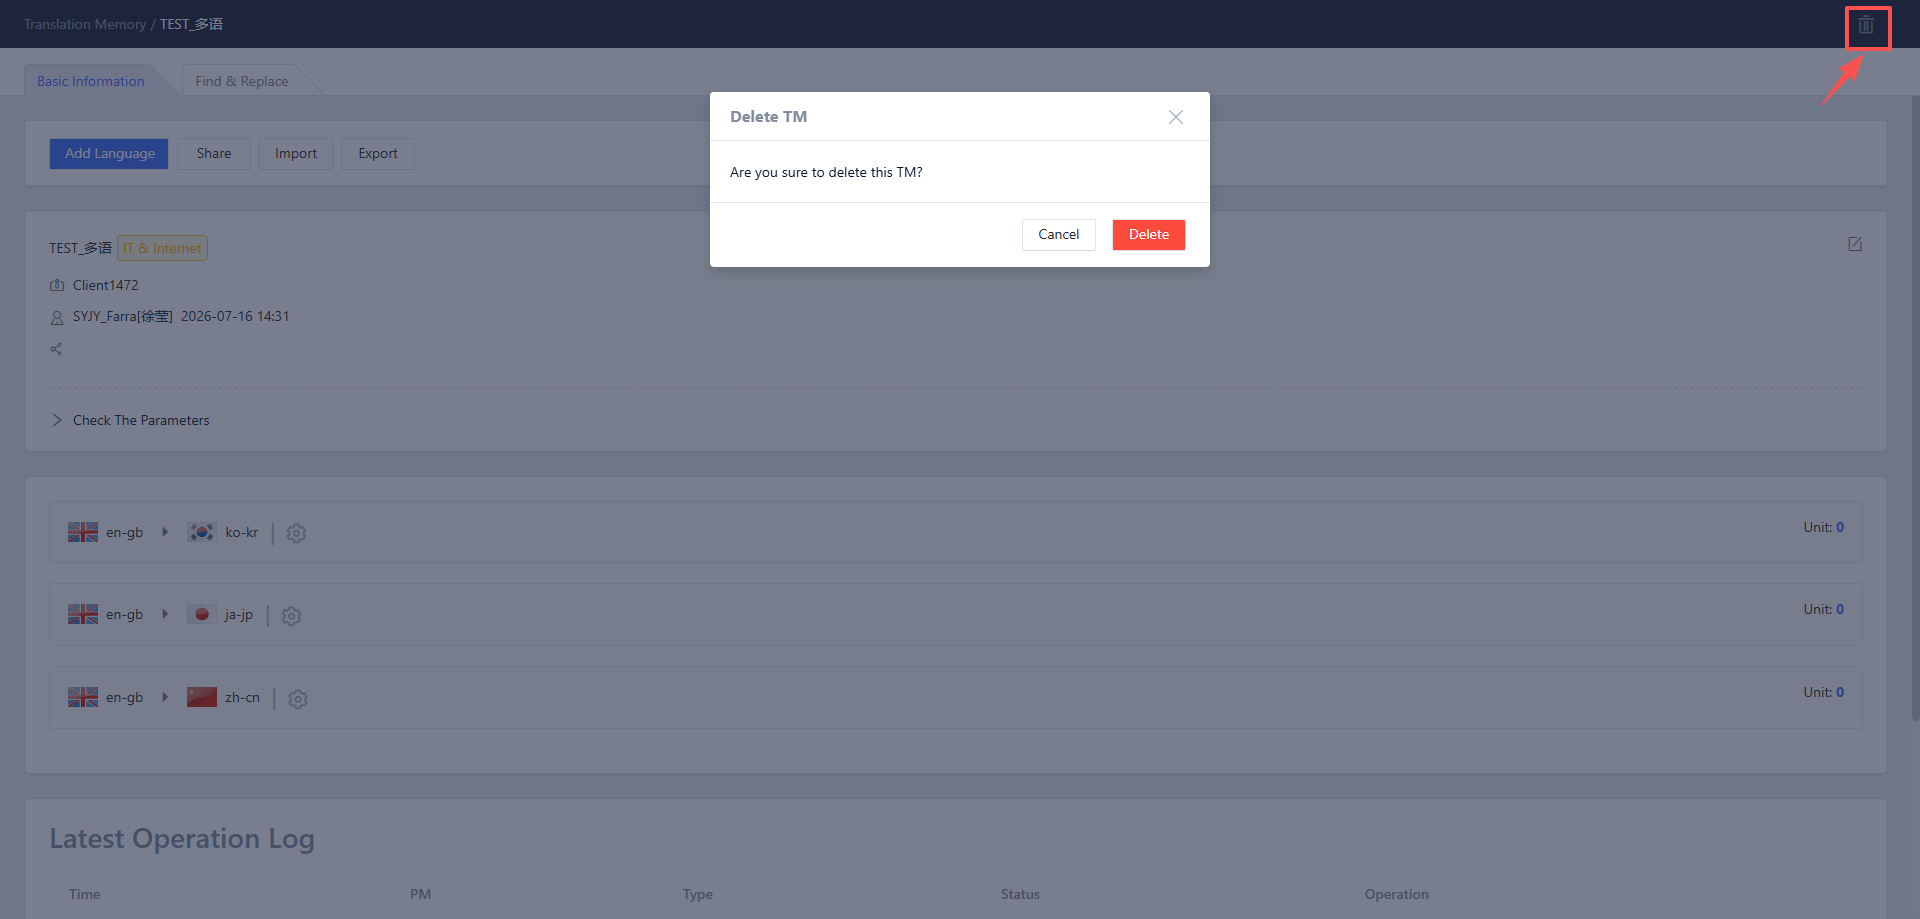
4.3.4 Delete Corpus
Click the Delete Corpus icon, the system will pop up a prompt window. Click the Delete button to delete the corpus;
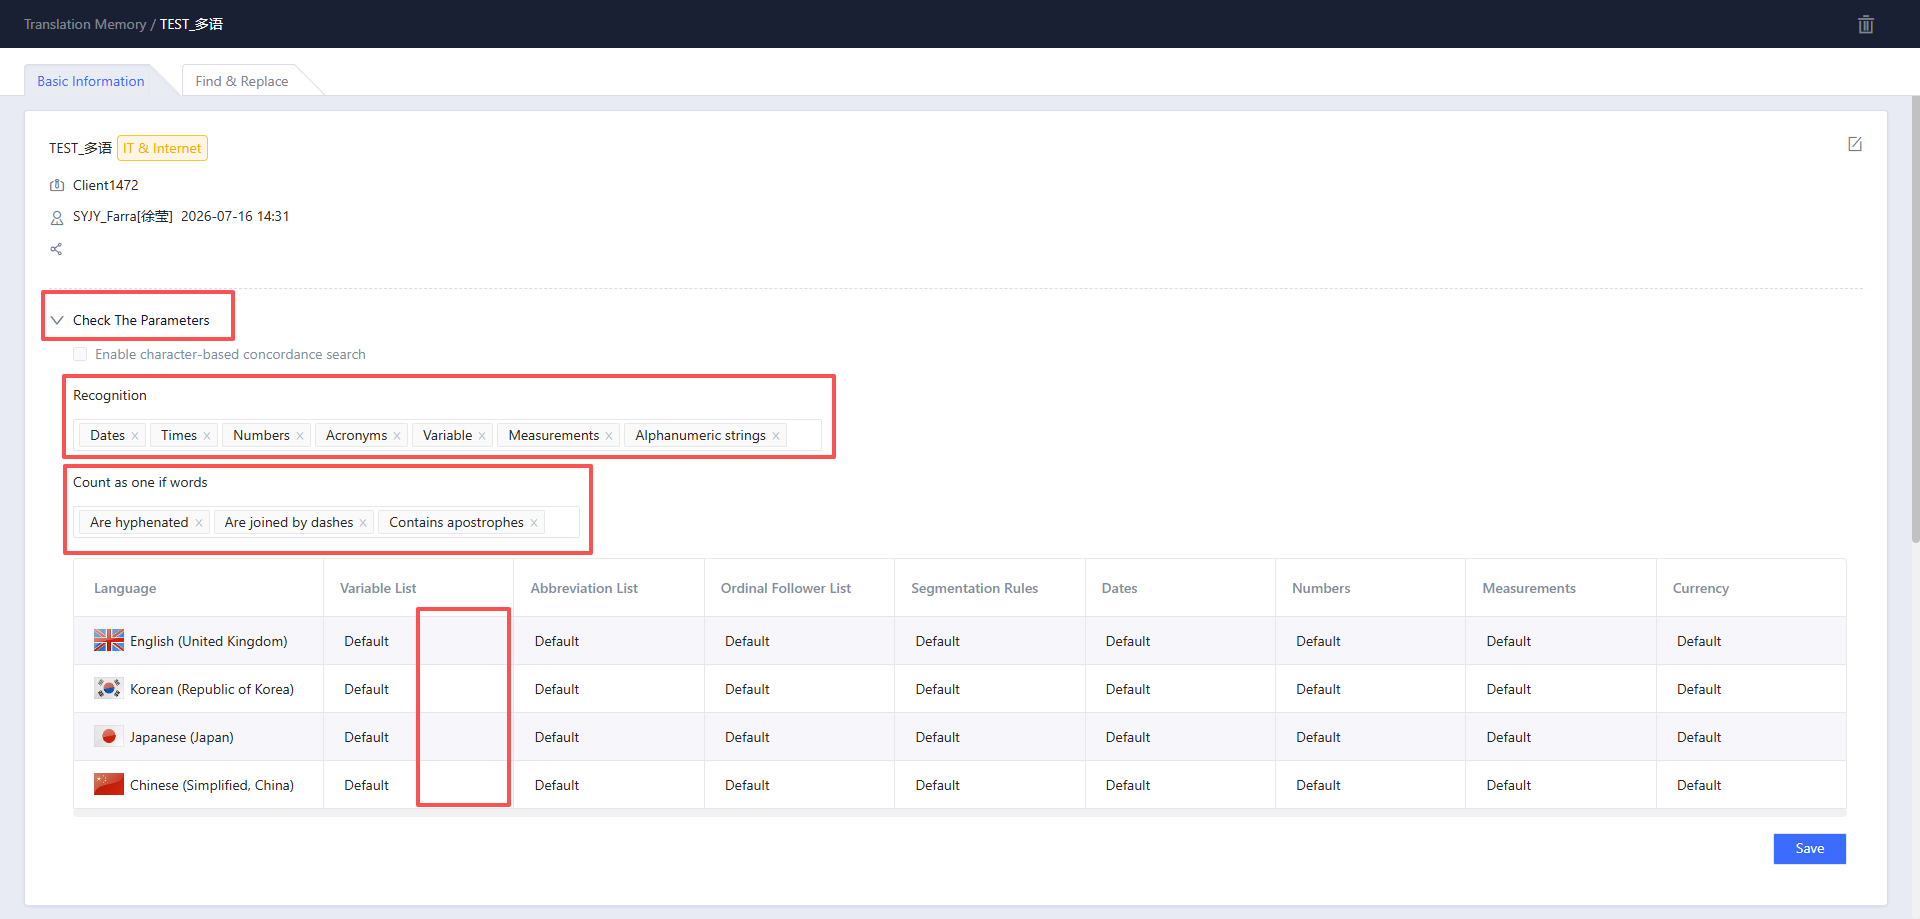
4.3.5 Modify Recognition Parameters
Advanced information such as TM recognition items can be modified in the inspection parameters
After modification, click the Save button to save the information. If there are entries in the current TM database, the entry index information will be recalculated.
For items related to language resource templates see #4.6 Language Resource Templates
4.3.6 Batch Import
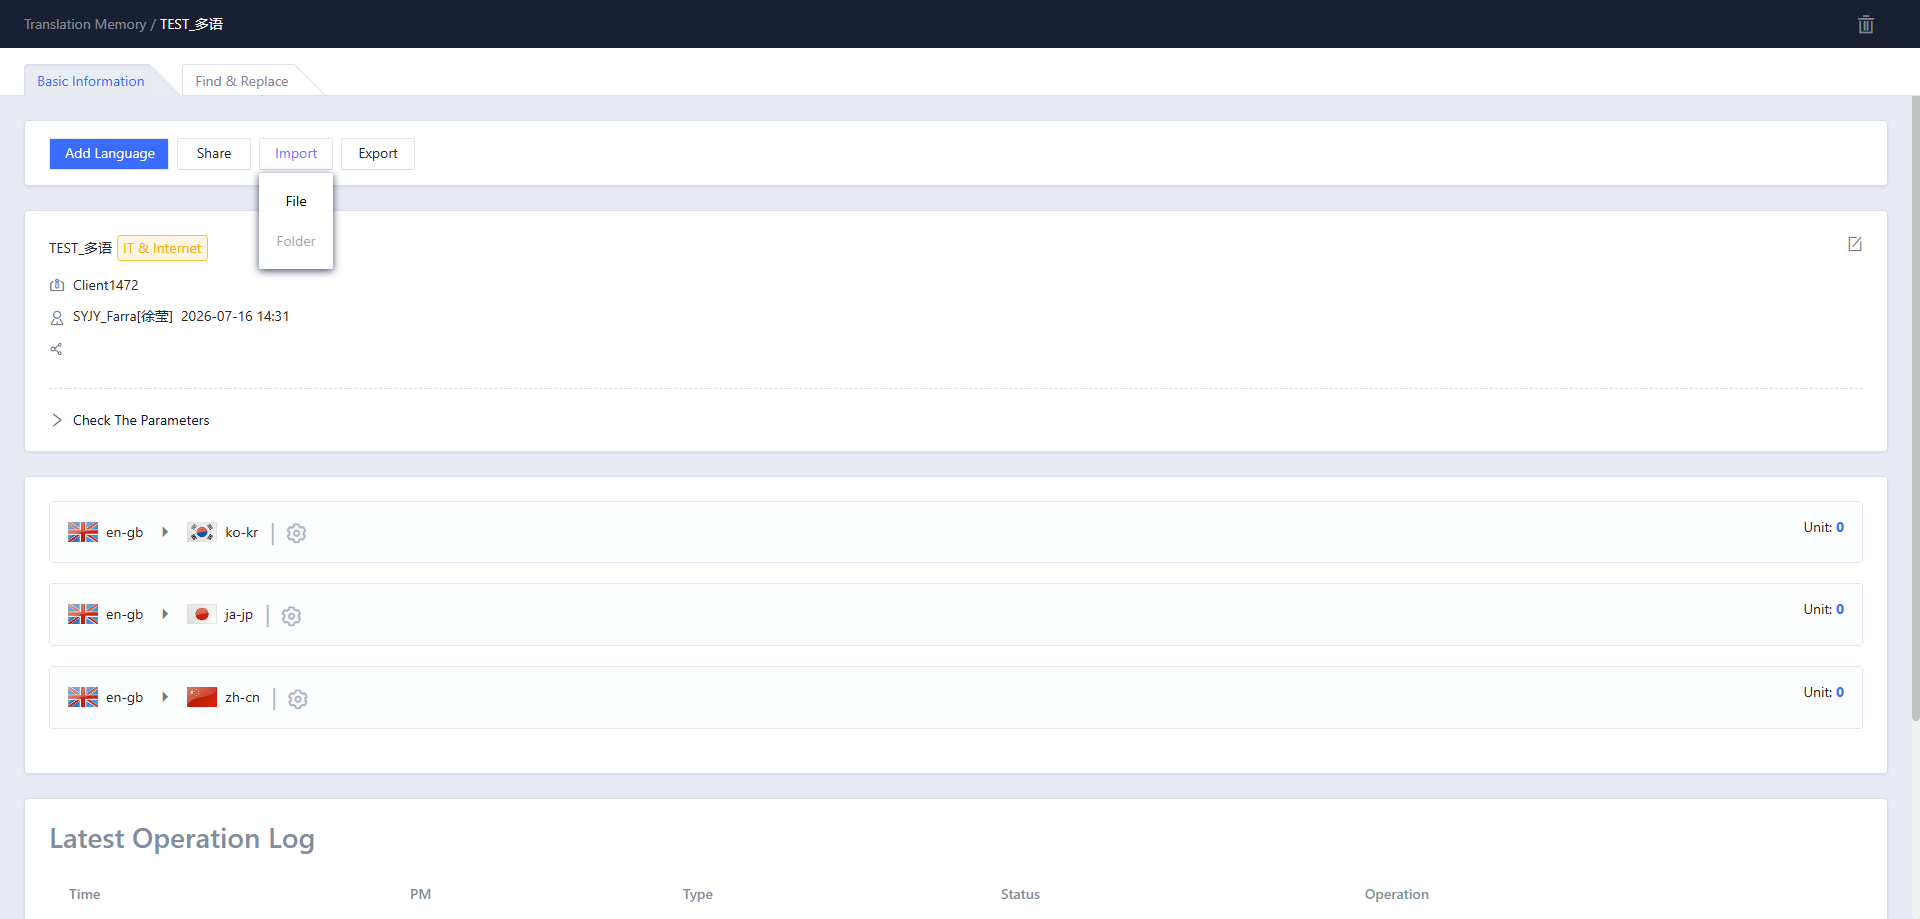
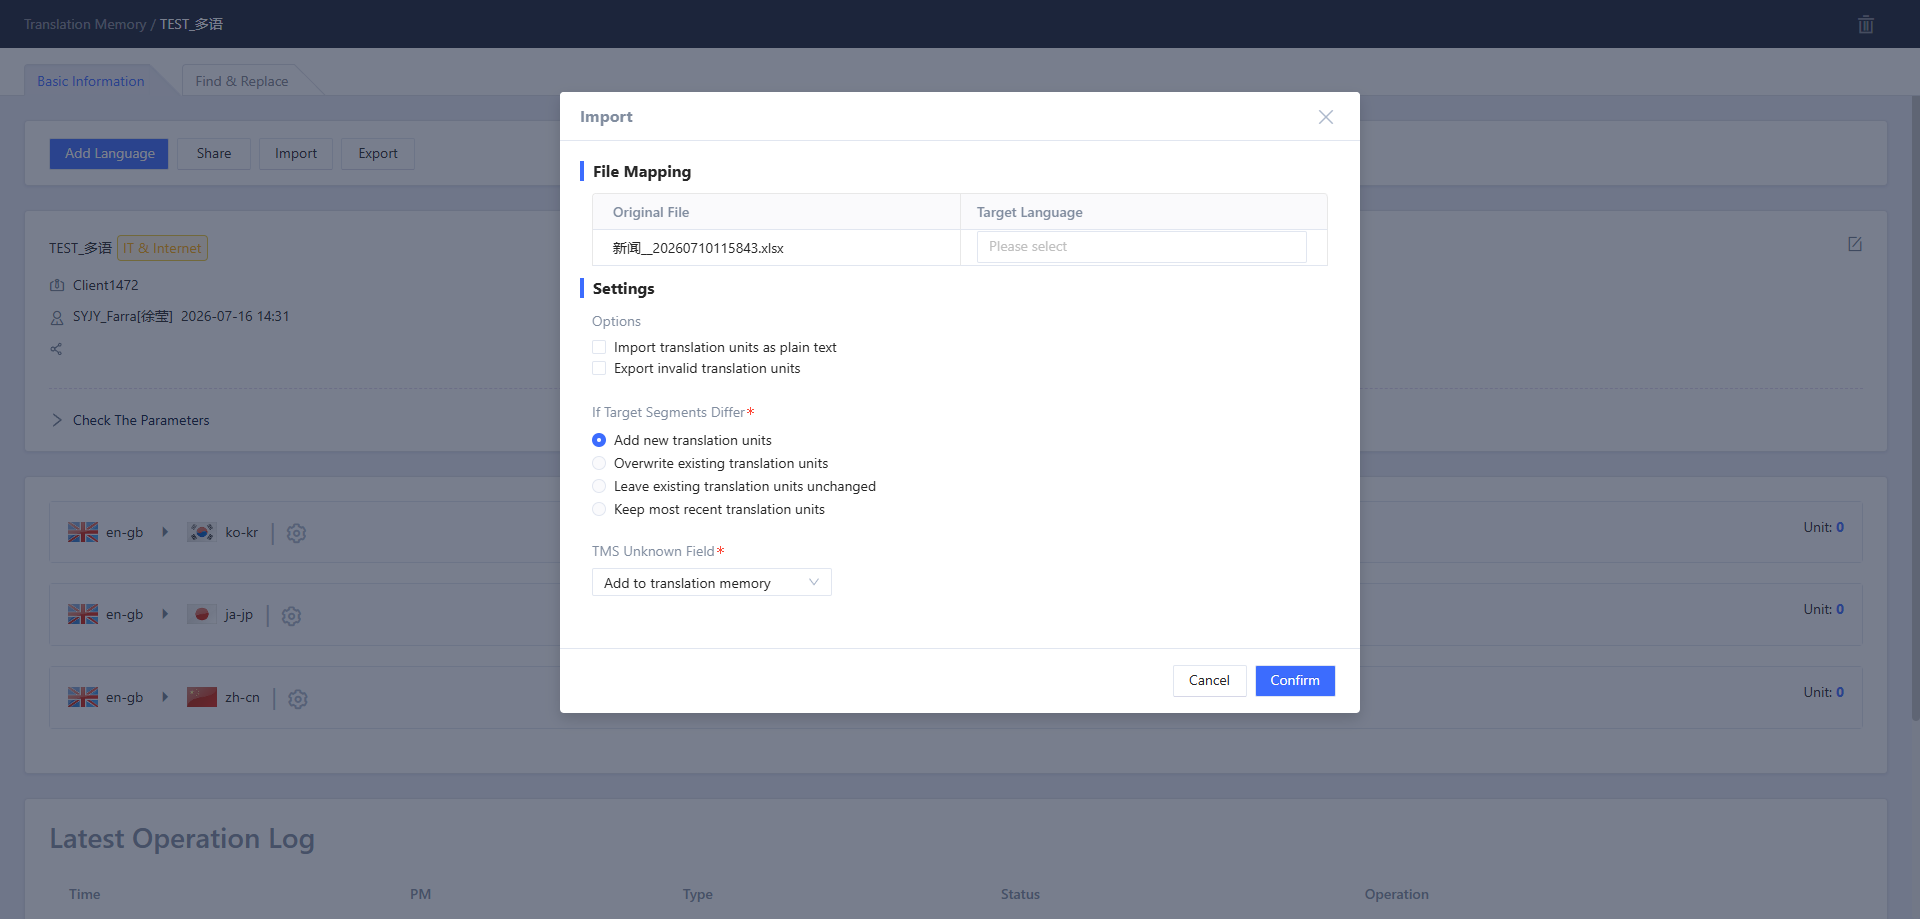
When performing batch import, you can select multiple files or folders to import. After the selection, the system will prompt for language mapping relationships, which can be selected according to the actual needs.
4.3.7 Batch Export
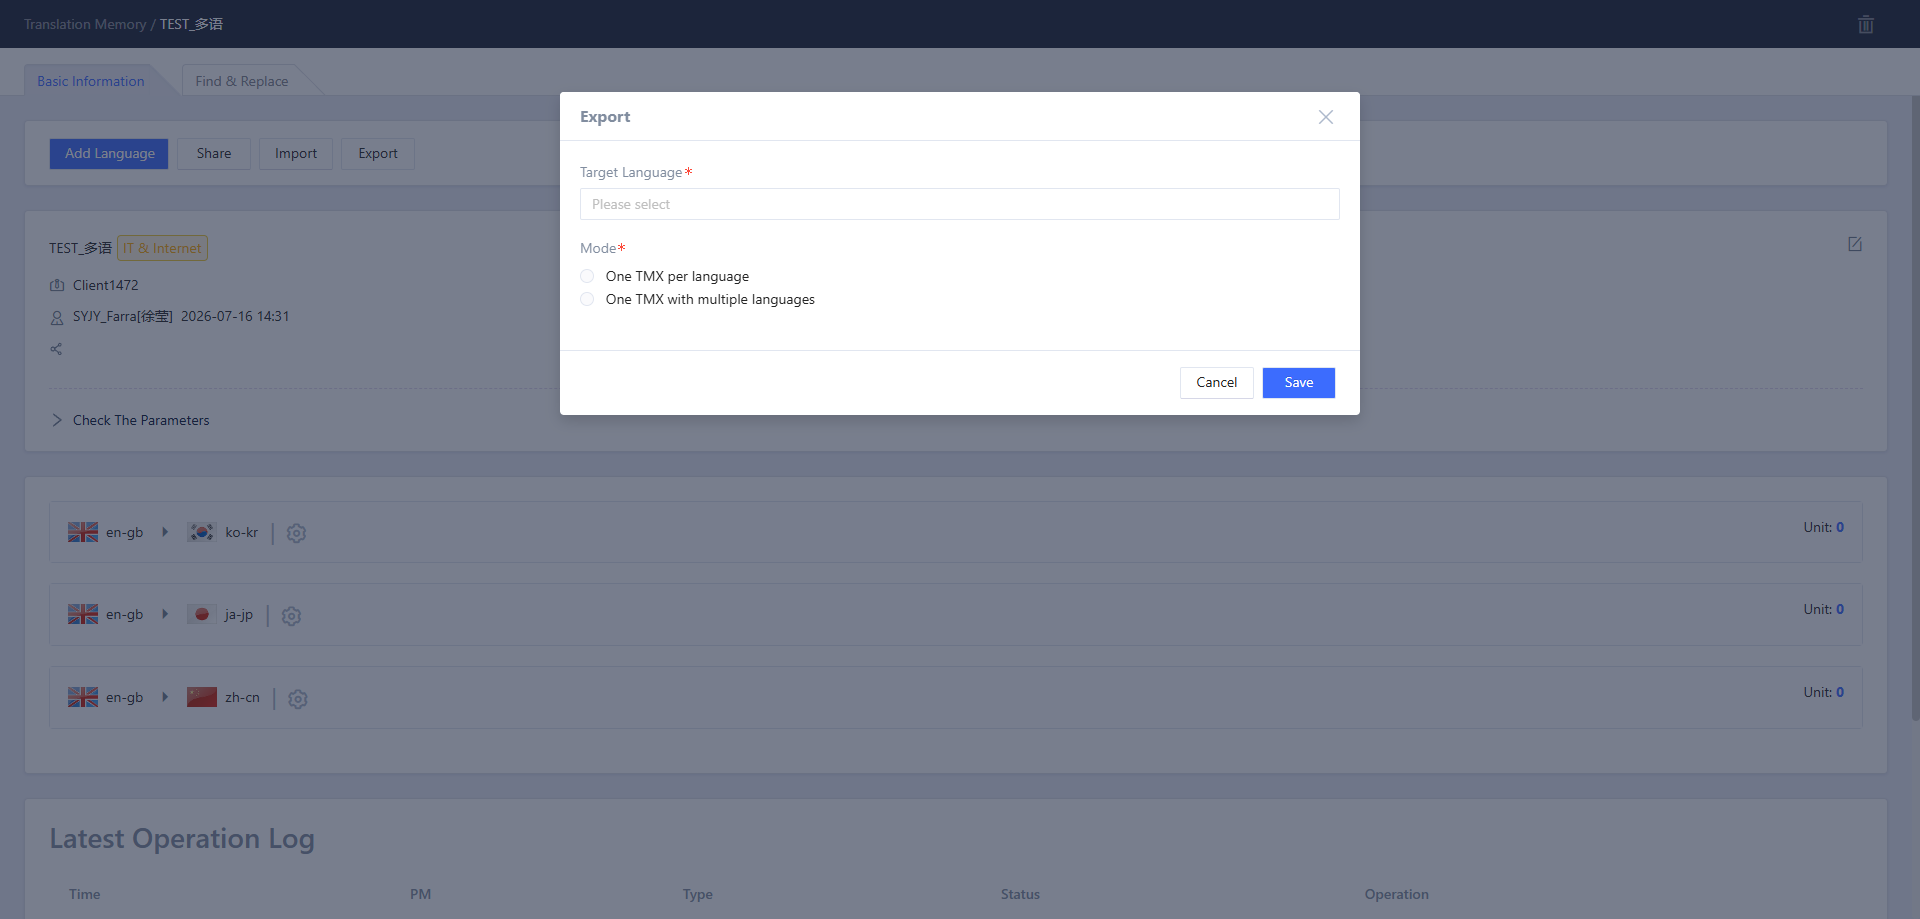
Click the Export button to open the export settings window, where multiple languages can be selected for simultaneous export.
- One TMX file per language: Exporting 3 languages will produce 3 TMX files
- One TMX with multiple languages: Exporting 3 languages will produce 1 TMX file
4.3.8 Language Operations
Import
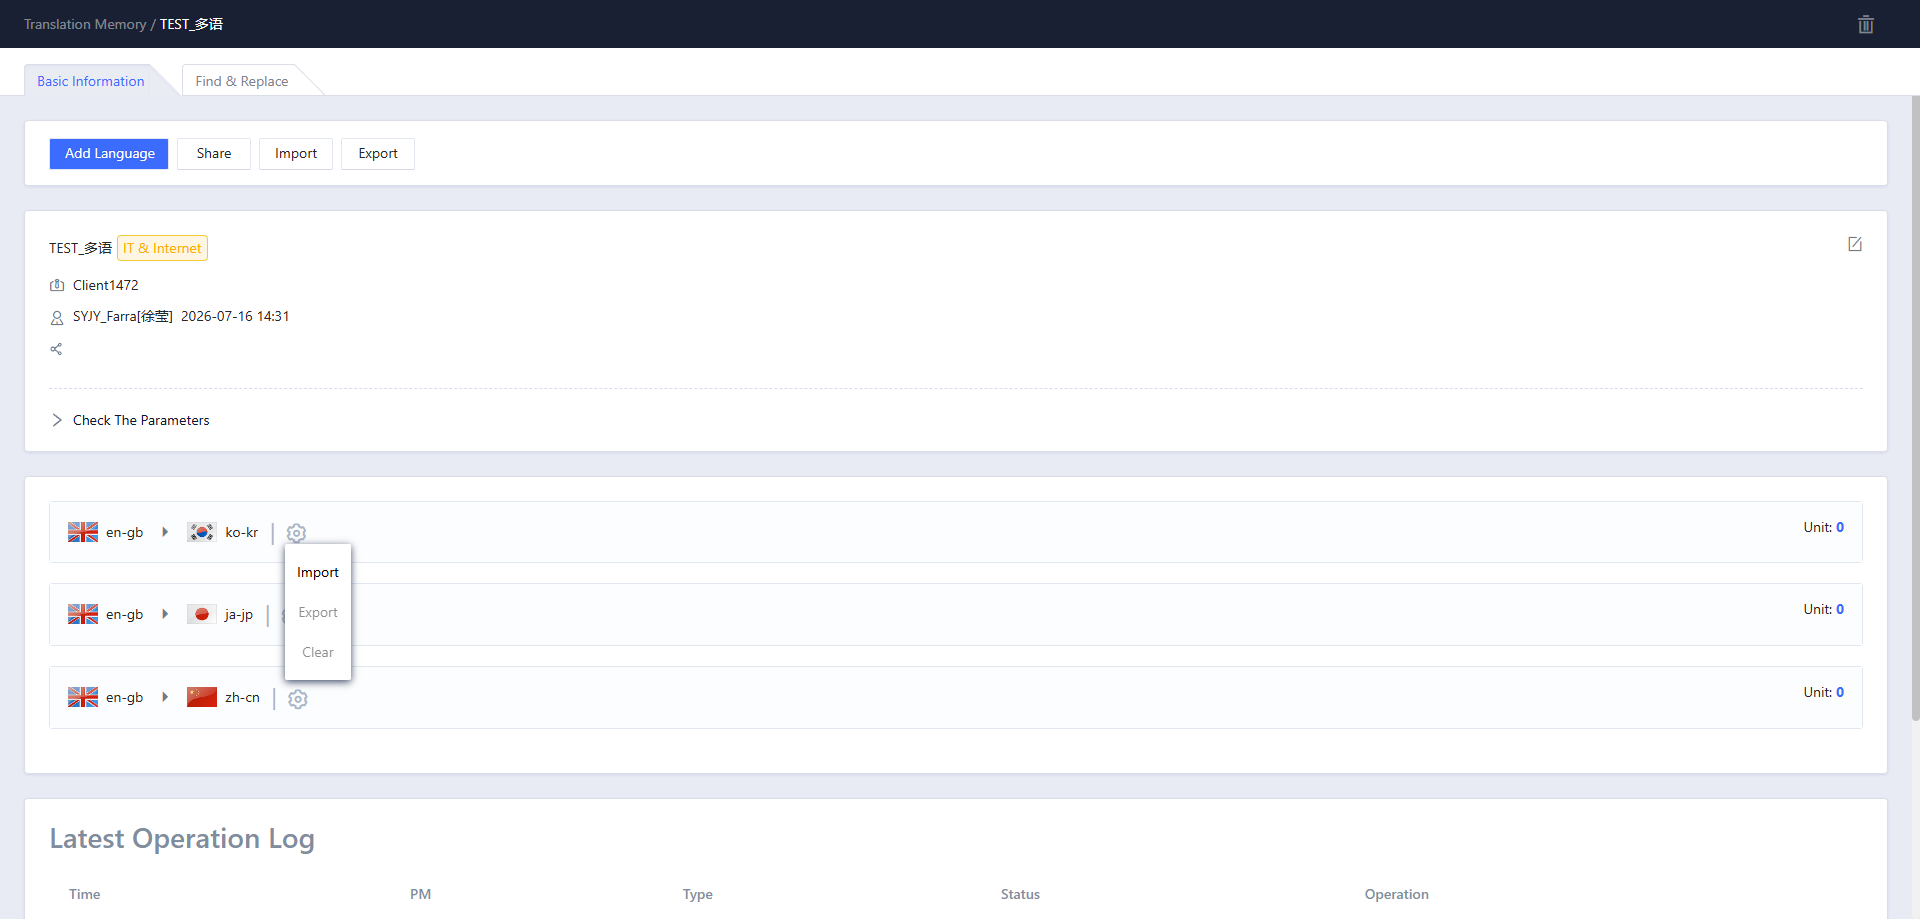
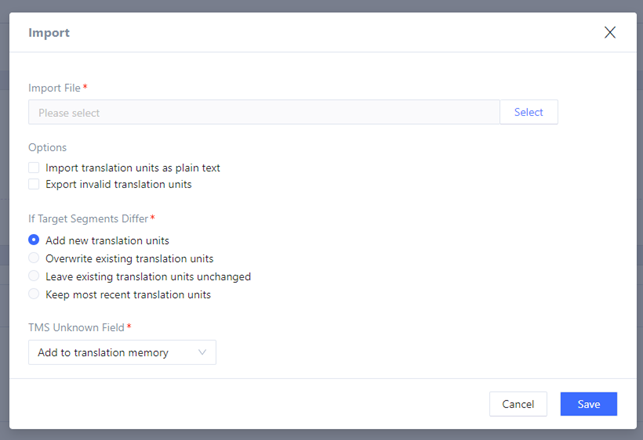
To import a corpus, hover the mouse over a language pair and click the button on the right. The options will appear. Click the Import button to open the Import tab, upload files and modify options (fields marked with red * are required). Then click the Save button to execute the import, or click the Cancel button to cancel the import. After a successful import, the system will display a notification.
Export
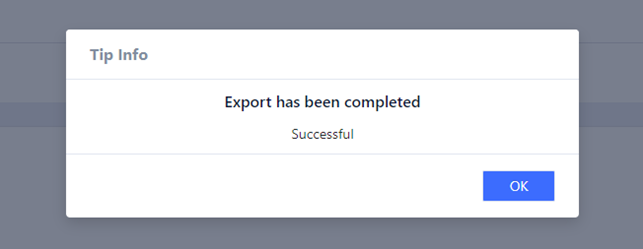
To export the corpus for a language pair, hover the mouse over the language pair and click the button on the right. The options will appear. Click the Export button and an export prompt will display. Wait for the system to complete the export and provide a notification.
Clear
Delete all entries under that language.
4.3.9 Latest Operation Logs
The operation logs record current TM import and export information. You can view the operation status and other details from the logs. Exported files can also be downloaded by clicking the icon below.

4.3.10 Find & Replace
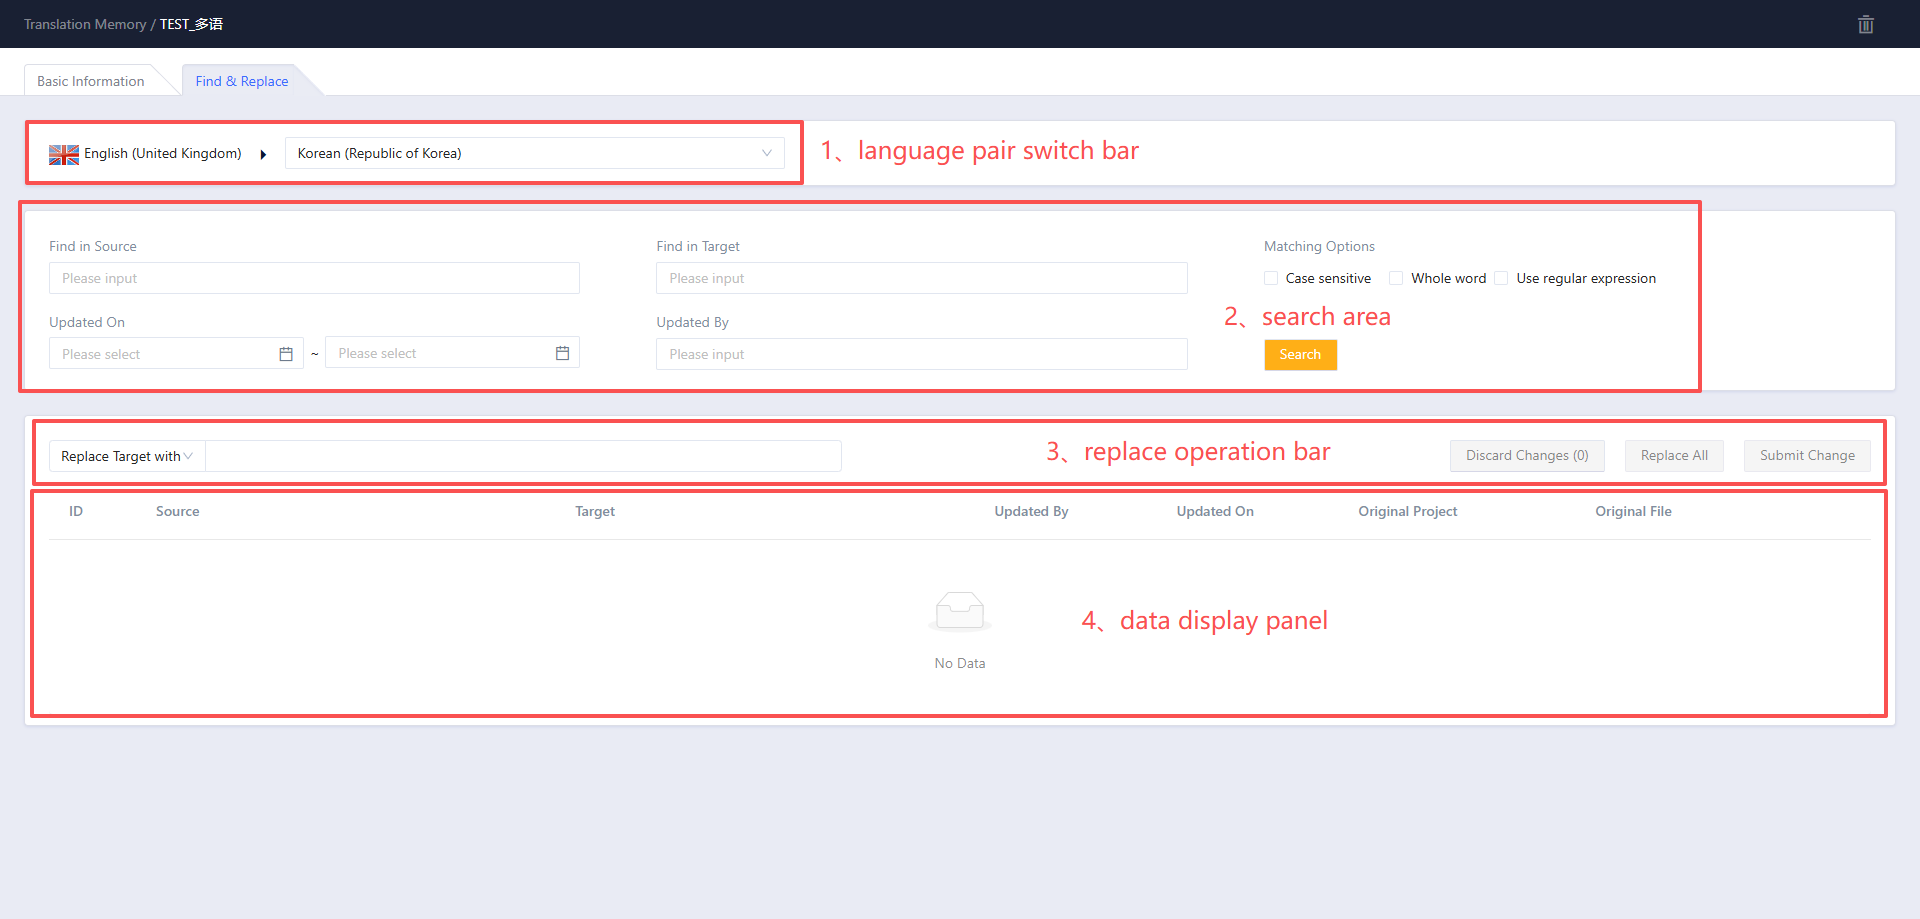
The corpus Find and Replace page provides online corpus editing functionality.
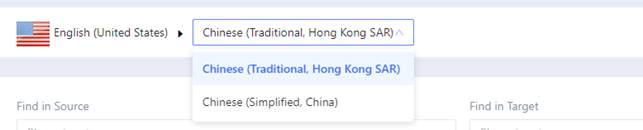
Language pair switch bar: Since the corpus may contain multiple language pairs, a language pair switch is provided. The first language is the source language and cannot be changed; the second is the target language. After selecting a target language, subsequent find and replace operations will be performed on that language pair's corpus.
Find and replace search area: This function allows searching the corpus based on criteria such as source text (Find in Source), target text (Find in Target), case sensitive (Case sensitive), whole word (Whole word), using regular expressions (Use regular expression), updated time (Updated On), updater (Updated By), minimum length of source (Minimum Length of Source), etc. By default, clicking the Search button will display a prompt "Please input source or target". After entering input and clicking the Search button, the table below will display corpus entries matching the search criteria.

Replacement operation bar: On the left of the replacement operation bar, choose whether to replace source or target (when searching source, only source can be replaced; when searching target ,only target can be replaced). Replacement operation buttons are provided on the right: Discard Changes, Replace all, and Submit Changes.

Switching between replacing source and replacing target: 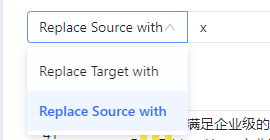
"Replace all" will replace all found corpus entries the interface will display the text after replacement according to the replacement value;

"Submit Changes" will submit the replaced corpus to the database and update the corpus;

"Discard Changes" will cancel the replacements and revert to the original corpus.

Data display panel: The data display panel displays corpus entries that match the search criteria and shows information such as Source, Target, Updated By, and Updated On, as well as the action column.

Replace Button: The Replace button substitutes the replacement value entered on the left side of the replacement operation bar into the current line of the corpus, and changes the display color. After replacement the button will change into an Undo button. Click the Undo button to abandon the replacement in the corpus. After clicking the Replace button, click Submit Changes on the right side of the operation bar will submit the changes to the database and update the corpus.


4.4 Corpus Content Search
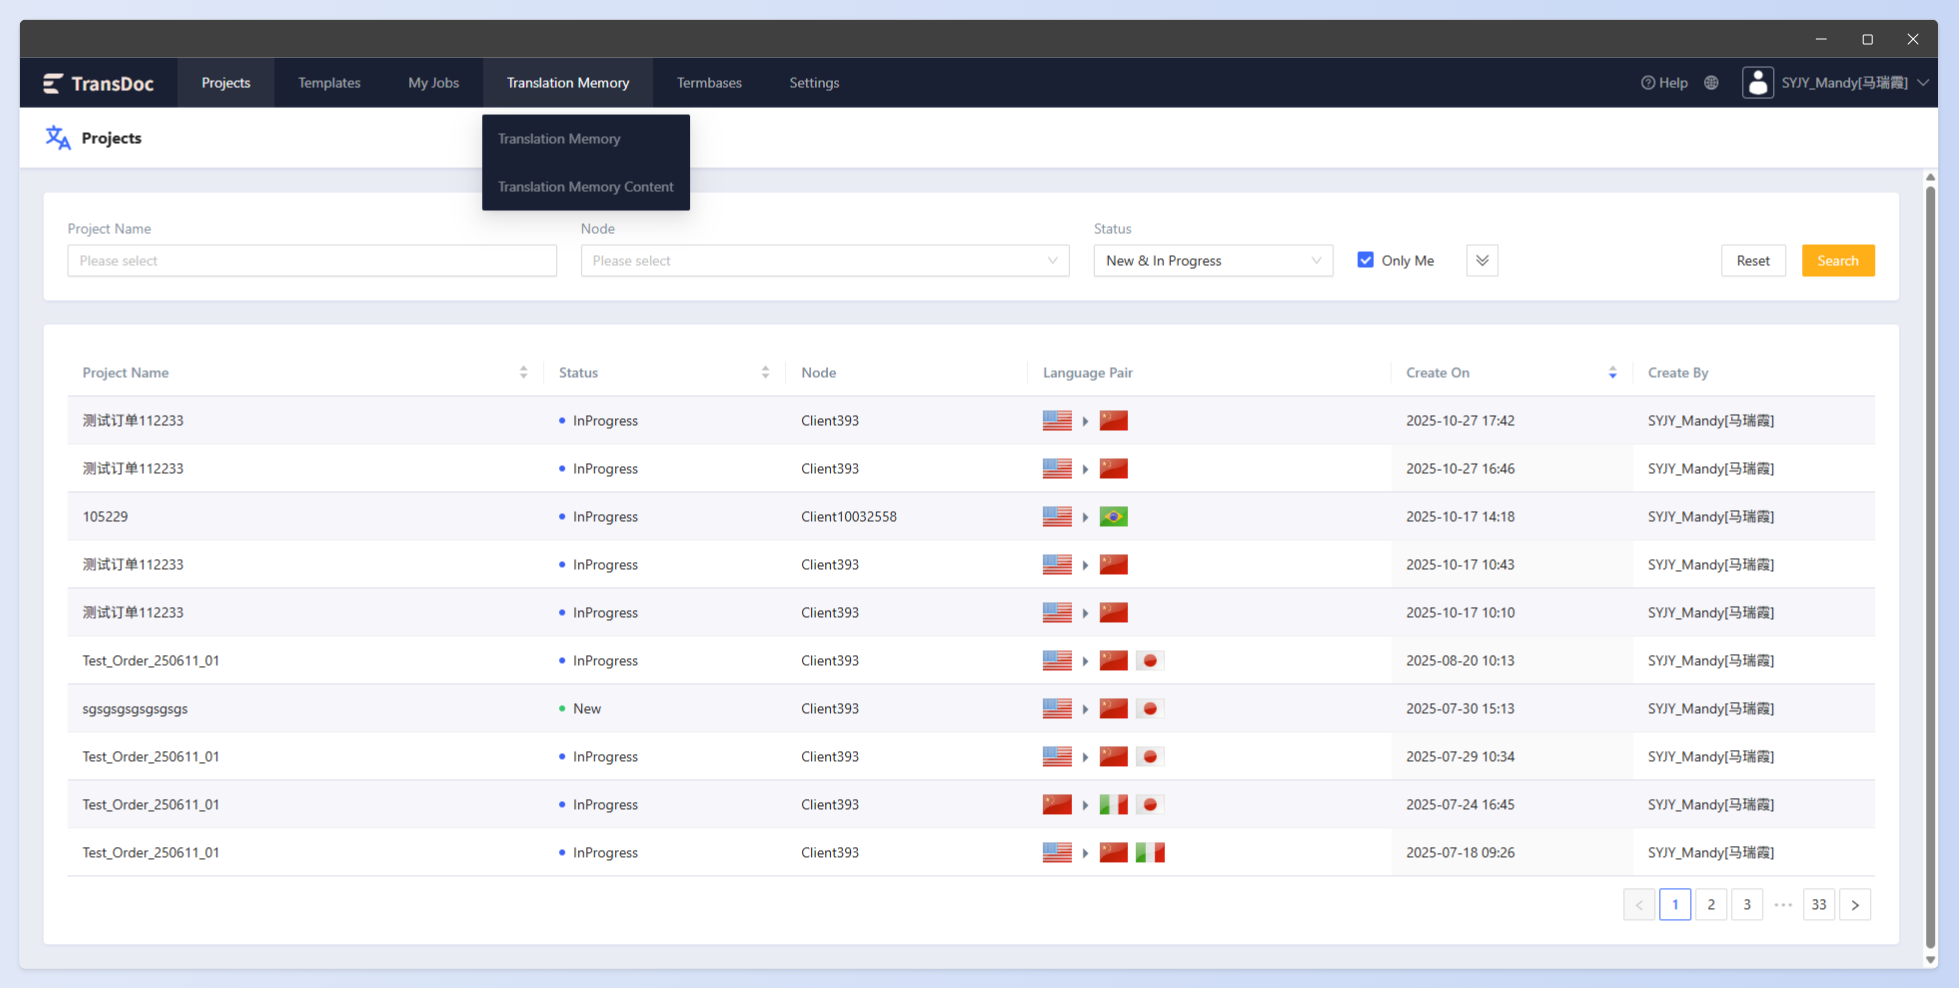 Click Translation Memory Content search from the menu to search content across all TMs.
You can search by client, source language, target language, source text, or target text.You can search by selecting client, source language, target language, source text, or translation. 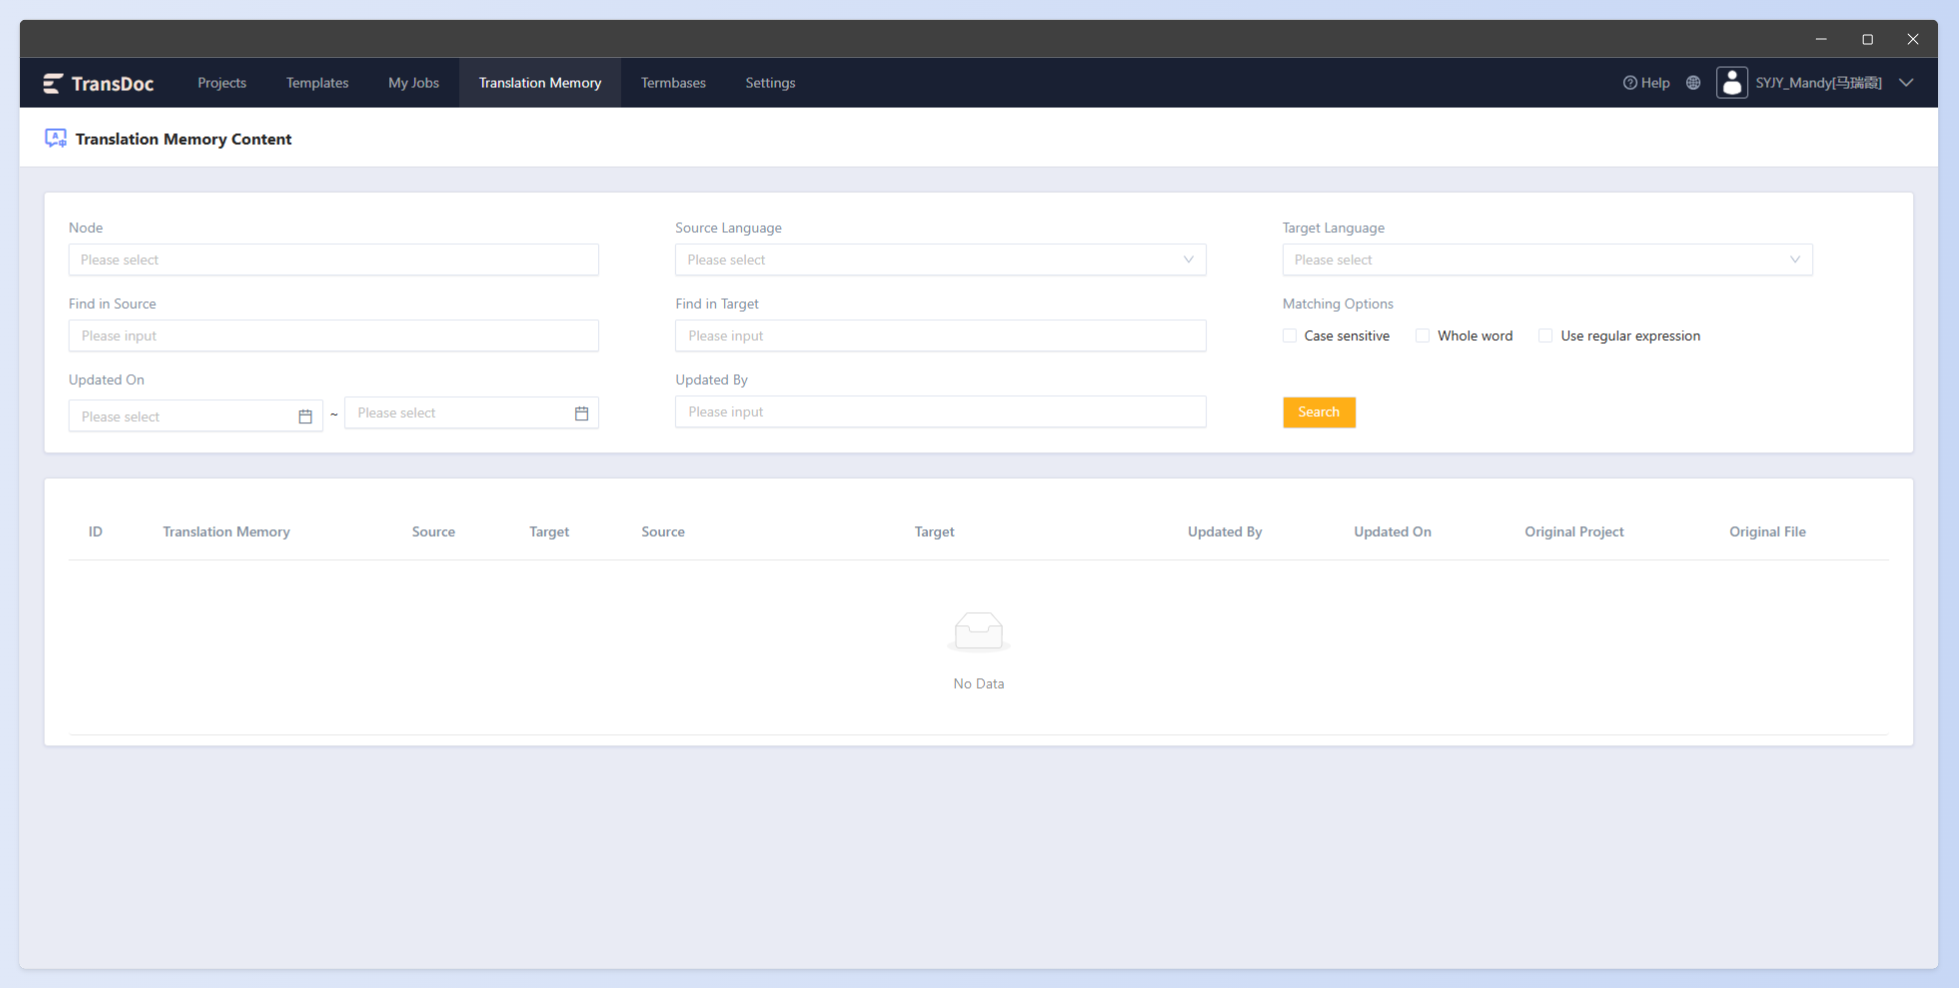
4.5 Corpus Alignment
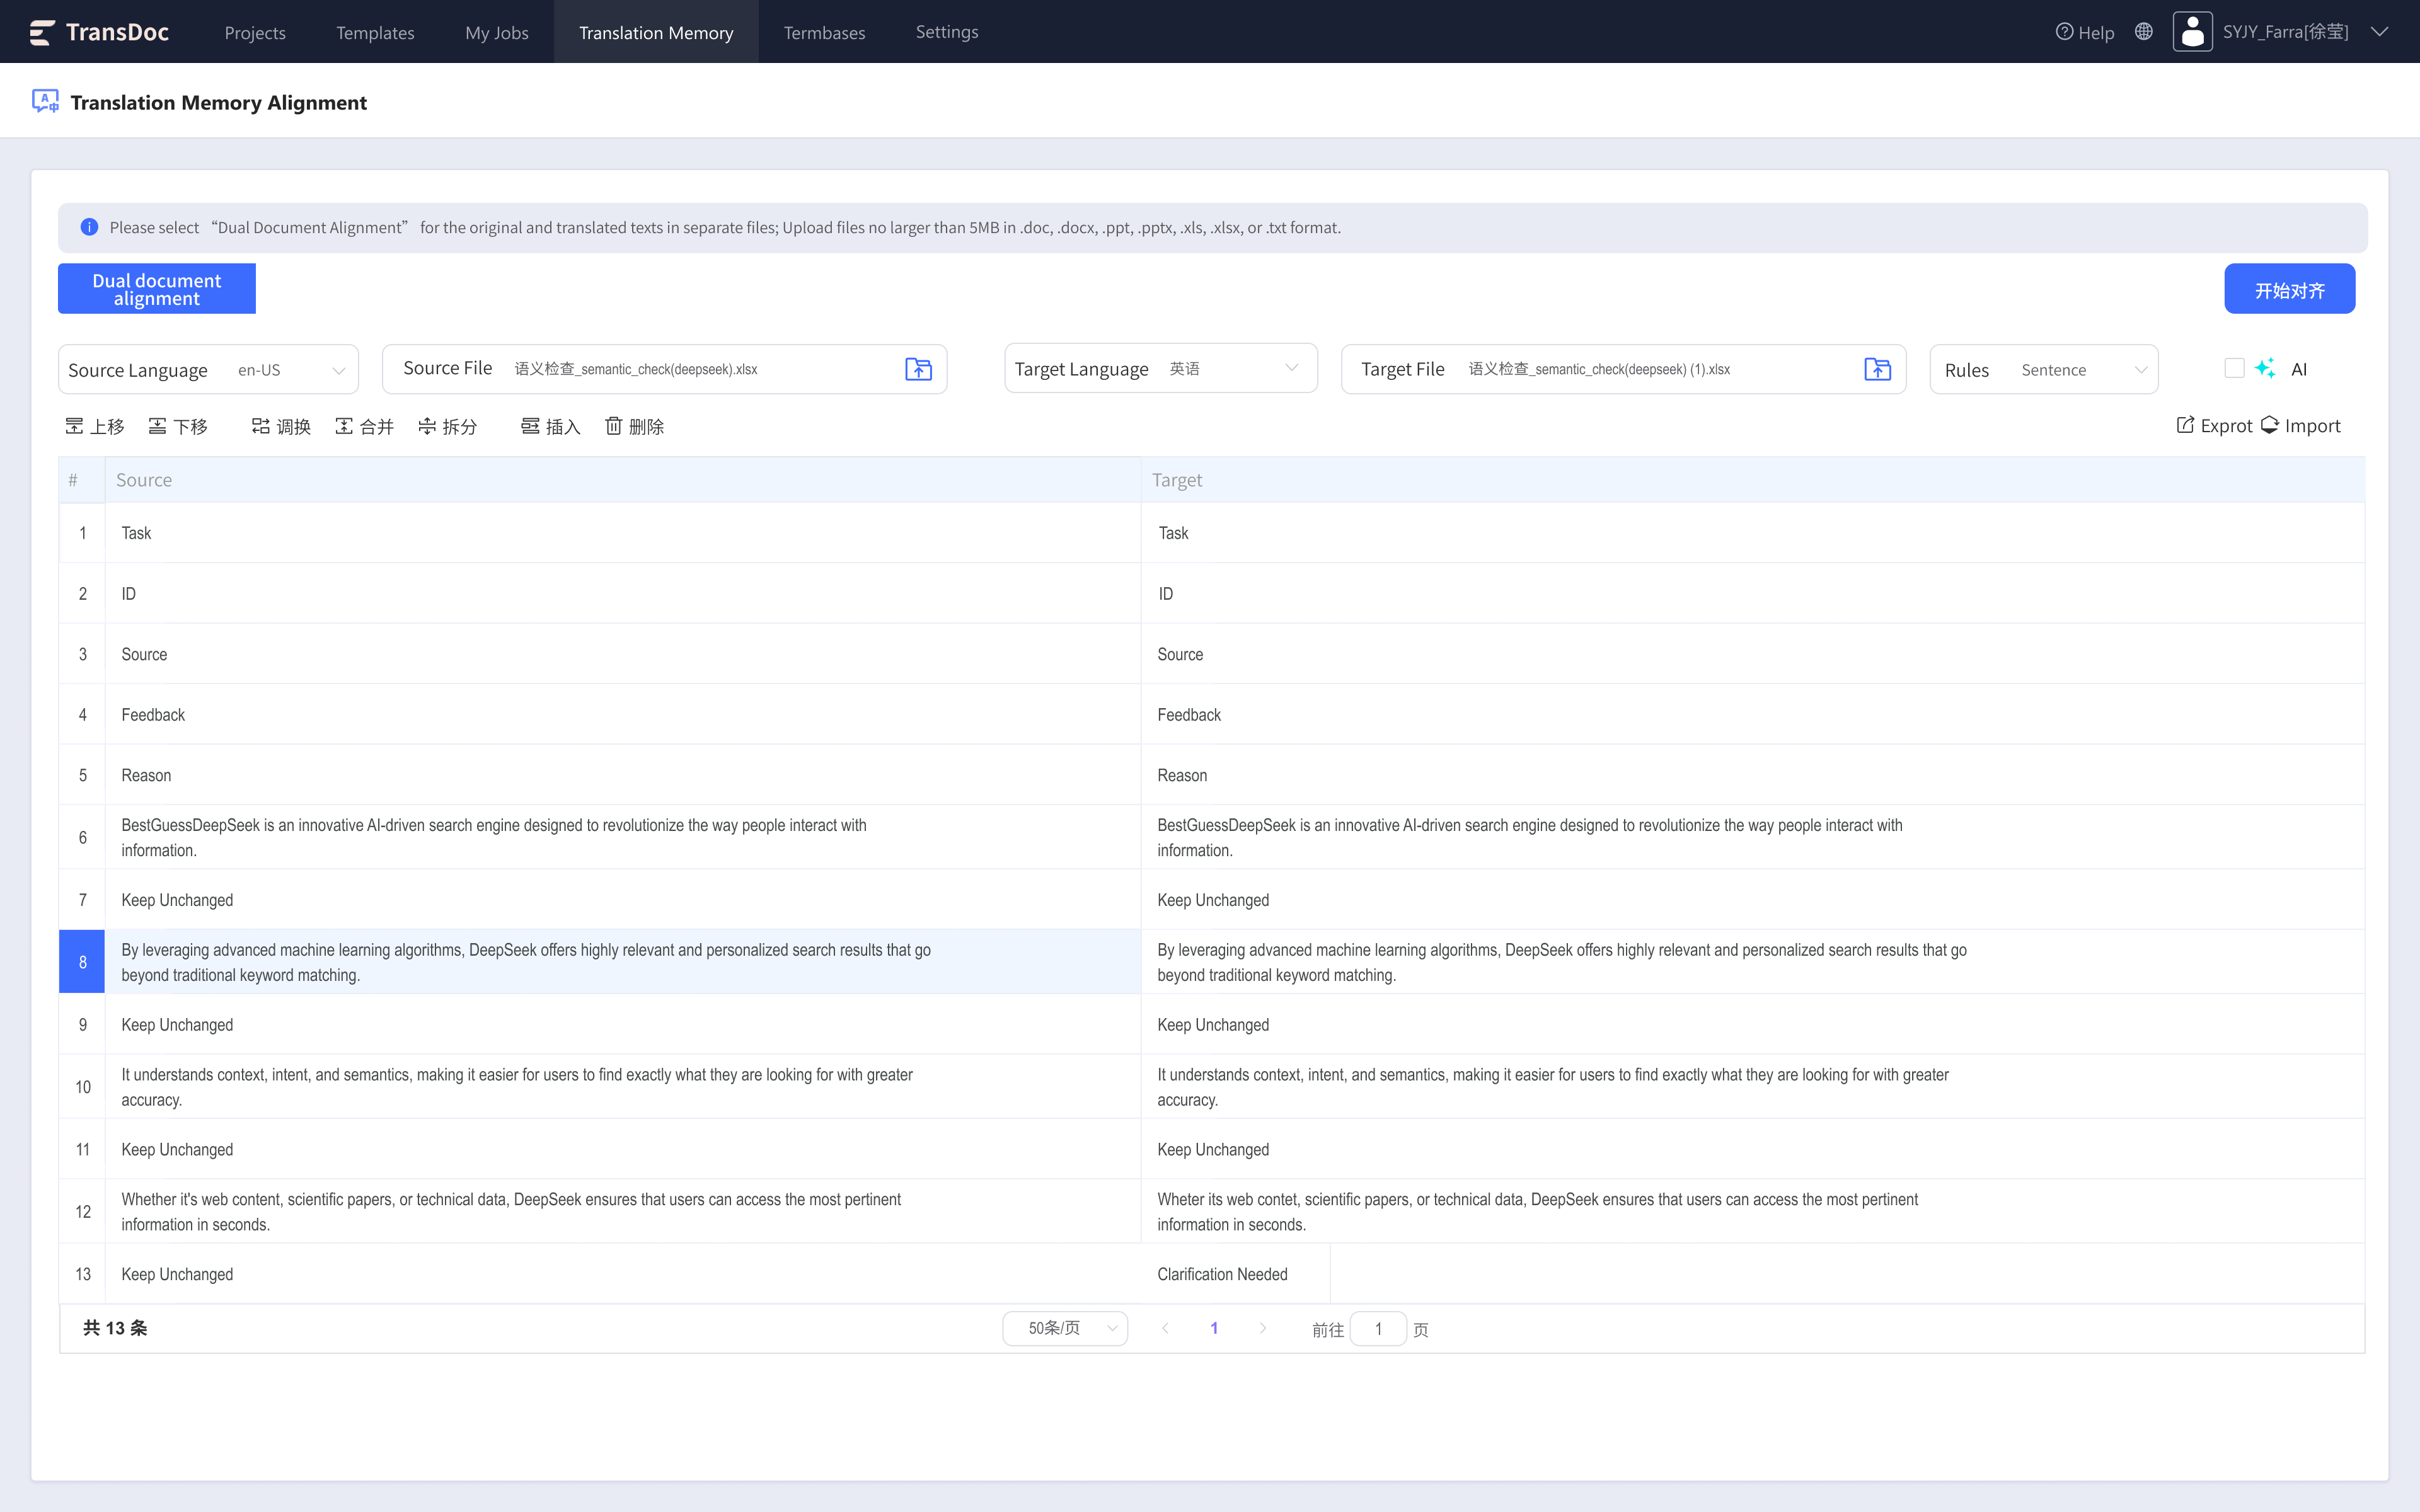
Mainly used to match existing source texts and their corresponding target texts at paragraph or sentence level to generate a reusable TM. The online system adds the ability to export TMX files and directly import files into existing TM libraries.
The system extracts segments according to the segmentation rules based on the source and target files uploaded by the PM. After extraction, the results are displayed on the page. After modifying the results, click the Export or Import button to confirm the results.
Selection: ① Click a cell to select the cell; ② Click the index number to select the entire row; ③ Hold Shift (or Ctrl) and click to select multiple cells (rows).
Edit: Double-click a cell to enter the edit mode and modify the cell content.
Merge: Select one cell (row), hold Shift (or Ctrl) and select the other cells (rows) to be merged. Click Merge to complete the operation.
Split: Double-click a cell to enter the edit mode, click the location where you want to split, click Split to complete the split operation.
Move Up: Select cell(s) (multiple selection supported), and click Move Up to complete the operation.
Move Down: Select cell(s) (multiple selection supported), and click Move Down to complete the operation.
Swap: Select cell(s) (multiple selection supported), and click Swap to swap the left and right column contents of the same row.
Insert: Select a cell (row), and click Insert to complete the operation. Only single-row insertion is supported; if nothing is selected, insertion occurs at the topmost row.
Delete: Select the cell(s) (row) to delete, click Delete to complete the operation.
AI: Clicking AI will call a large model to perform semantic alignment. After alignment, the results will be displayed in the table.
4.6 Language Resource Templates
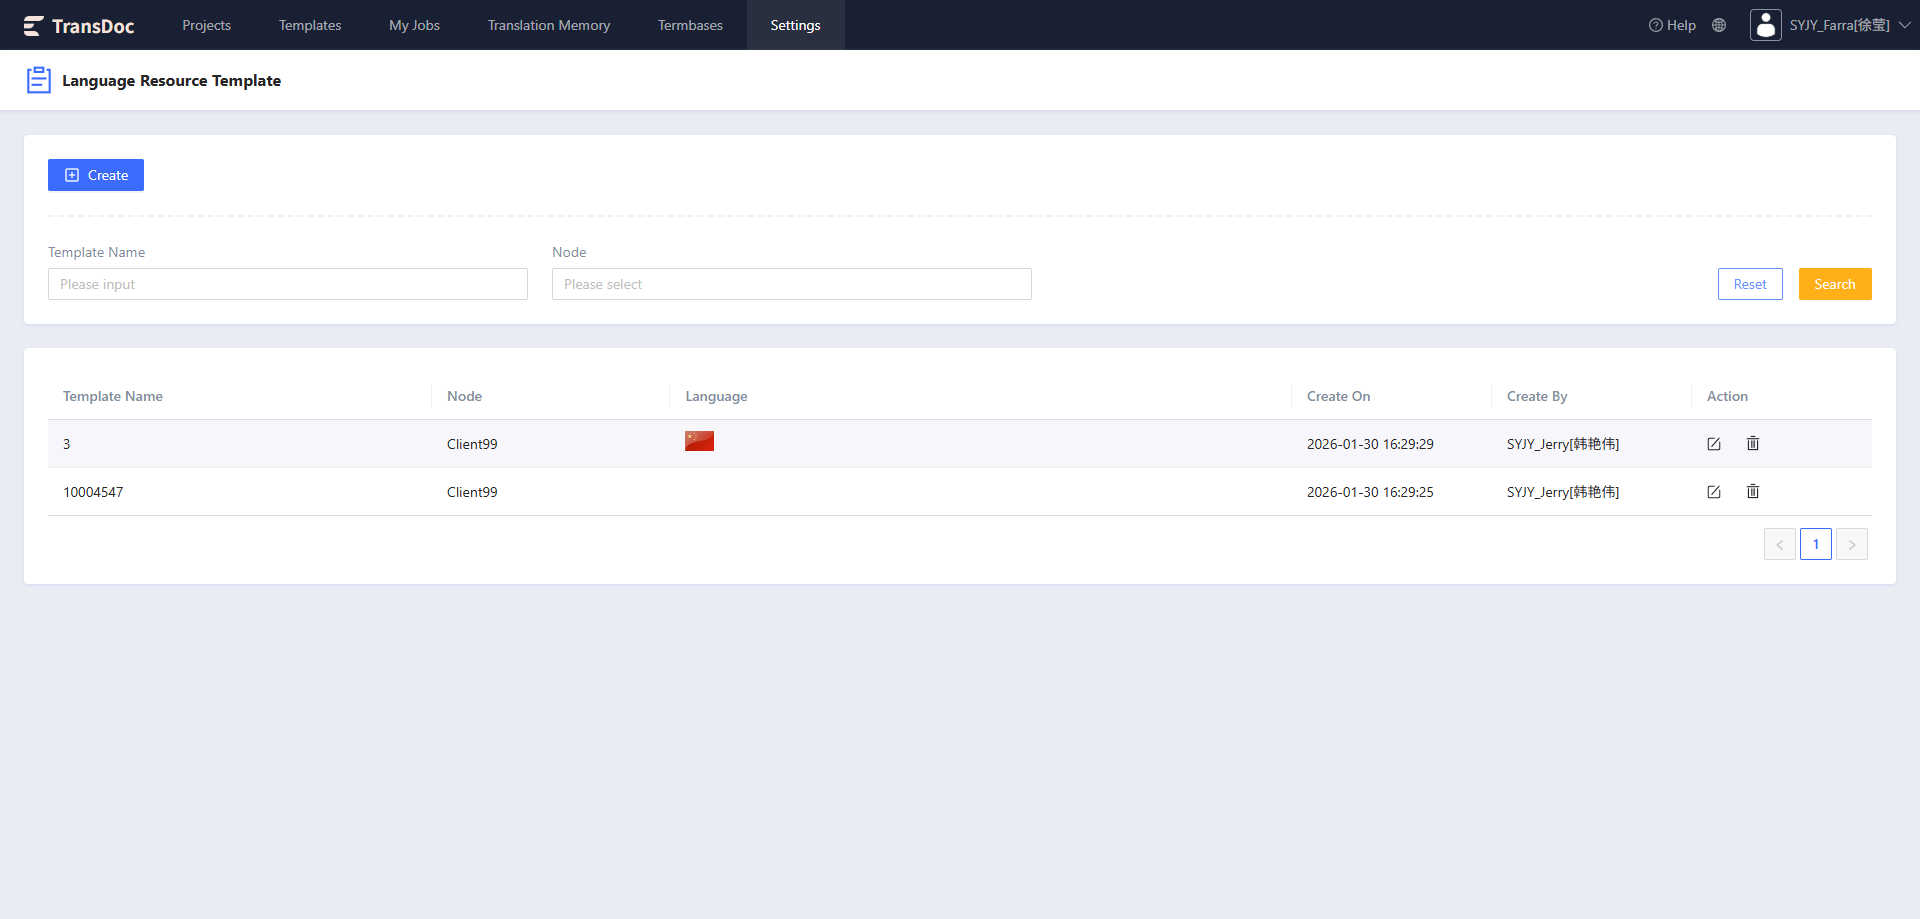
Language resource templates contain a set of language resources that have been modified to meet your needs. You can choose a template when creating a new TM to apply the settings stored in the template to the TM.
The system provides a set of default language resources. If the default language resources meet your needs, there is no need to create a language resource template. You can create and maintain language resource templates in the system.
4.6.1 Create a Language Resource Template
Click the New button to enter the creation page.
Required fields (marked with a red * on the page):
- Template name : Please enter the name of this template (example: Client123_EN-ZH_TM).
- Node: Select the associated node from the drop-down list (e.g., Client1092, Client173, etc.).
- Description: Enter comments for this template.
- Distinguish: You can select items to identify, such as dates, times, numbers, acronyms, variables, measurements, alphanumeric strings, etc. Identified items will affect tokenization and matching logic.
- Count words that meet the following conditions as one word: Used to define rules for handling consecutive characters or hyphenated strings (for example "are hyphenated," "are joined by dashes," "contains apostrophes").
- Languages: You can add multiple languages and configure settings for different languages.
Variables: When the TM is applied to segment text, some items will be translated automatically. If you do not want to translate certain items, you can add them to the variable list. For example, you might not want to translate a company name. Add it to the variable list to mark it as non-translatable. By default, this list is empty.
Abbreviations: When splitting text into segments, a period denotes the end of a segment. However, periods also appear in abbreviations and can cause improper segmentation of the source. To avoid such issues, periods after recognized abbreviations will be ignored when segmenting the source; the list contains the most common and frequently used abbreviations such as max., min., and usd. You can edit this list to add your own abbreviations or remove existing ones.
Ordinal followers: The most common ordinal followers are the period and the comma. In general, segmentation rules use periods and commas to parse the entire translation memory (TM). However, if periods and commas are designated as ordinal followers in certain phrases, those contexts will be ignored and will not interfere with the TM parsing mechanism. For example, you might have a date entry 23.03.2000. You do not want the TM to interpret the periods as sentence terminators, so you can assign them to the ordinal follower status in that context.
Segmentation rules: Segmentation settings can define how the translation memory (TM) or project divides source text into segments.
Segmentation rules are defined by specifying regular expressions for segments.

Typically, a segment corresponds to a sentence, in which case the regular expression will specify the text format that constitutes a sentence.

Within any project, the same language pair can use multiple main TMs with different segmentation rules.Rules for specifying exceptions
Abbreviation list. This includes lists of abbreviations that end with a period (.), such as "etc." The period at the end of "etc." does not necessarily indicate the end of a sentence, though it sometimes does.

Ordinal follower list. Similar to abbreviations, the period in ordinal words does not necessarily indicate the end of a sentence: when followed by a noun, a number followed by a period (for example 23.) indicates an ordinal (23rd), not the end of a sentence. For example, 23.April may represent 23rd April. The ordinal follower list is a list of such nouns.

## Example: A simple segmentation rule

```
\.+[\p{Pe}\p{Pf}\p{Po}"]*
```

This regular expression specifies segments in a very simple way. It will match all characters up to the punctuation that ends the sentence.

Closing, final, and other punctuation are those defined by the following Unicode categories:

**\p{Pe}** denotes closing punctuation.

**\p{Pf}** denotes final quotation marks.

**\p{Po}** denotes other punctuation.Dates/Times: When segmenting text, default date and time lists for each source and target language are used. These lists ensure that date and time formats in the source language are correctly recognized and localized in the target language.
Numbers: When segmenting text, default number format lists for each source and target language are used. These lists ensure that number formats in the source language are correctly recognized and localized in the target language.
Measurements: When segmenting text, default measurement lists for each source and target language are used. These lists ensure that units of measure in the source language are correctly recognized and localized in the target language.
Currency: When segmenting text, default currency (symbols and symbol placement) lists for each source and target language are used. These lists ensure that currency formats in the source language are correctly recognized and localized in the target language.
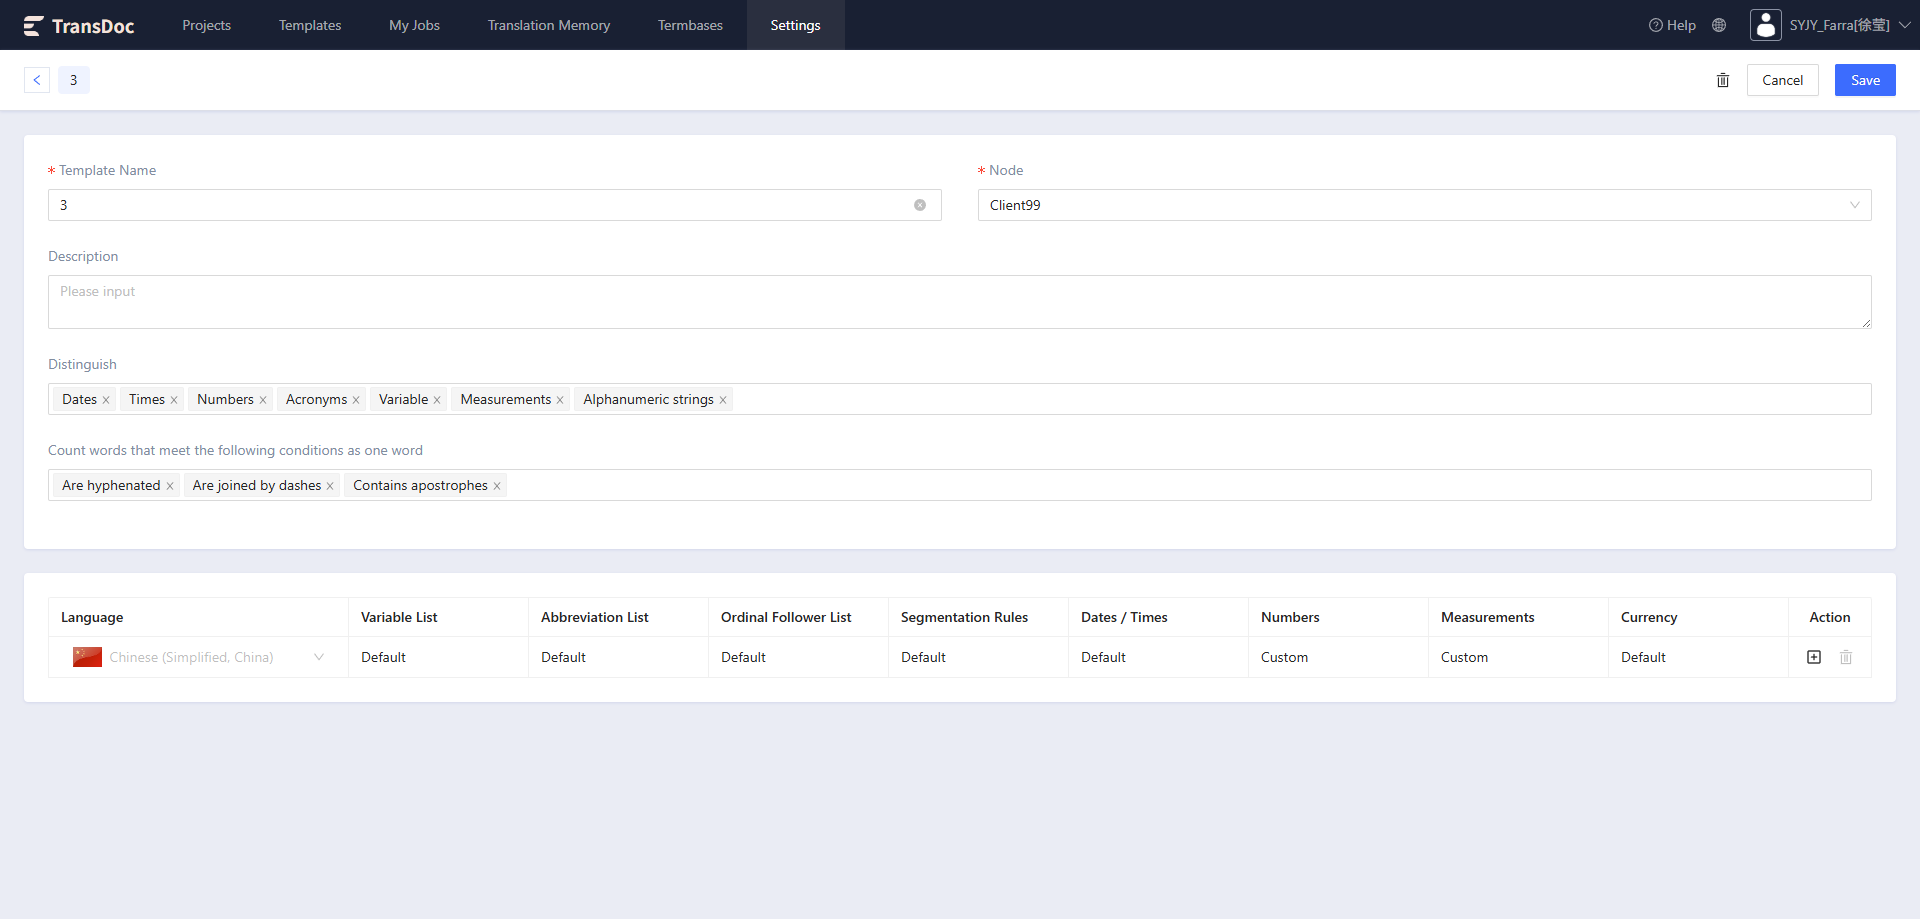 After filling in the required information, click the Save button to save the information to the template
4.6.2 Edit Language Resource Template
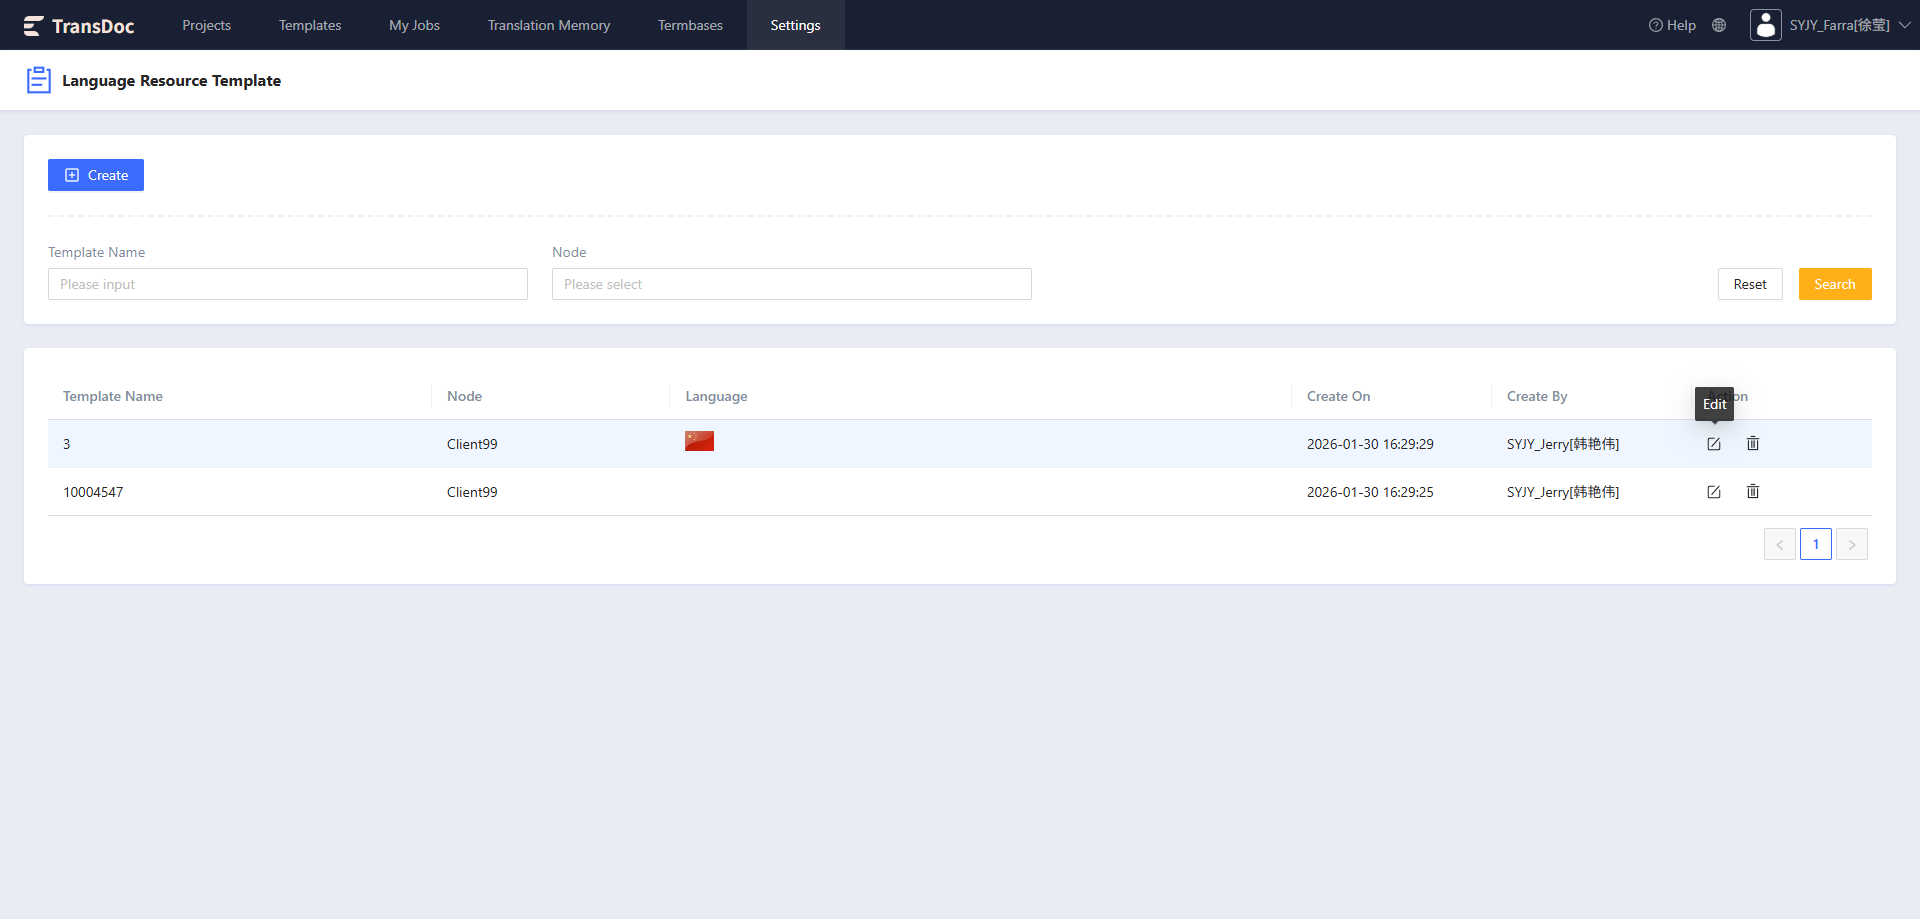
Click the Edit Language Resource Template button to enter the information editing page
The edit fields are the same as those for creating templates.
4.6.3 Delete Language Resource Template
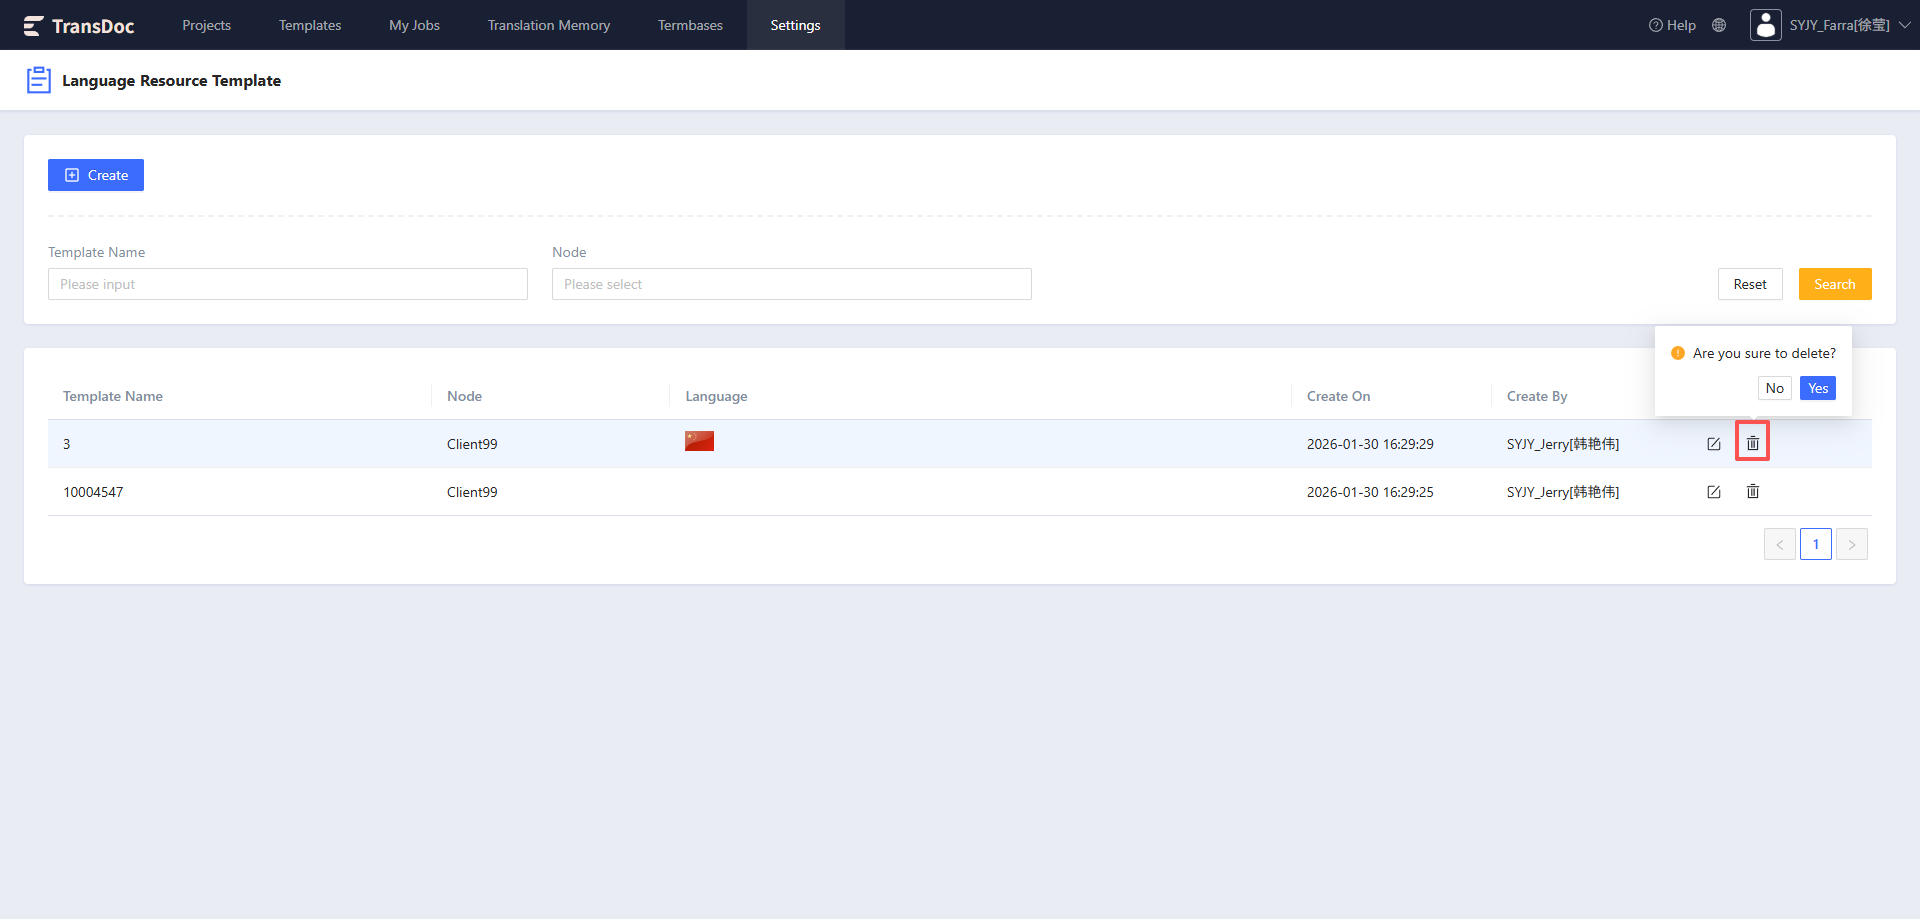
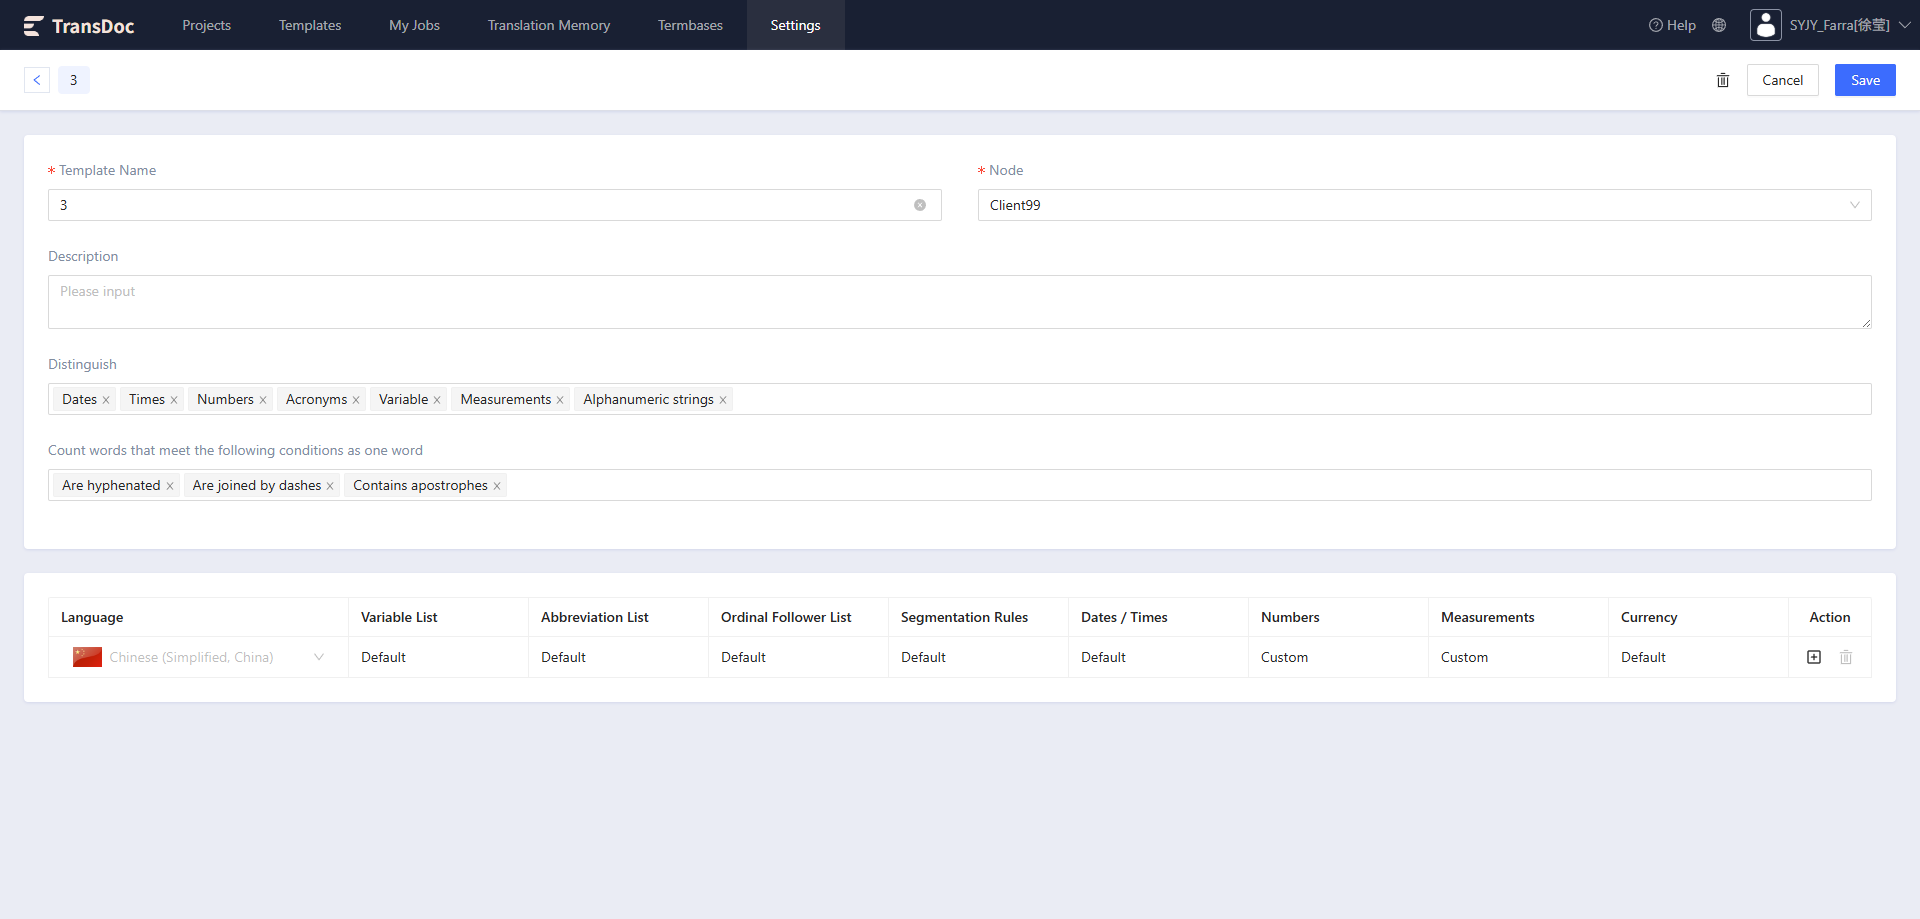
Click Delete Language Resource Template to delete a template