
1. File Center
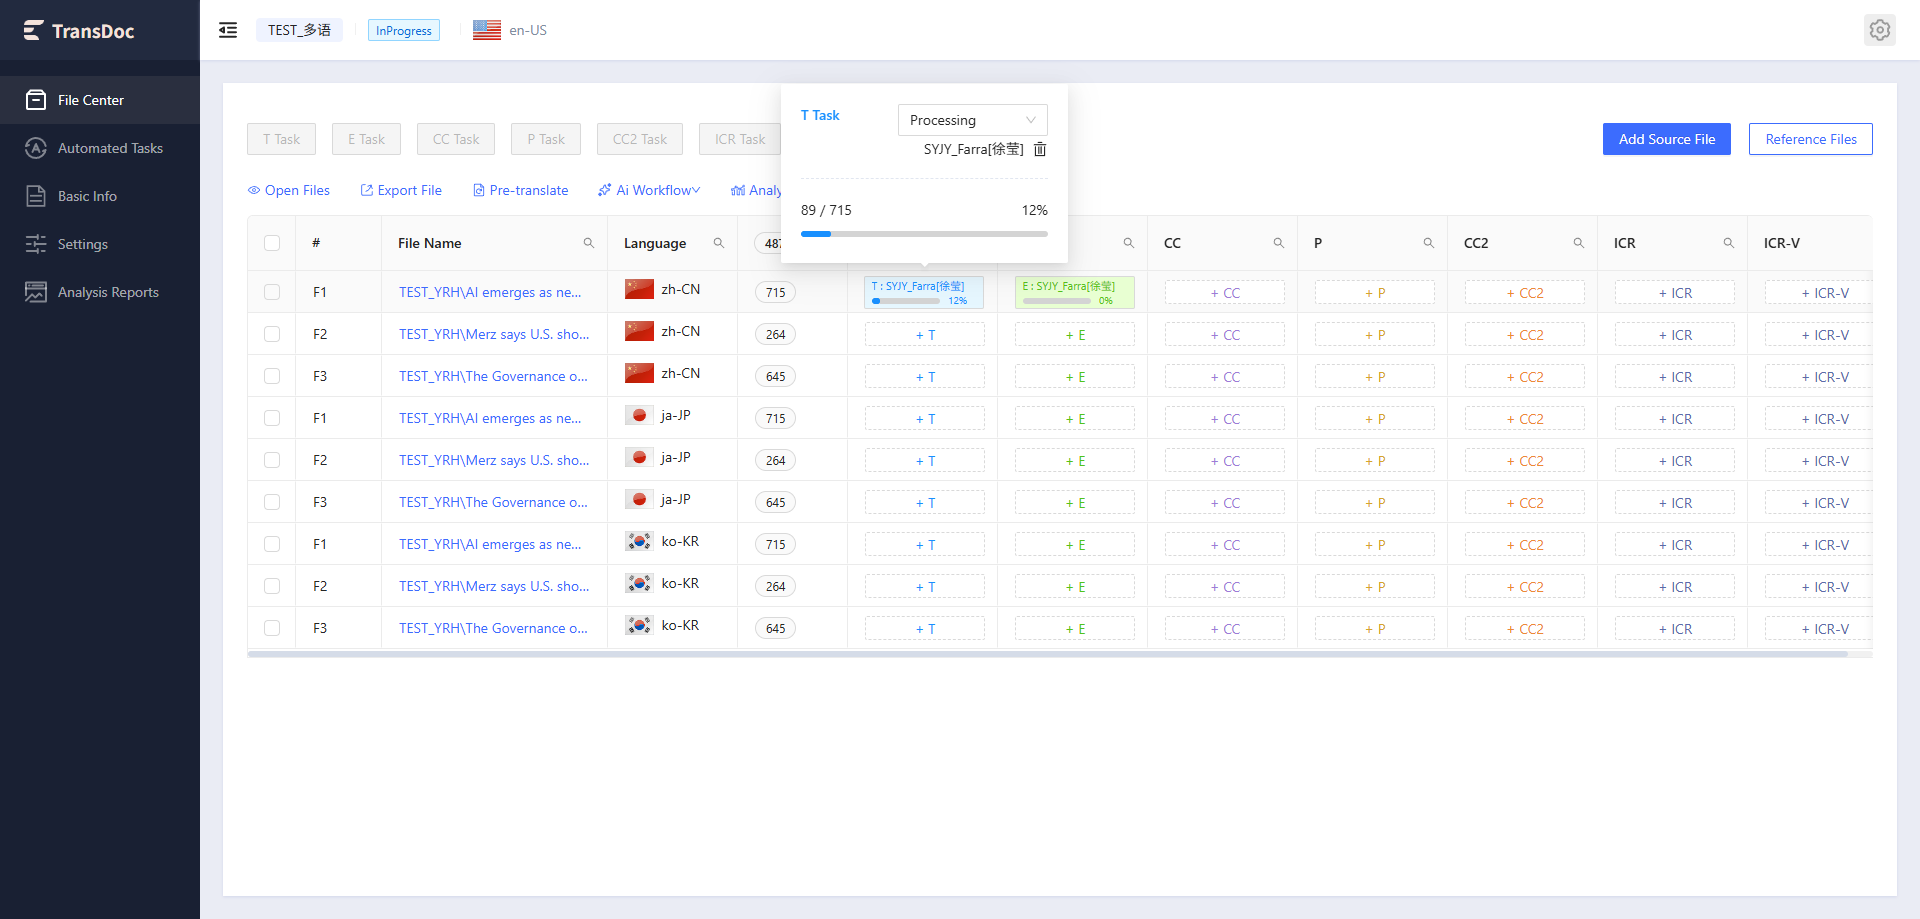
File Center is a list for managing file information across the entire project. The list aggregates and displays files by language pair, with display items including file number, file name, word count information, assignment information, etc.
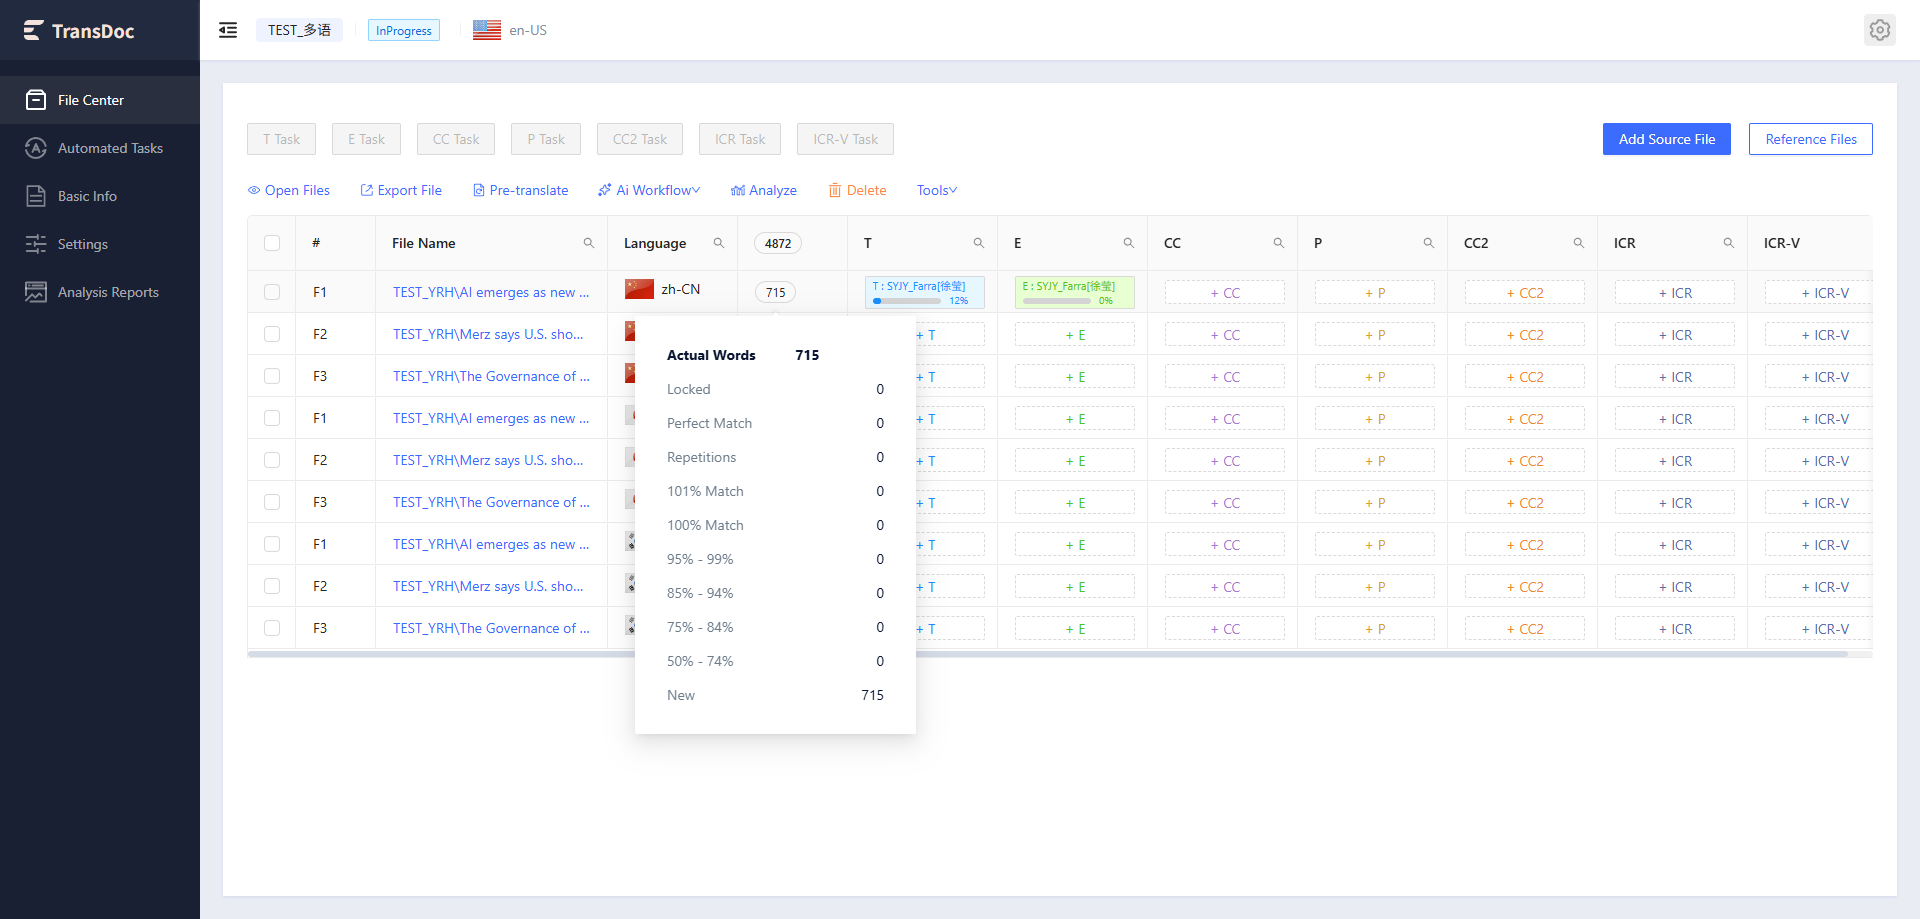 Hover the mouse over a specific file in the Actual column to display the word count for each section of that file.
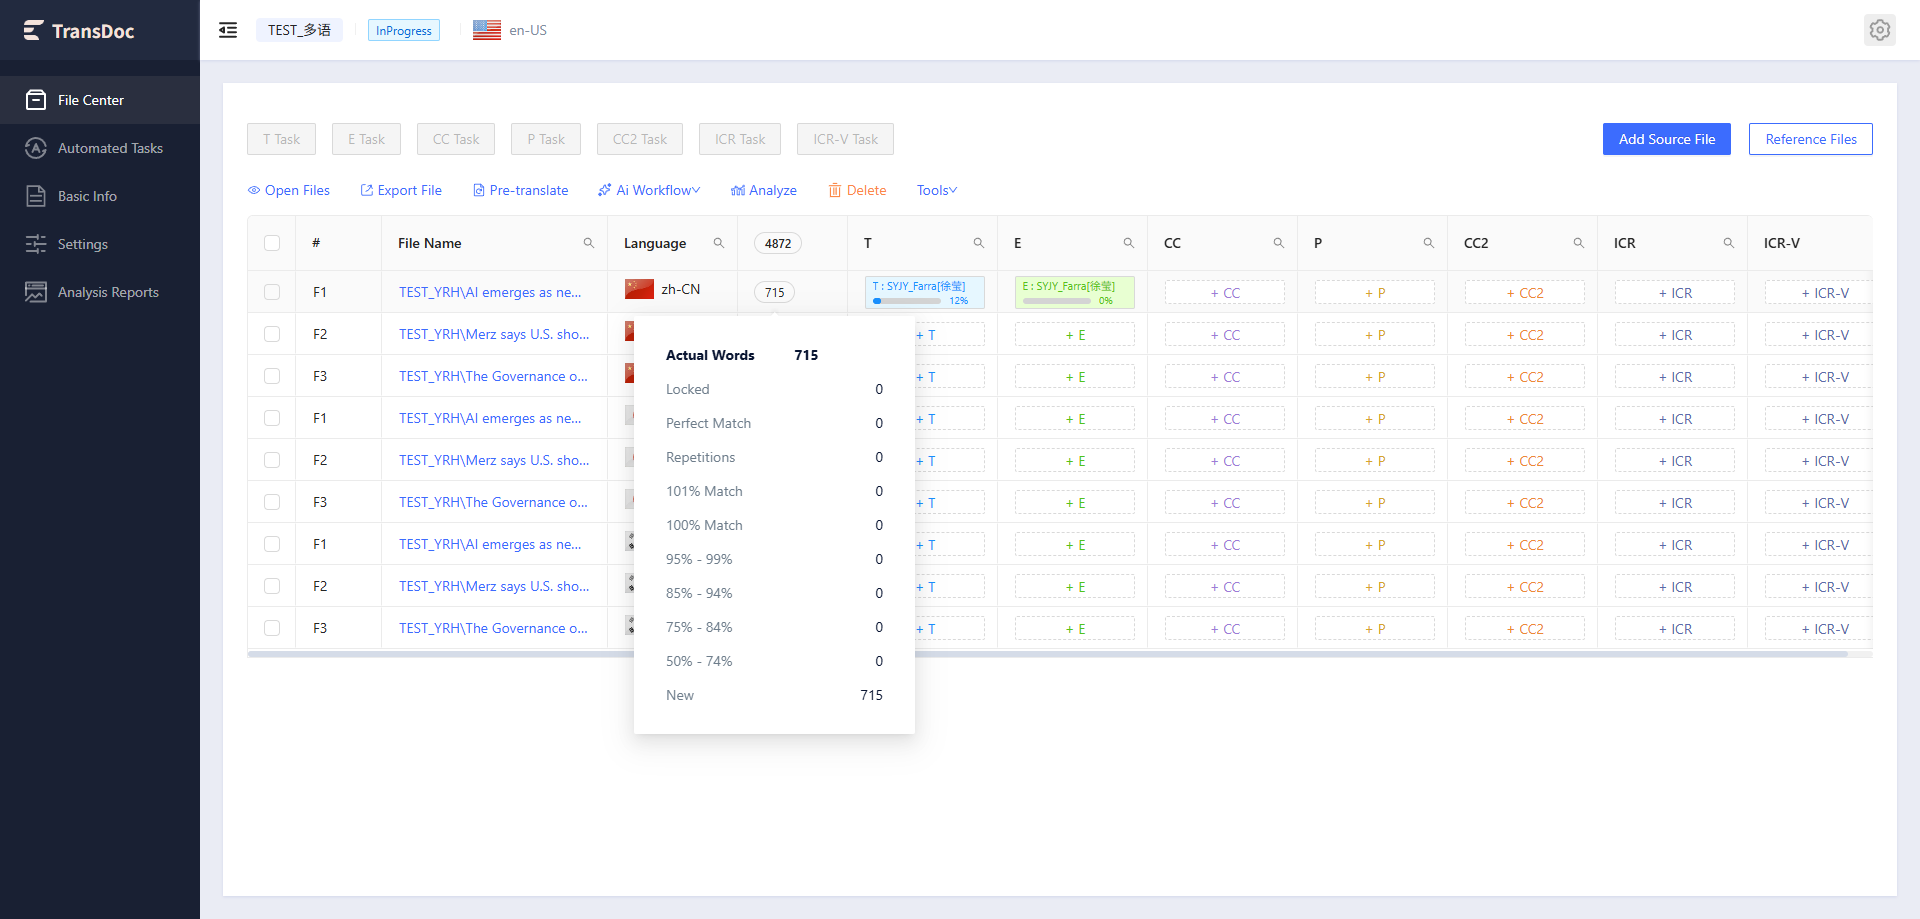 When hovering over the translator assigned to the corresponding file node, the progress of the steps related to that file will be displayed.
1.1 Add Source File
Source files that have been added and successfully pre-translated are referred to as online files, and can be edited online within the system.
1.1.1 First Upload
Before uploading a file for the first time, the system will ask whether the target language files of the current project are consistent; as shown in the screenshotscreenshot below.
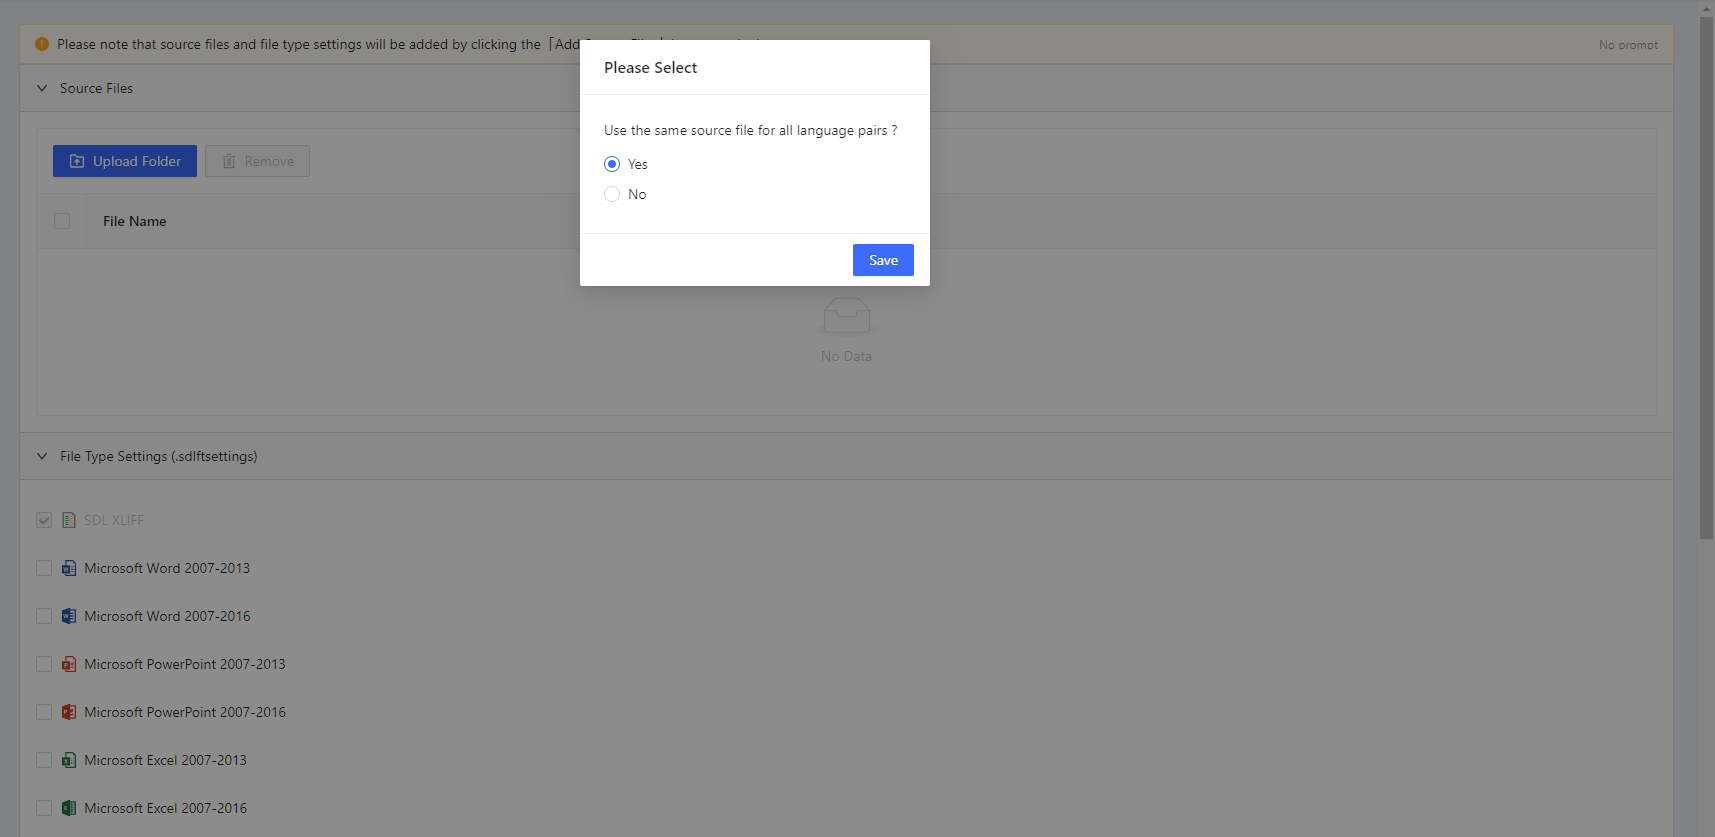
The option for whether the project target language files are consistent cannot be changed once set.
This is commonly used for uploading offline bilingual files, for example, when files have been processed offline with CAT tools and the translations have been filled in. For files with the same target language: The uploaded files will be automatically uploaded to each target language by the system. For files with different target languages: The files need to be uploaded according to their target language folders, as shown in the screenshotscreenshot below.
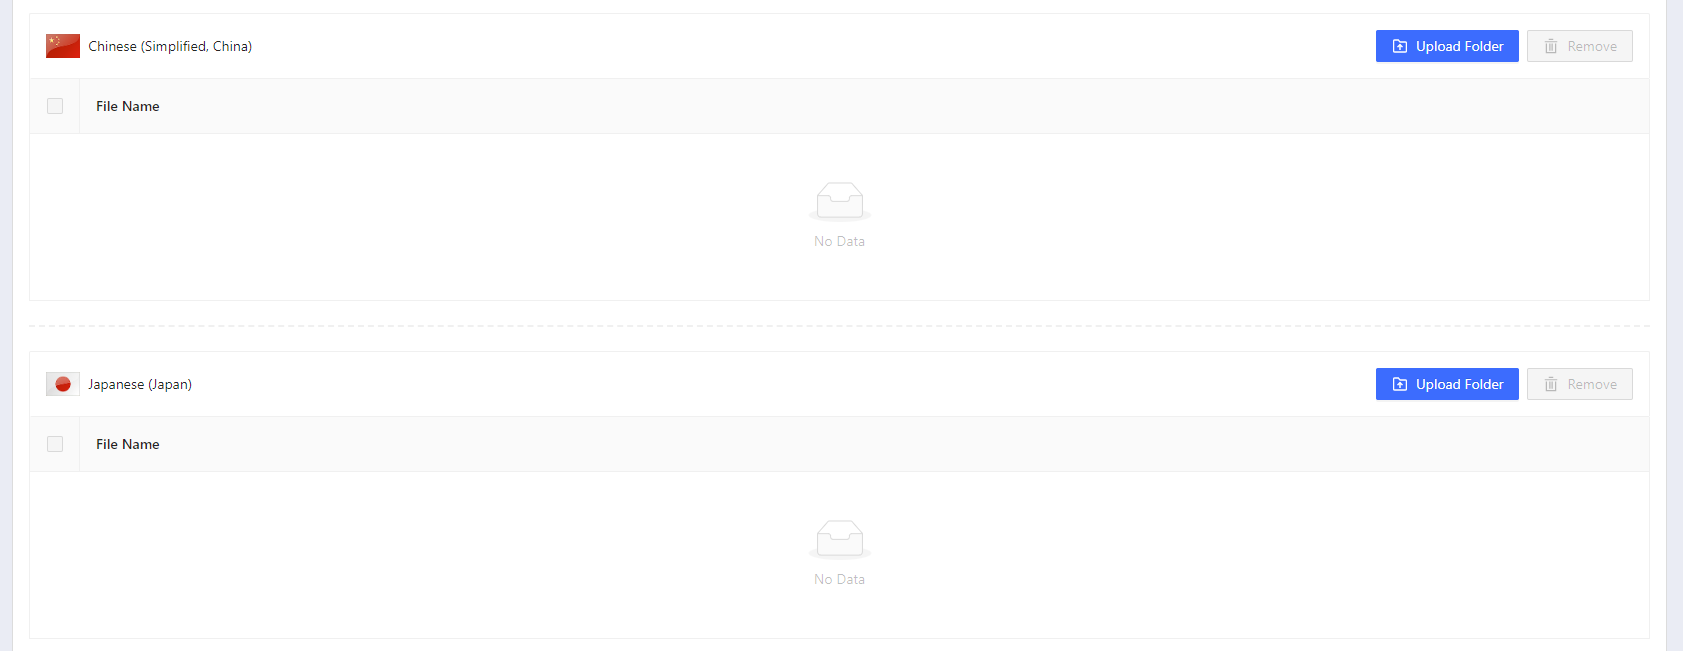
Based on the actual situation, select the corresponding option, then click the "Upload Folder" button and choose the project folder to upload (only folders are supported). After uploading, the system will prompt whether there are unsupported files in the folder based on the file type. If there are unsupported files, relevant information will be displayed (as shown in the screenshot below); if all files are supported, no prompt will be shown. You can make your selection based on the actual situation.screenshot
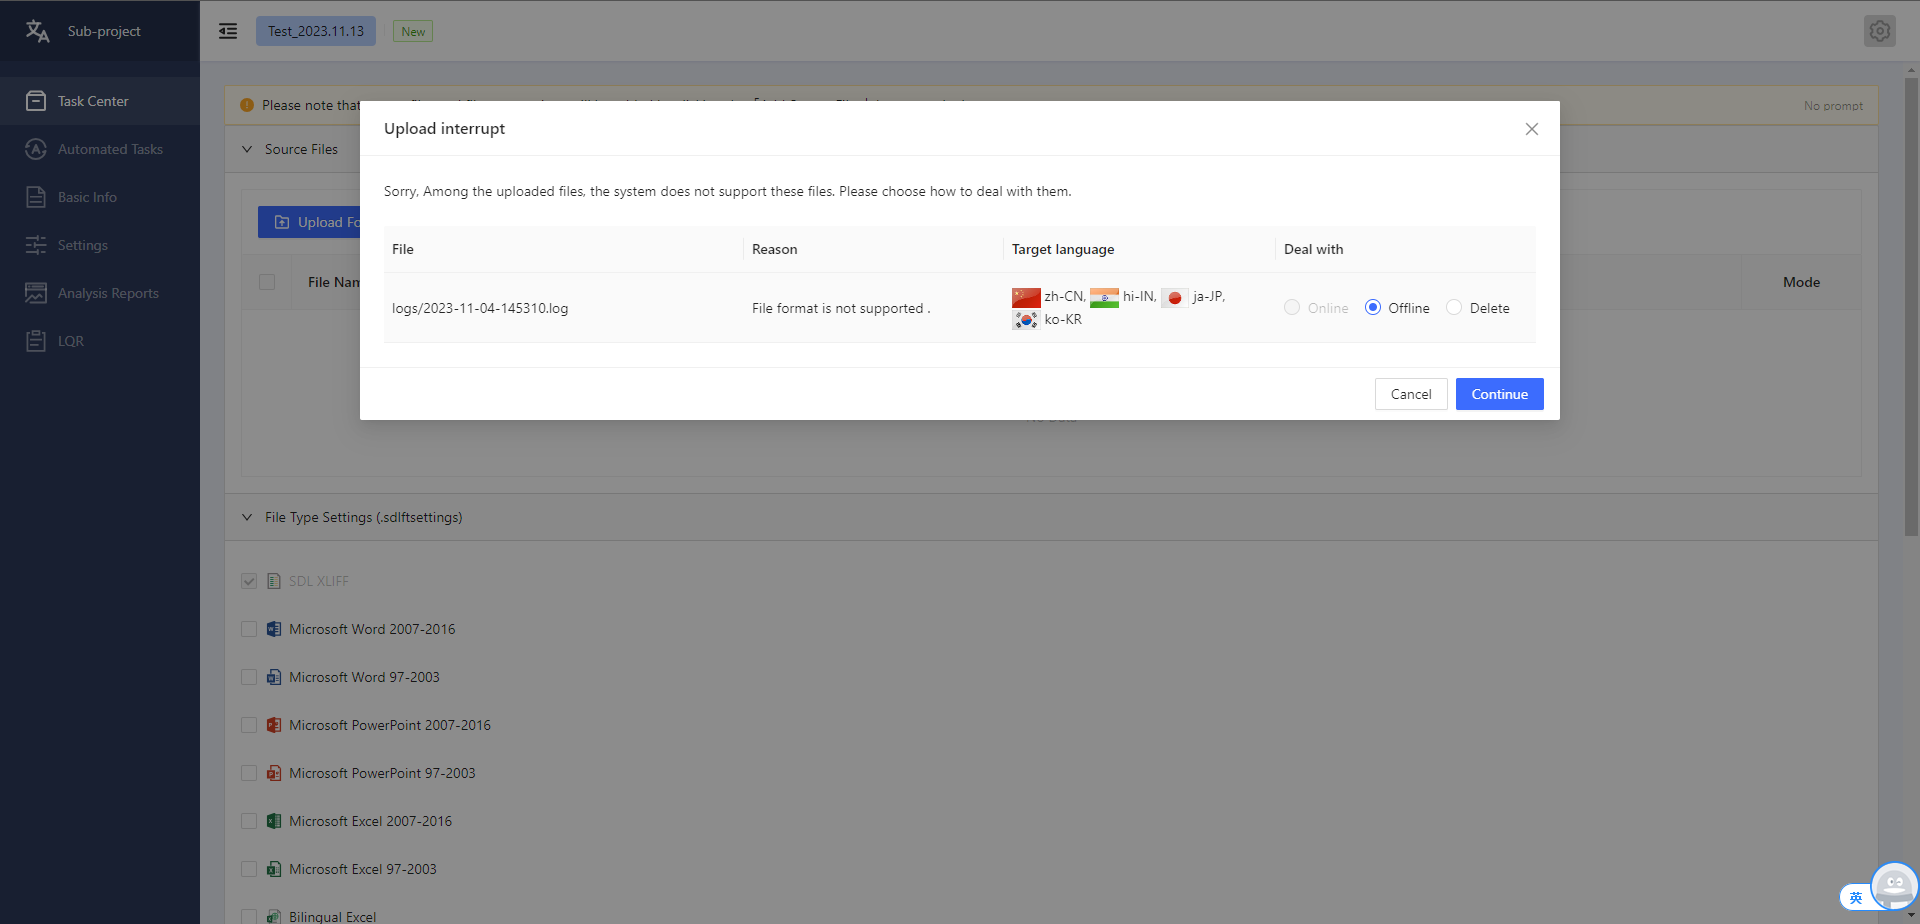
Note: There are four types of possible prompts.
File format not supported: Files not supported can be deleted.
TM language not supported: You can choose to upload the file or delete the file. If you choose to upload the file, it may not be found in the TM during online editing.
TB language not supported: You can choose to upload the file or delete the file. If you choose to upload the file, it may not be found in the TB during online editing.
File already exists: Files that already exists can only be deleted.
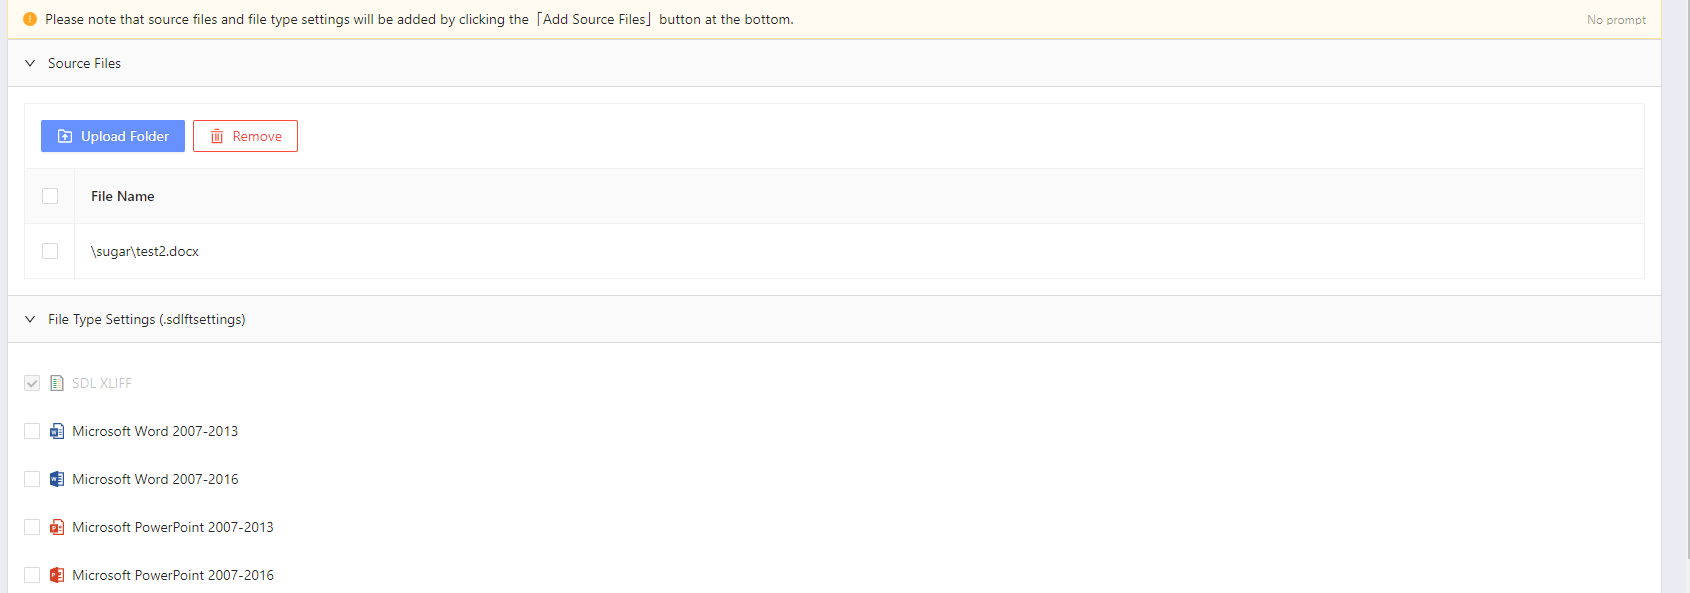
After all files have been successfully uploaded (as shown in the figure below), you can select a file and click the "Remove" button to remove it.
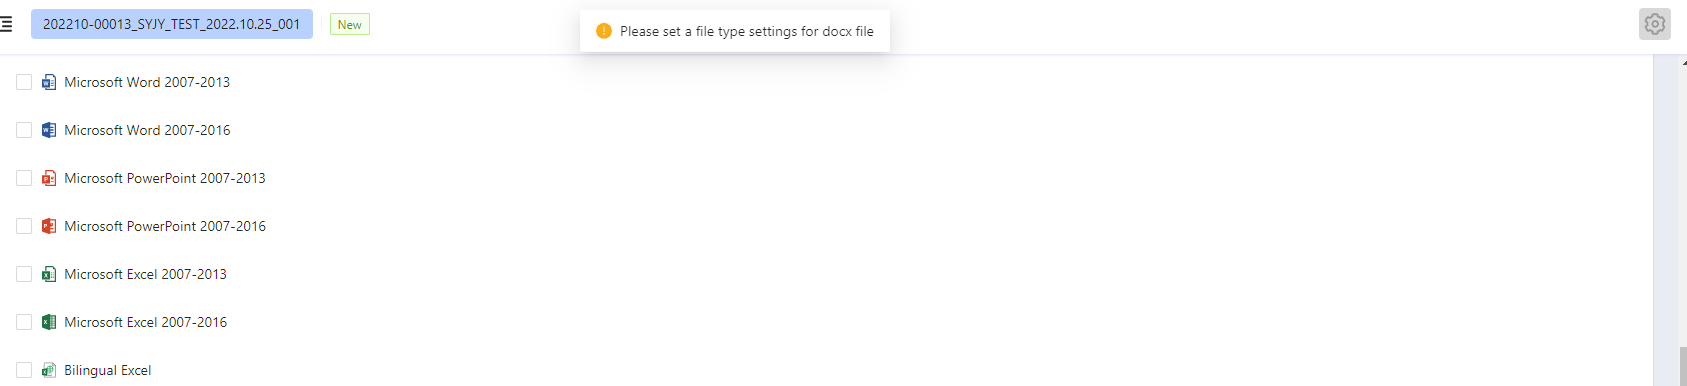
After the file is uploaded successfully, you need to check the File Type Settings of the uploaded file (as shown in the screenshot below). After selecting one of the File Type Settings, the File Type Settings used in the client's historical projects will be displayed along with the default file parser. You can choose based on the actual situation, or click Upload to upload a new File Type Settings file.
The FileTypeSettings file is a built-in folder parser in Trados, and can be exported from Trados. Askan engineering colleague for help if needed.
SDL Xliff bilingual files do not need to be uploaded, as the system has a built-in default.
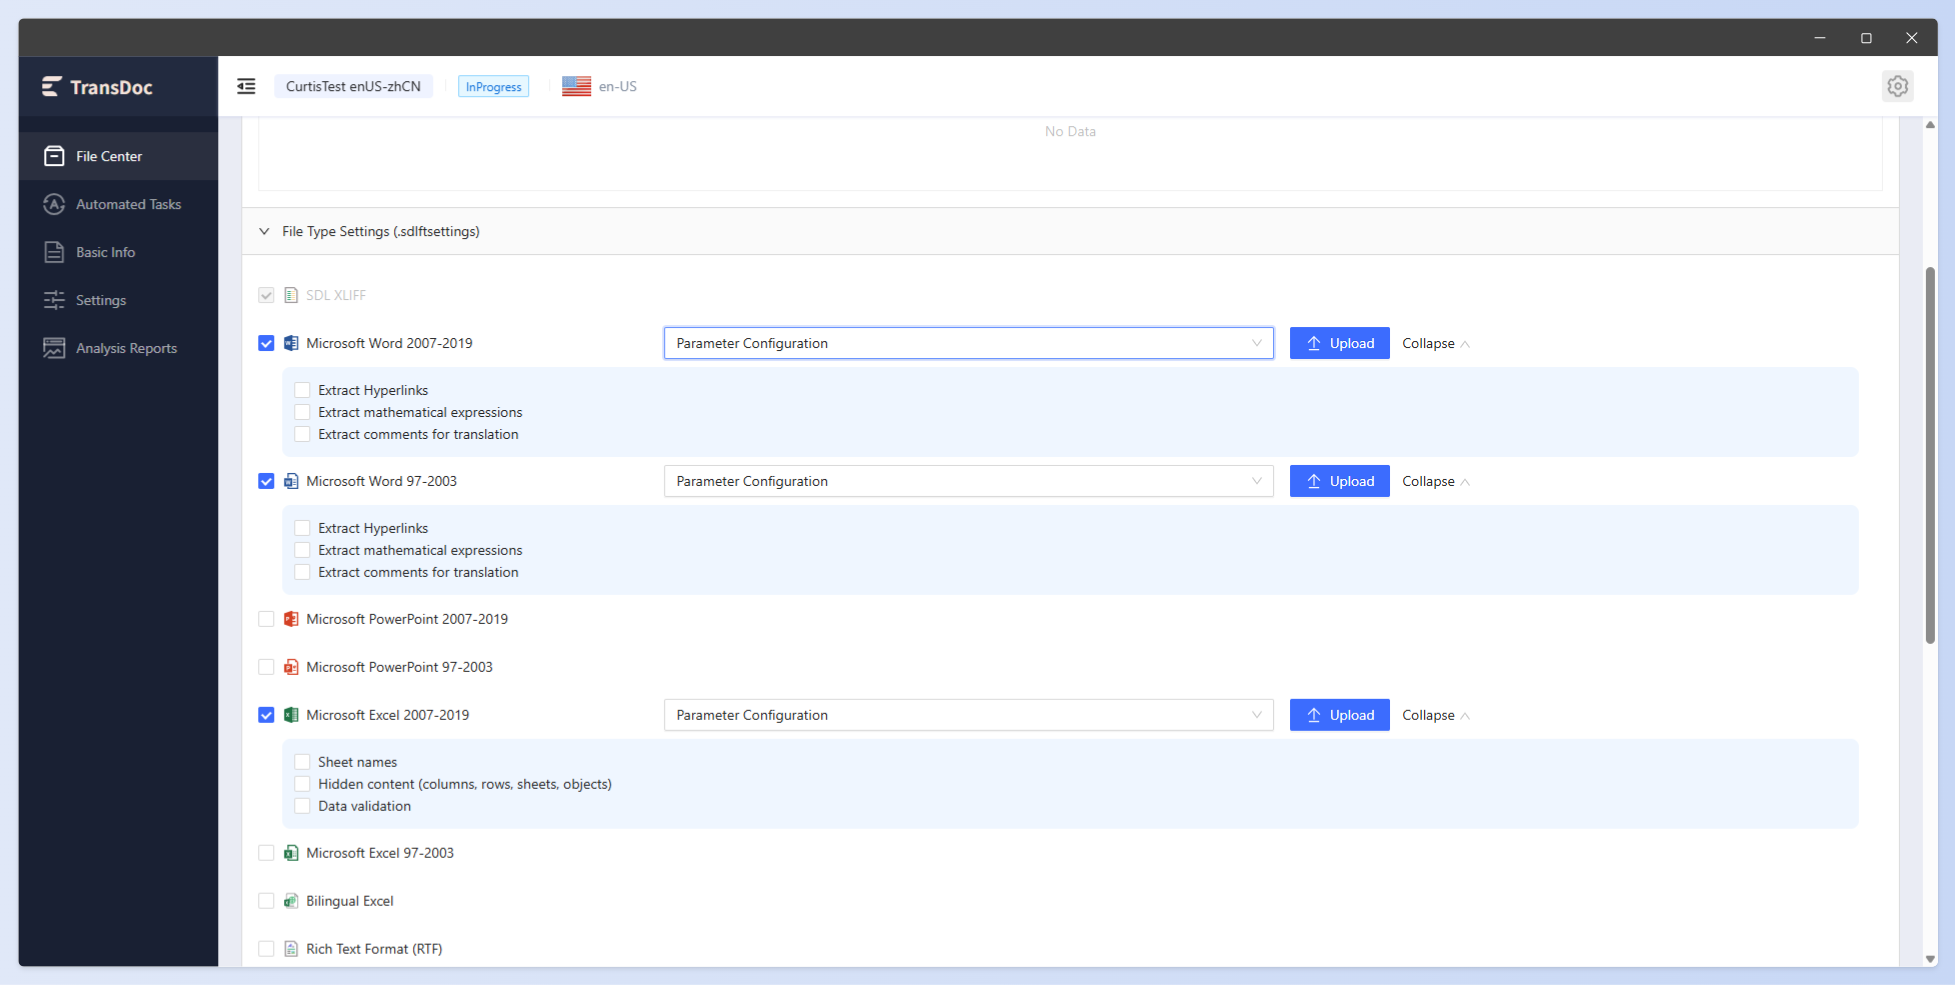
Several file types in the uploaded folder require checking the corresponding File Type Settings. If not checked, the system will prompt when saving (as shown in the screenshot below)
After completing the above operations, you can click the "Finish" button at the bottom of the page to add files. After clicking the button, the system will perform file conversion, pre-translation, MT, word count analysis (analysis parameters are set in Settings), and other operations on the uploaded files. You can also click the "Next" button to set pre-translation rules, MT, and TM information based on the currently uploaded files.
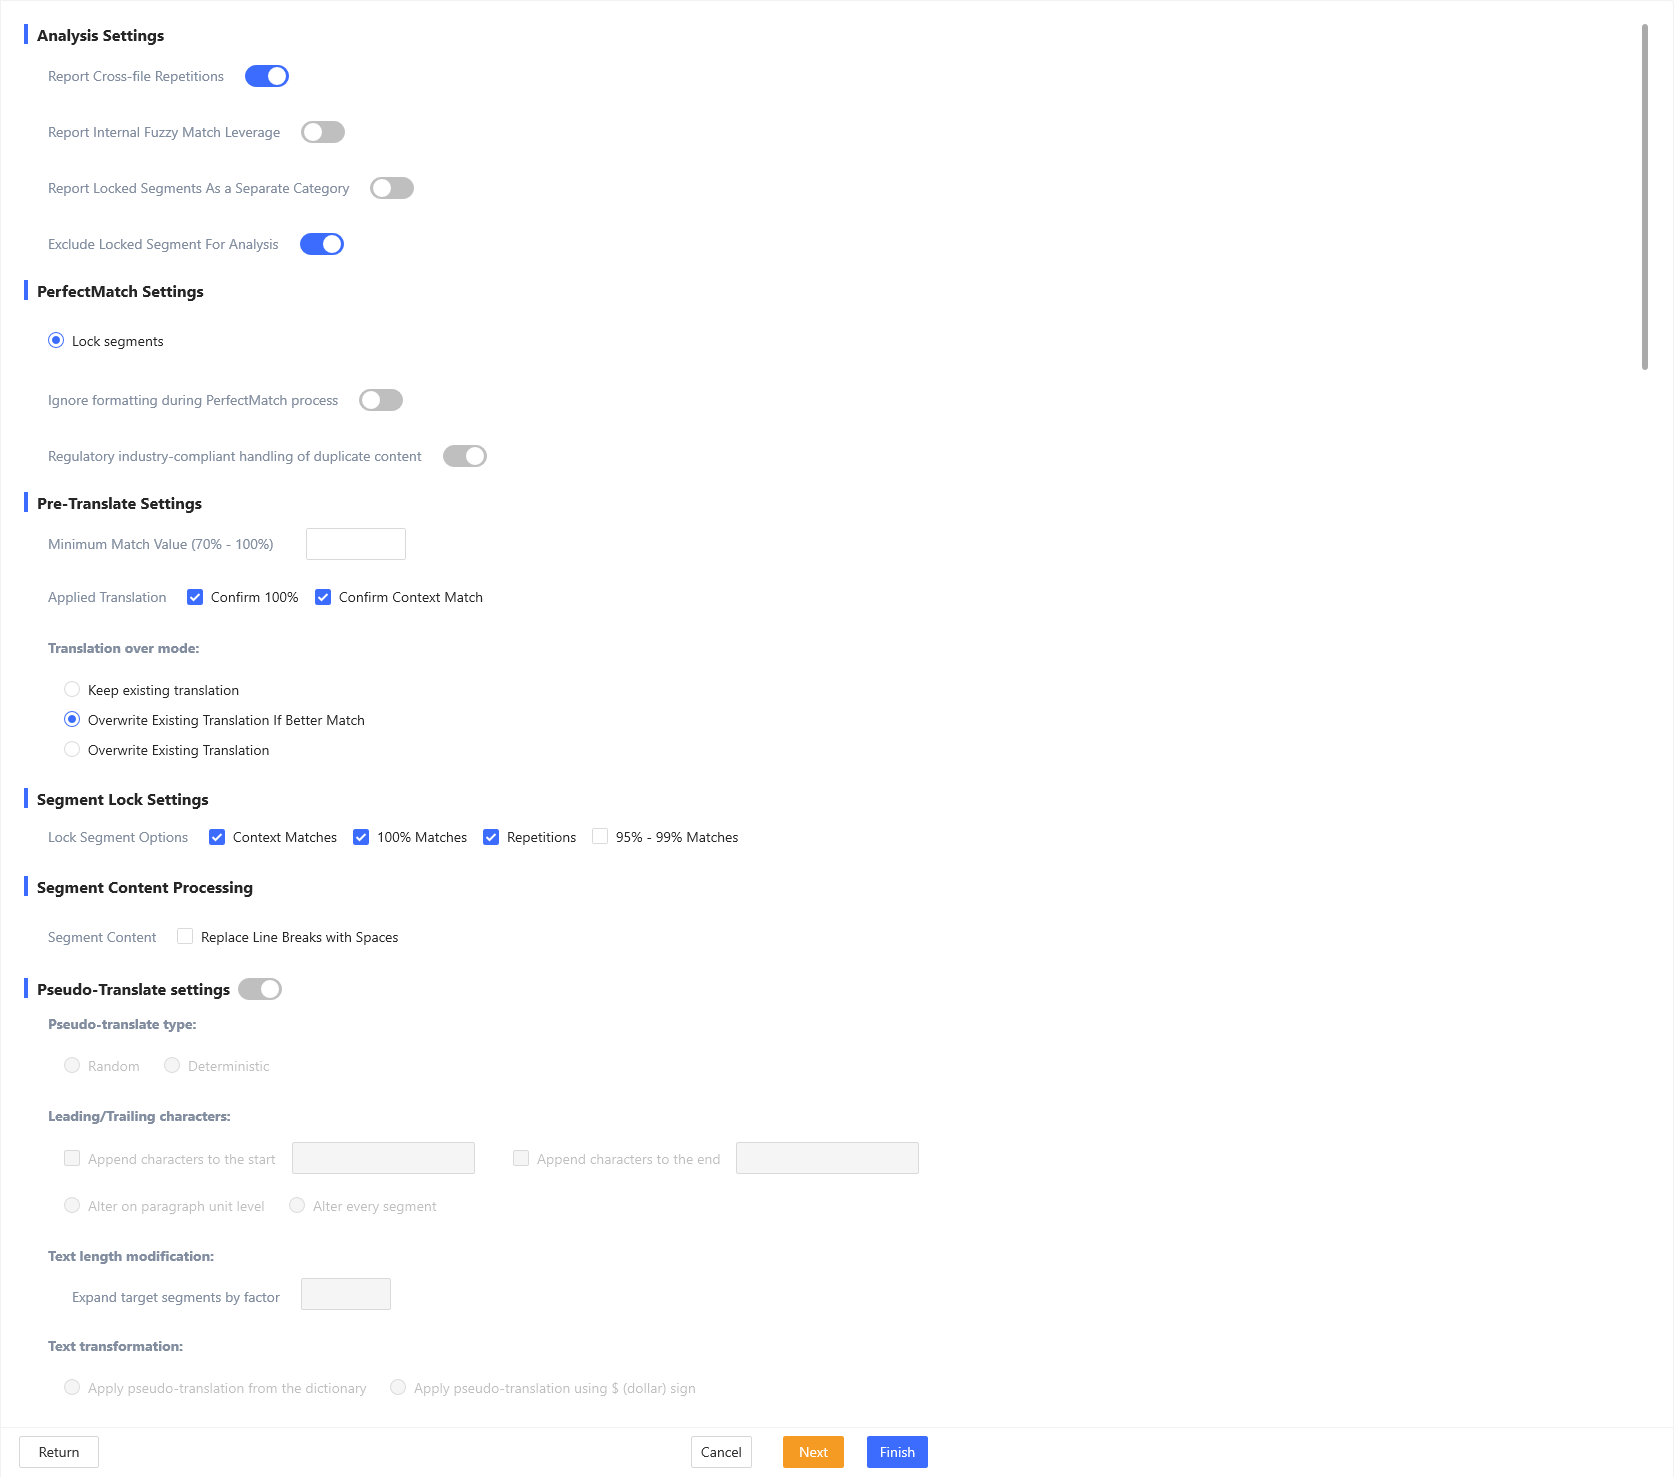
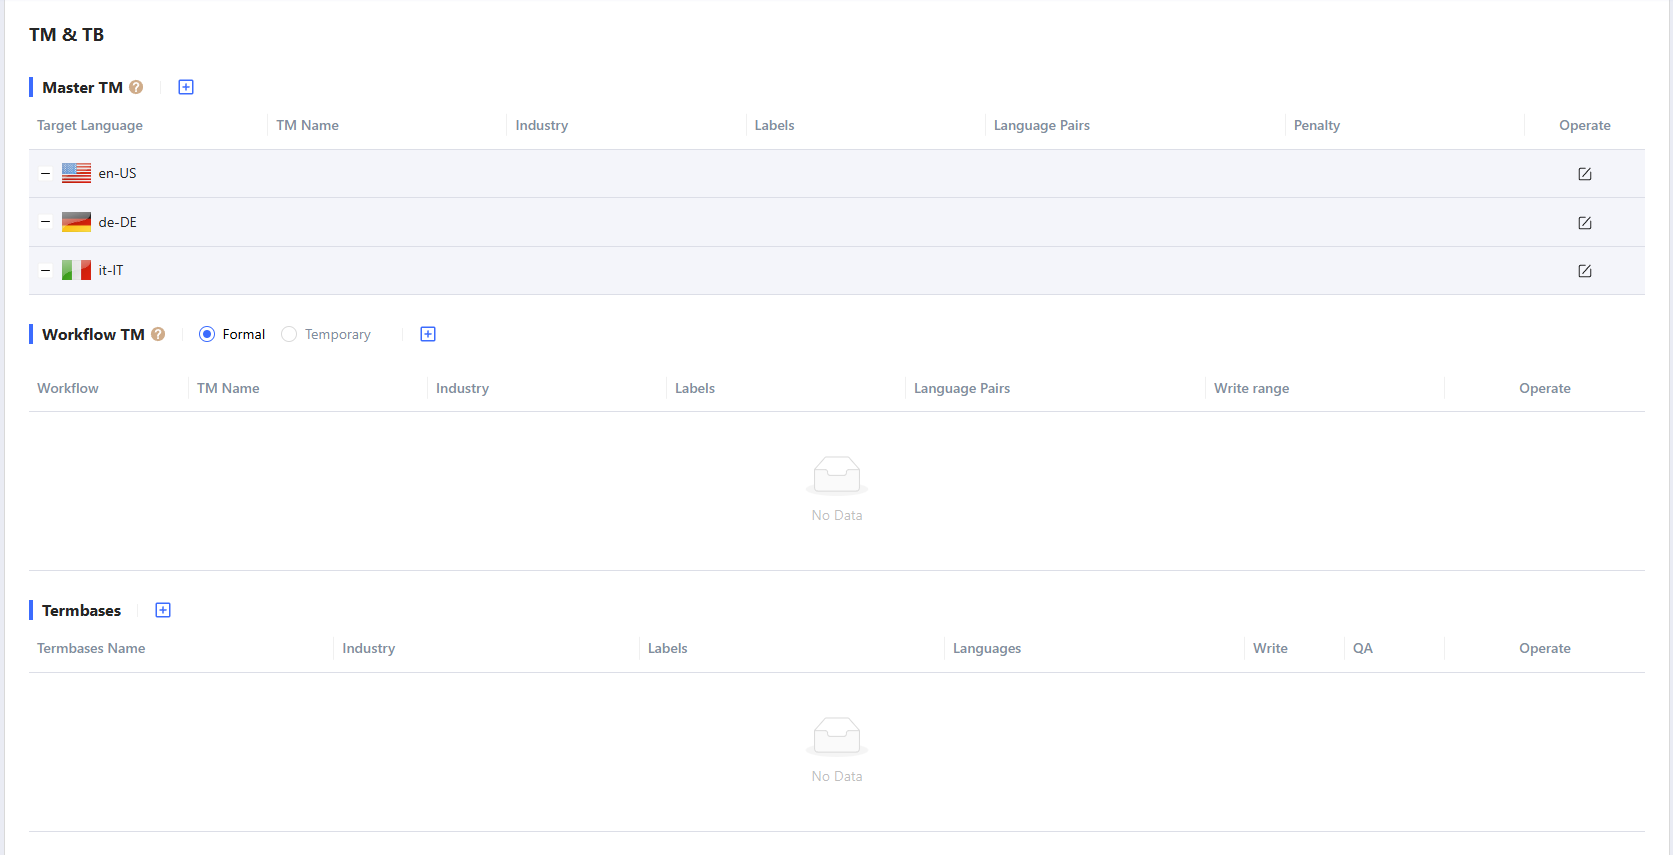 After completion, click the "Finish" button, and the system will perform file conversion, pre-translation, MT, word count analysis (analysis parameters are set in Settings), and other operations on the uploaded file. The file cannot be operated on until the file processing is complete. The file conversion processing time depends on the file content size.
1.1.2 Subsequent Uploads
For subsequent uploads, there is no need to set whether the target language files of the project are consistent; other operations are the same as the first upload.
1.2 Reference Files
Reference files refer to the references content that translators can download when receiving a task.
Click Reference Files in the upper right corner to open the Manage Reference Files window, as shown below.
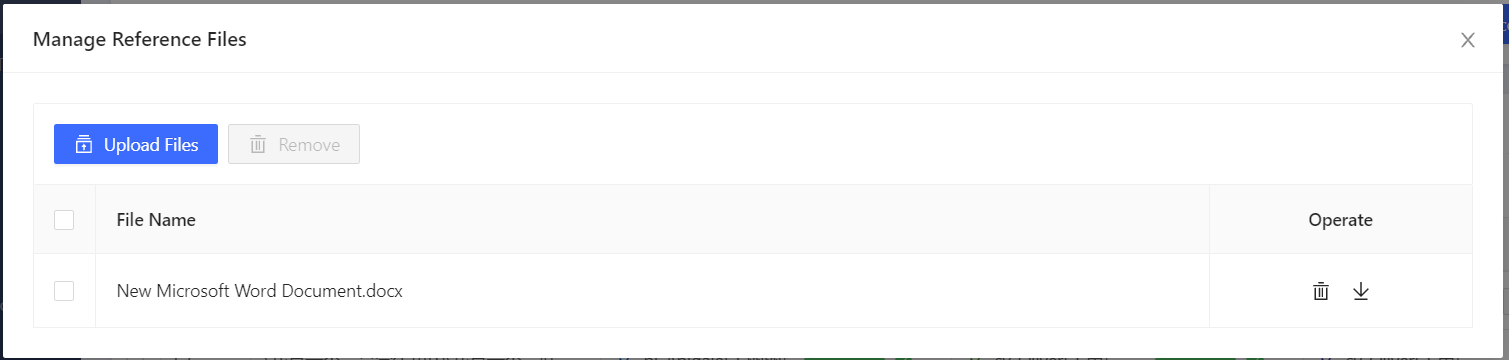
As shown in the screenshot, you can upload/download/delete any files here. The file list here will be shared with the translators assigned to the task, who can download the files from within their tasks.
1.3 Splitting Files
For files with a large number of segments, you can use the split file function to divide them into smaller files. The button is located above the file list and behind the file, as shown in the screenshot. There are four splitting methods, as shown in the screenshot.
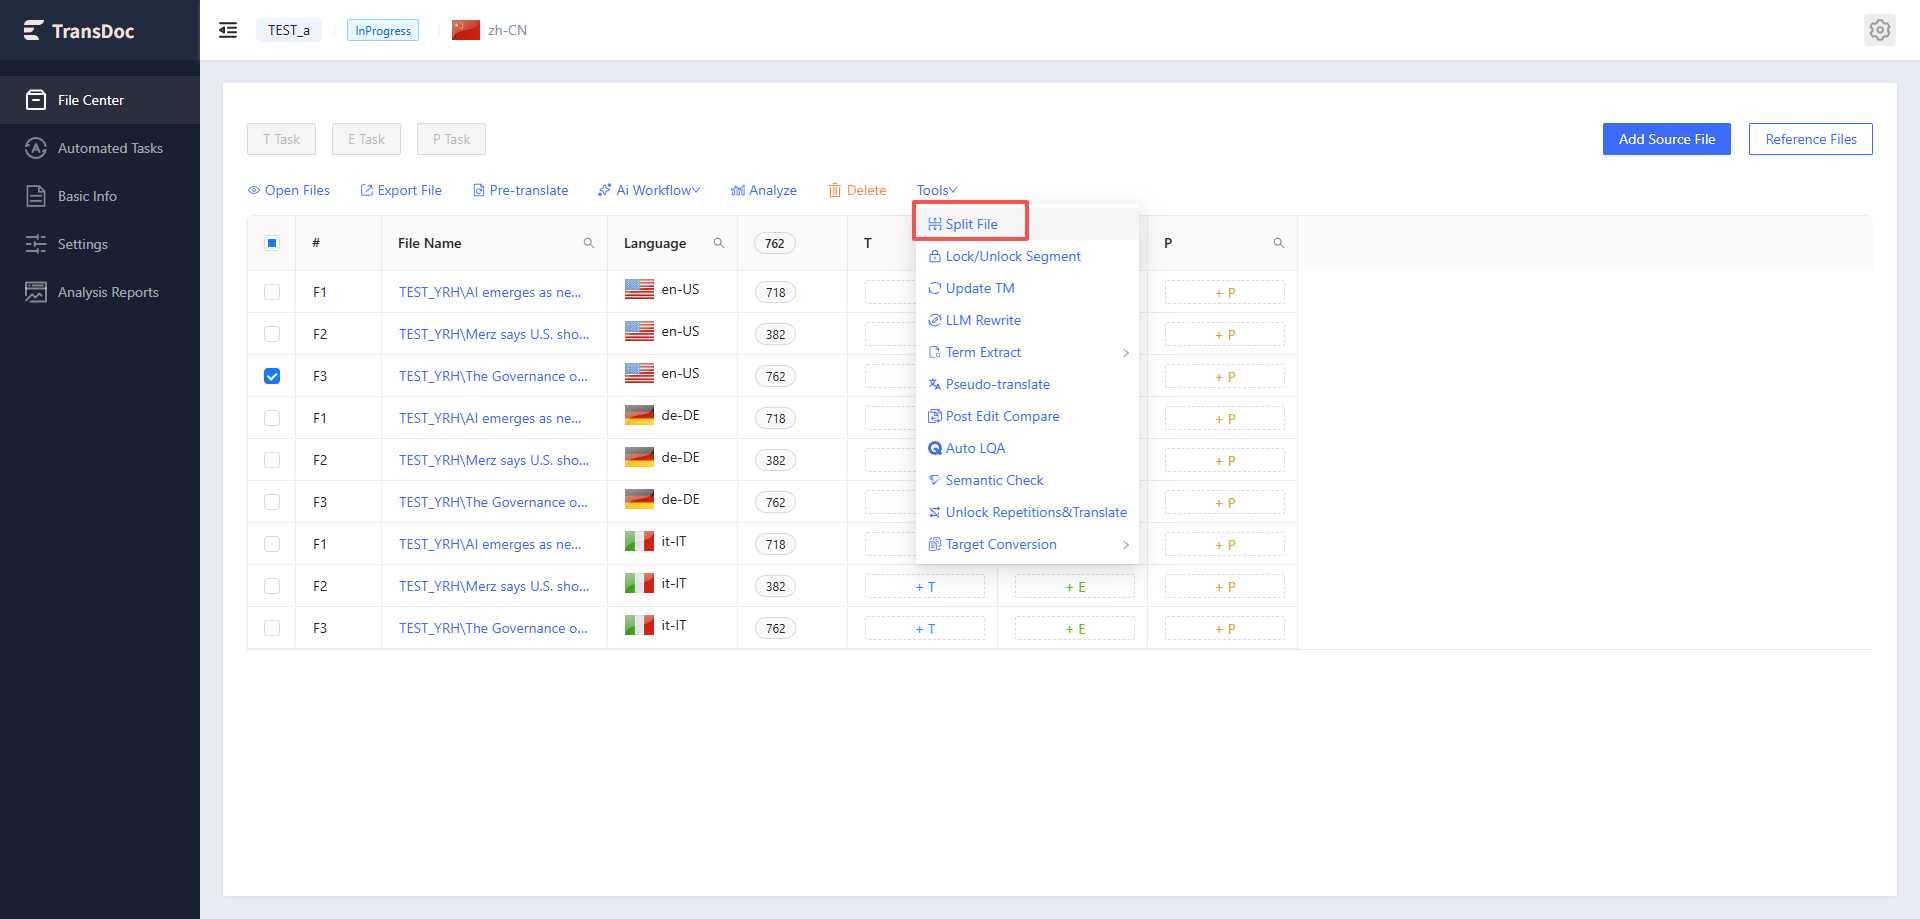
The splitting options are shown in the figure, with a total of four splitting methods.
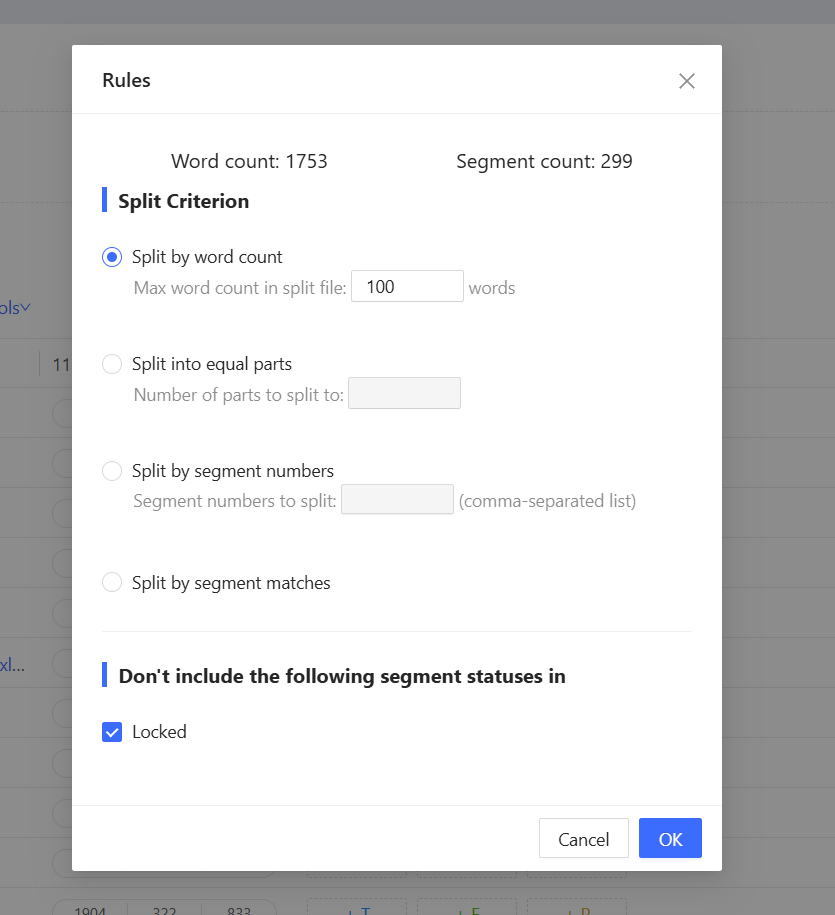
① Split by word count
The system will split the file based on the set word count. For example, if 1,000 words per file is set, a file with 10,000 words will be split into approximately 10 files.
② Split evenly by number of parts
The system will split the file evenly according to the set number of parts. For example, if splitting into 5 parts is set, regardless of how many segments the original bilingual file has, it will ultimately be split into 5 files.
③ Split by segment numbers (separated by commas)
The system will split the file based on the input segment numbers. For example, for a file with a total of 200 segments, entering 30,100 will split the file into three parts: 1-30, 31-100, and 101-200.
④ Split by word count range
The file will be split into two parts. As shown in the screenshot below, the segments within the selected word count range will be split into one part, and the remaining segments will be split into another part.
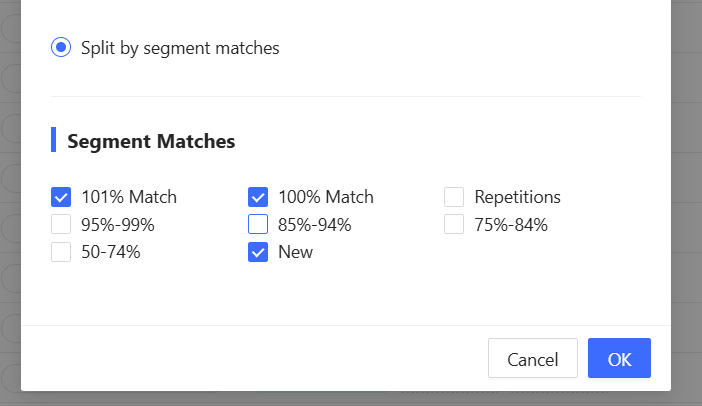
PS: Splitting files takes some time, depending on the file size. During the splitting process, no other operations can be performed on the file.
Files that have already been split do not support being split again.
Files that have been assigned as tasks cannot be split.
A split file cannot be deleted partially.
1.5 Update TM
When you need to update the translations from a bilingual file into the TM, you can use the Update TM function. The location of the function button is shown in the screenshot below.
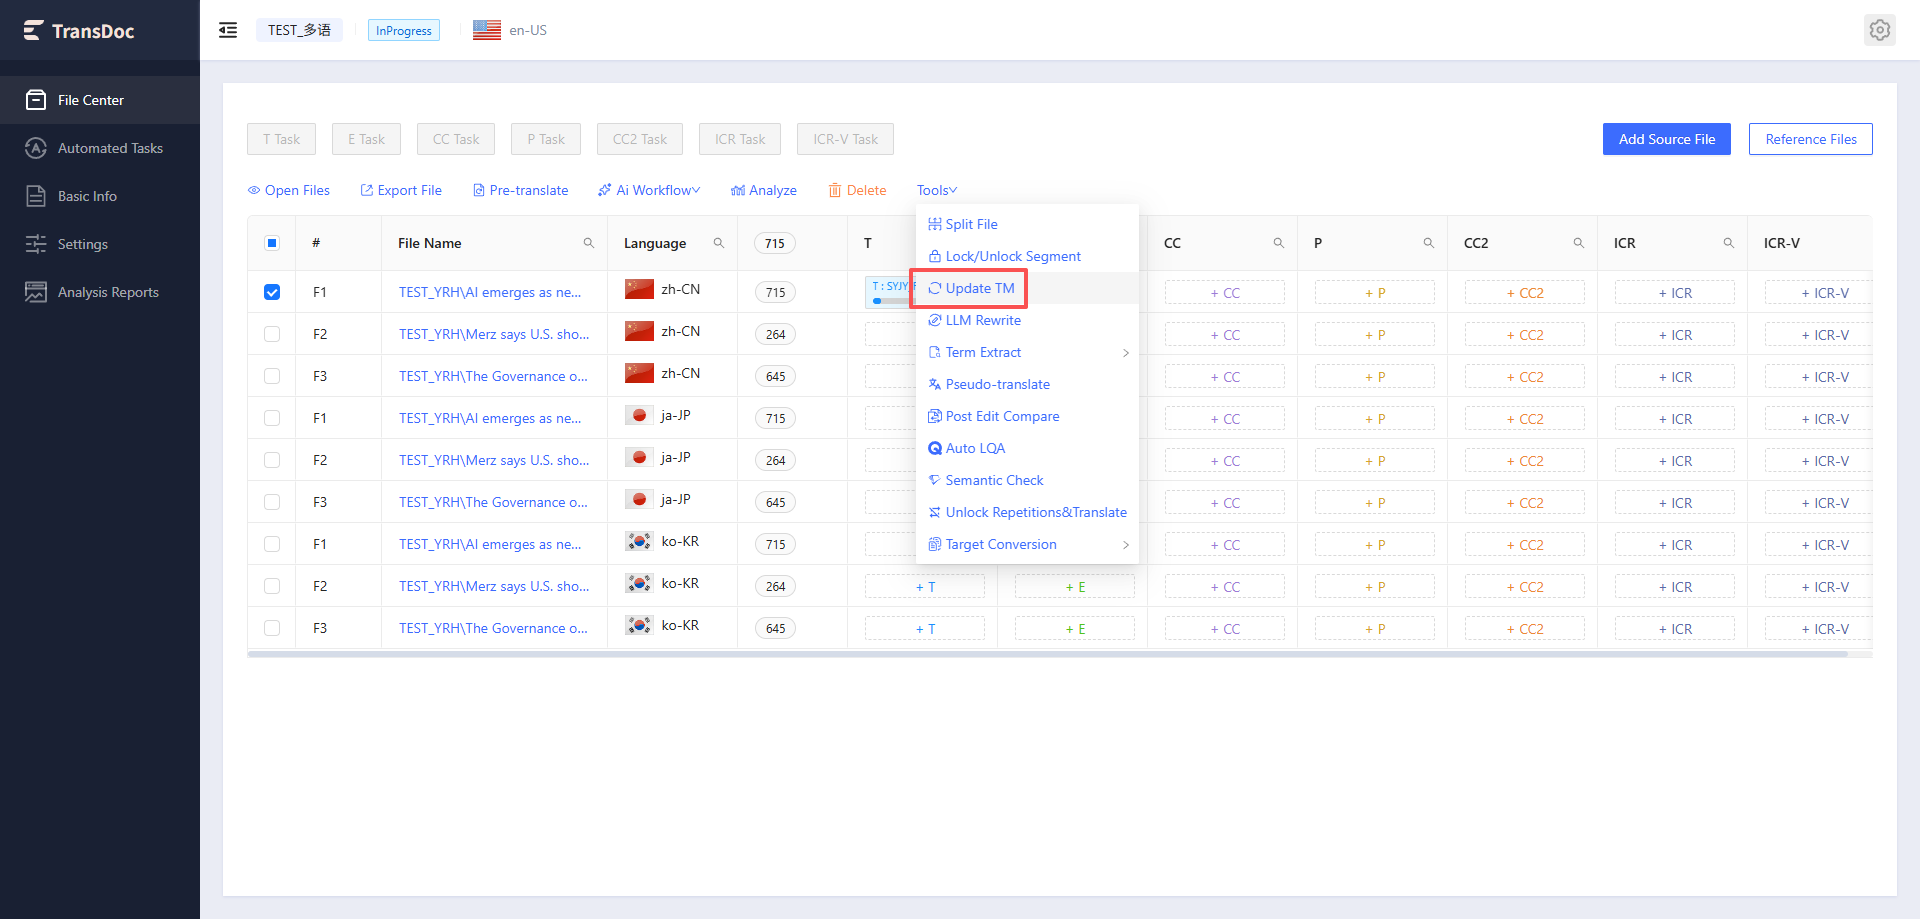
After selecting a file, click the Update TM option, and in the screen shown below, select the TM to be updated.
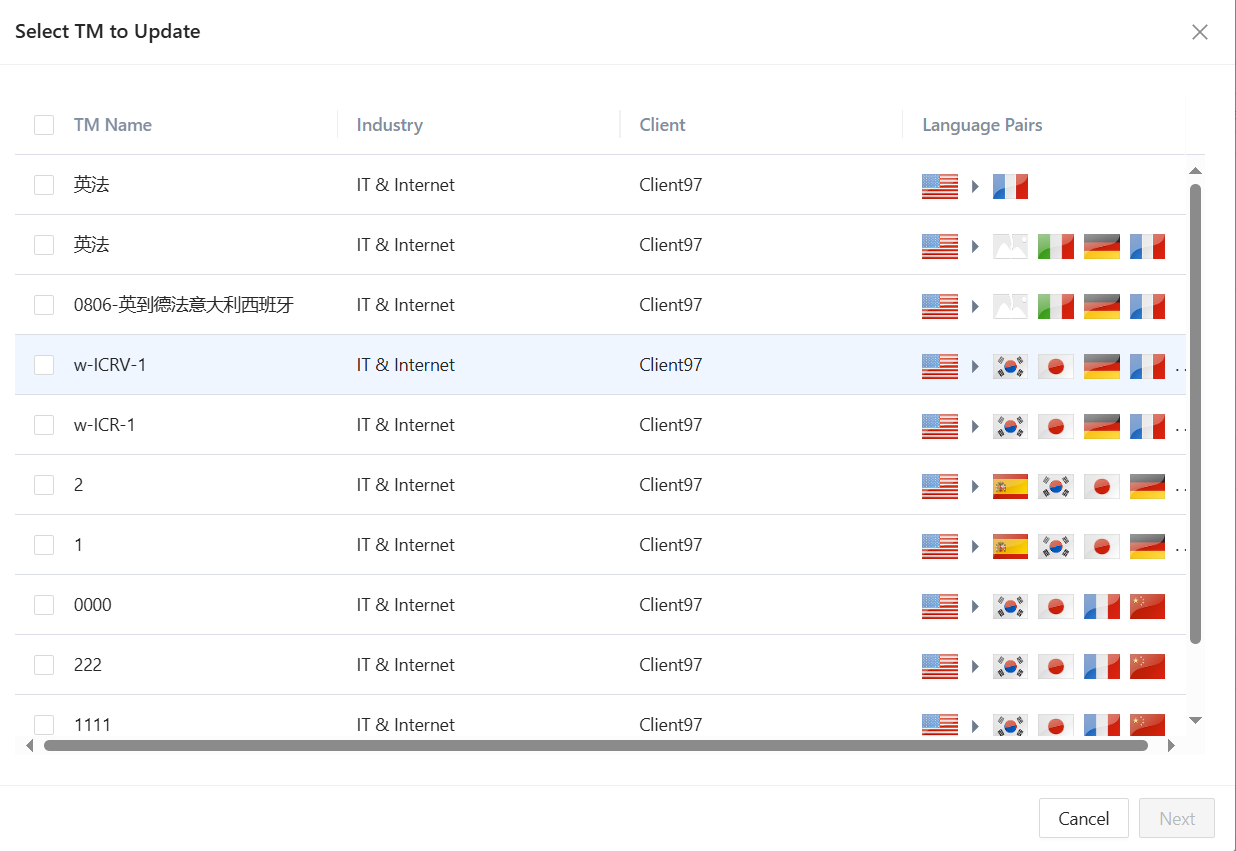
After selecting the TM, click the Next button to enter the update options interface as shown in the screenshot below.
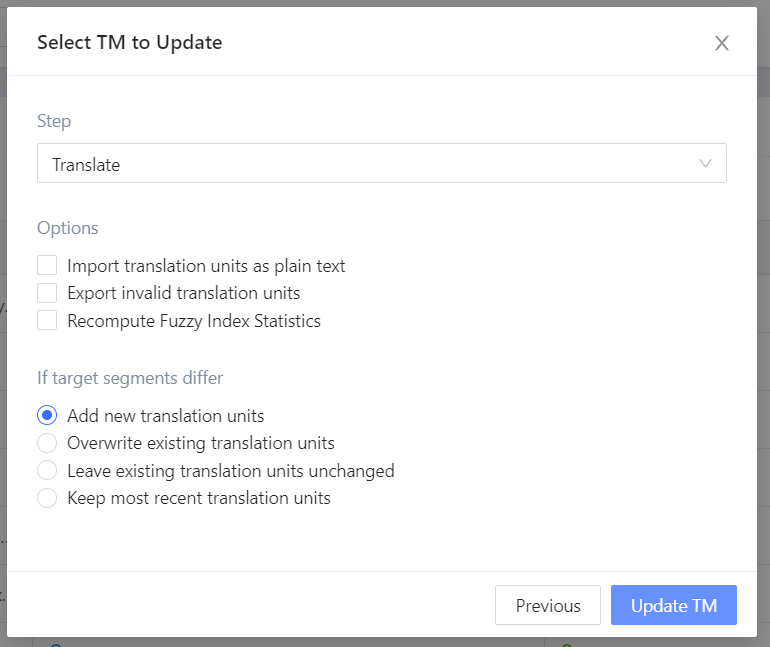
It is the file that is selected, but updating the TM requires specifying the step that the translation comes from. Therefore, first select the step in Step, then adjust the parameters for updating the TM as needed. Click Update TM to start the update. The update task will start immediately, but it will take some time to complete. After closing the window, you can check the status of the TM update task in the Automated Tasks menu.
1.6 Export File
Select a file and click the export button in the top left corner, as shown below.
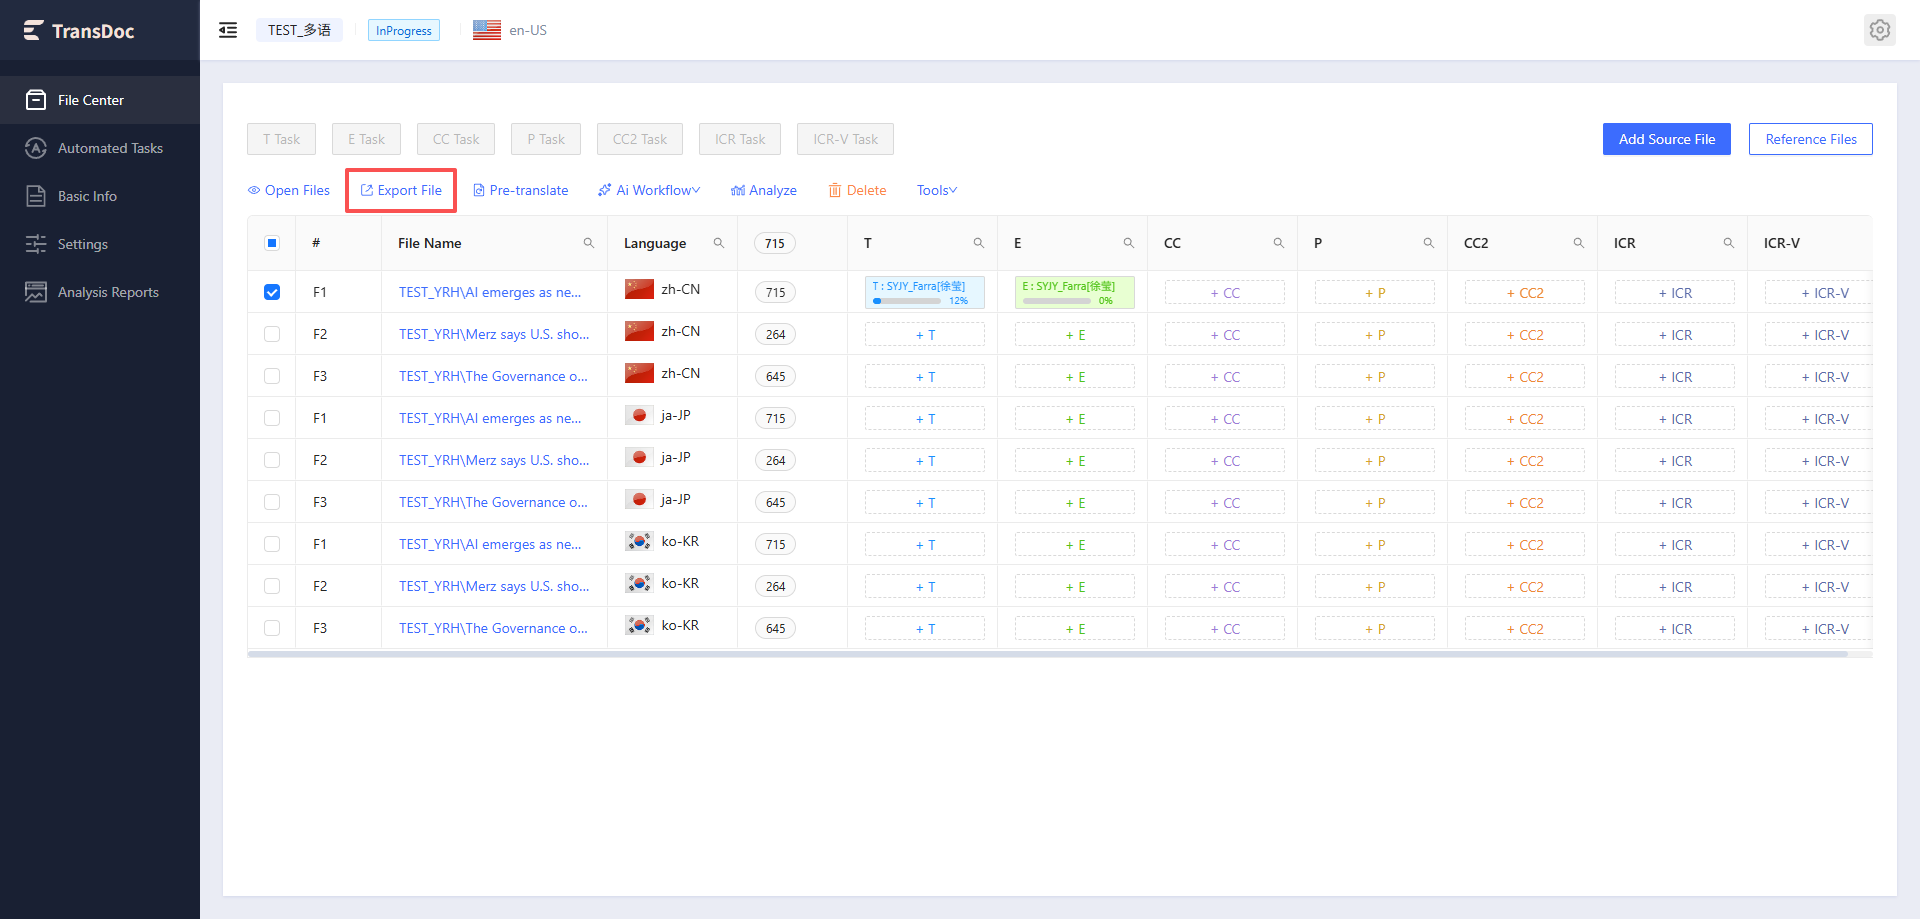
Click Export, and the export options will pop up as shown in the screenshot below. Select the steps to export, adjust the export options, and click the Export button to export. The export task will then start.
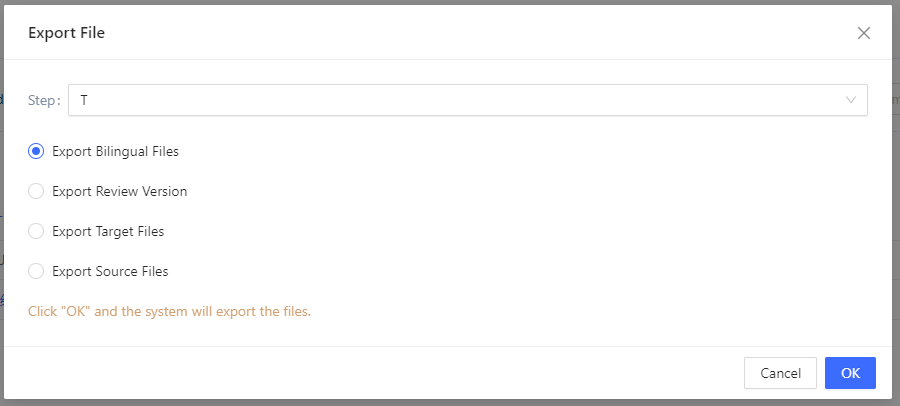
The export task takes some time. After closing the window, you can check the status of the export task in the Automated Tasks menu. When the export task is completed, you can download the exported file from the task list.
1.7 Delete File
For files that have not been assigned a task, you can click the delete button, as shown in the figure.
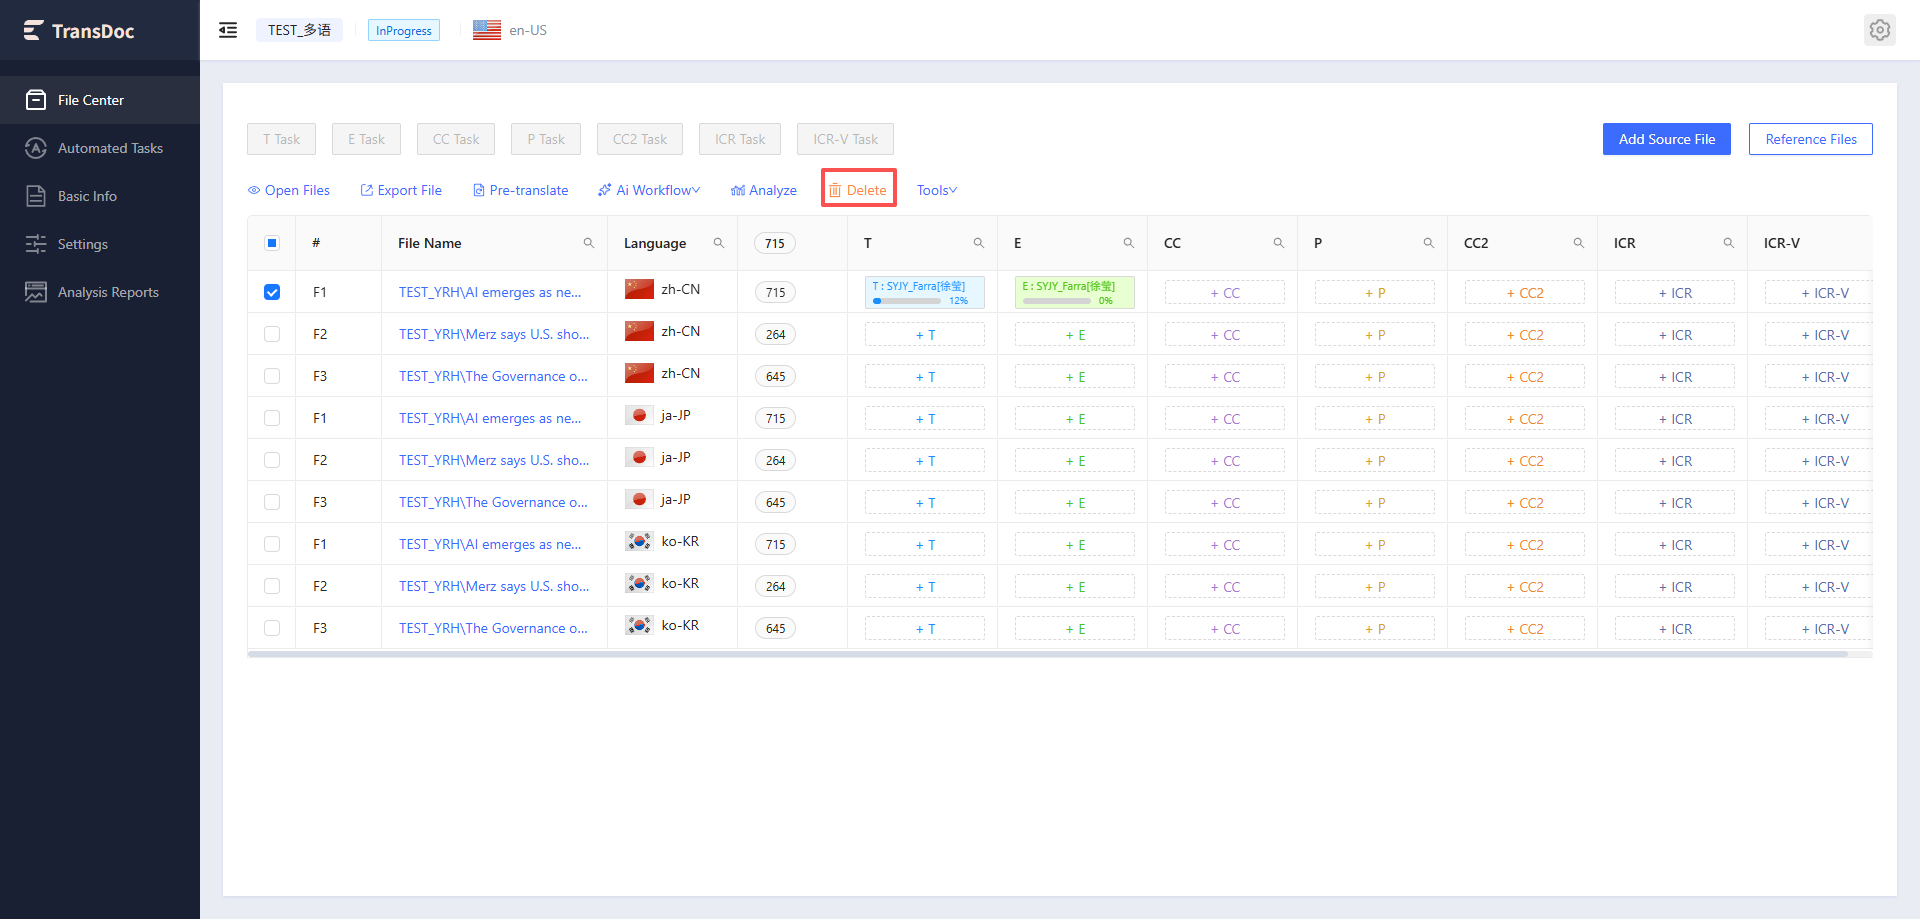
After confirmation, the file can be deleted.
When all files for all language pairs have been deleted, you can reselect "Use the same source file for all language pairs" or "Use independent source files for each language pair."
1.8 Open File
Online files can be viewed by opening the online editing page, and can be opened by node.
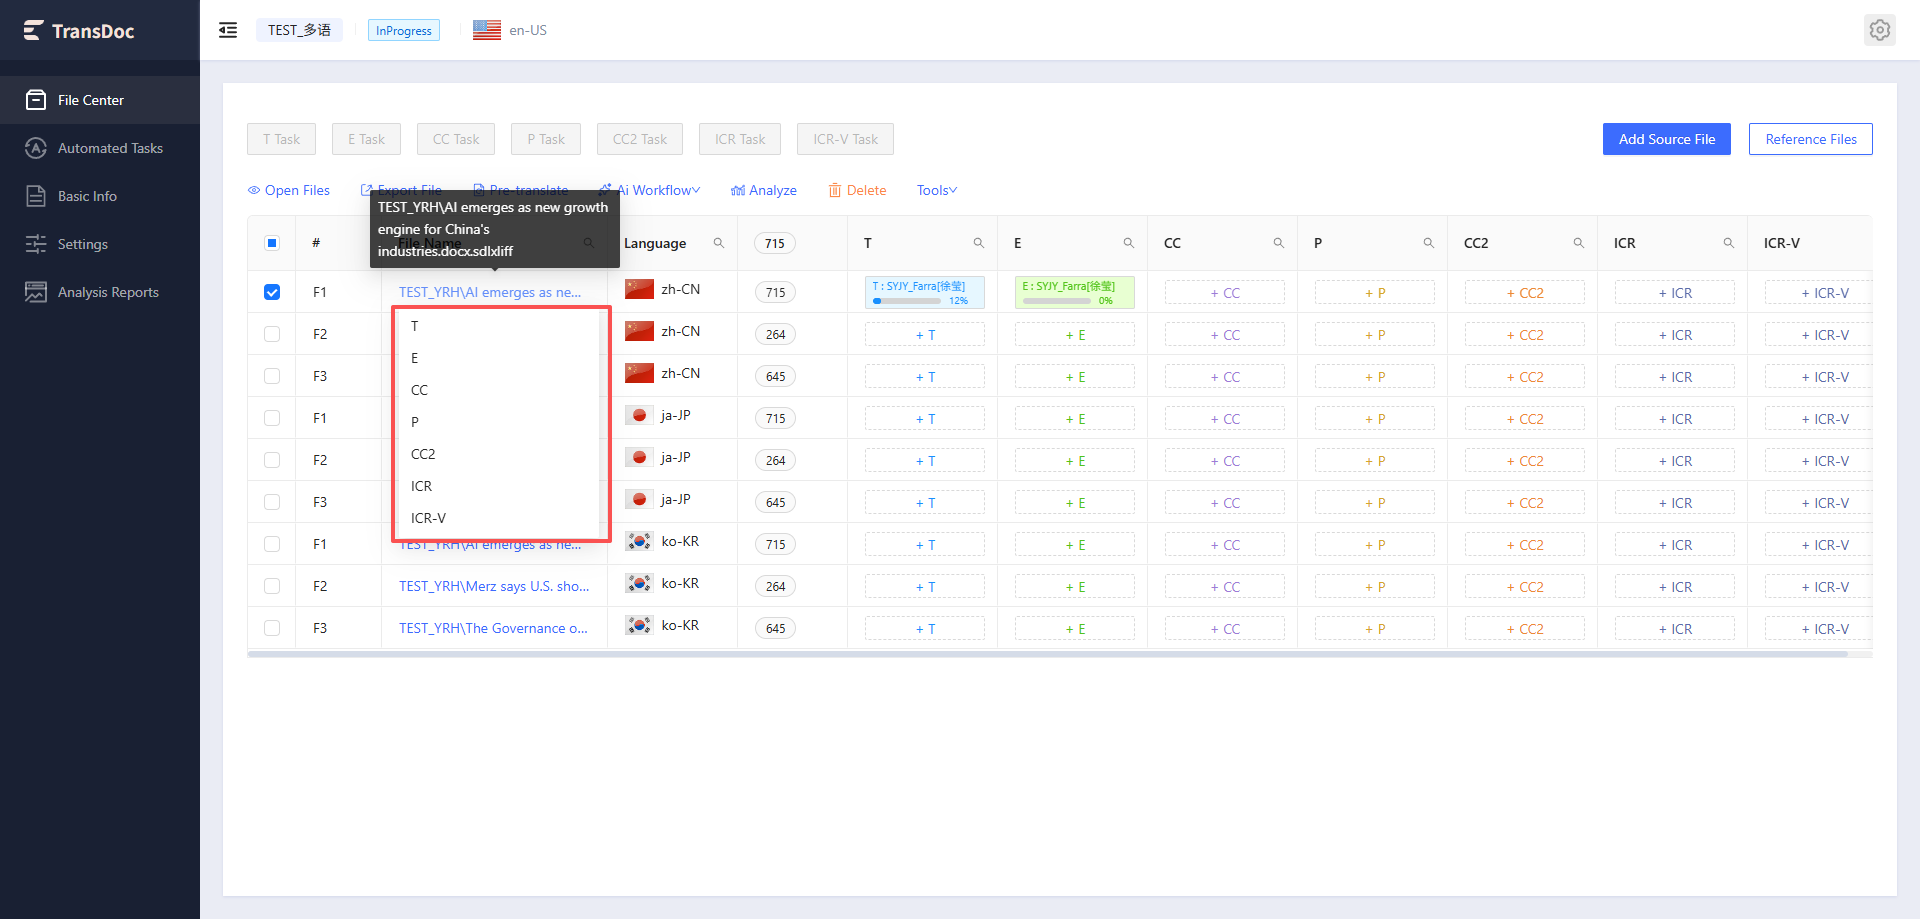
1.9 Pre-translate
PM can re-pre-translate files.
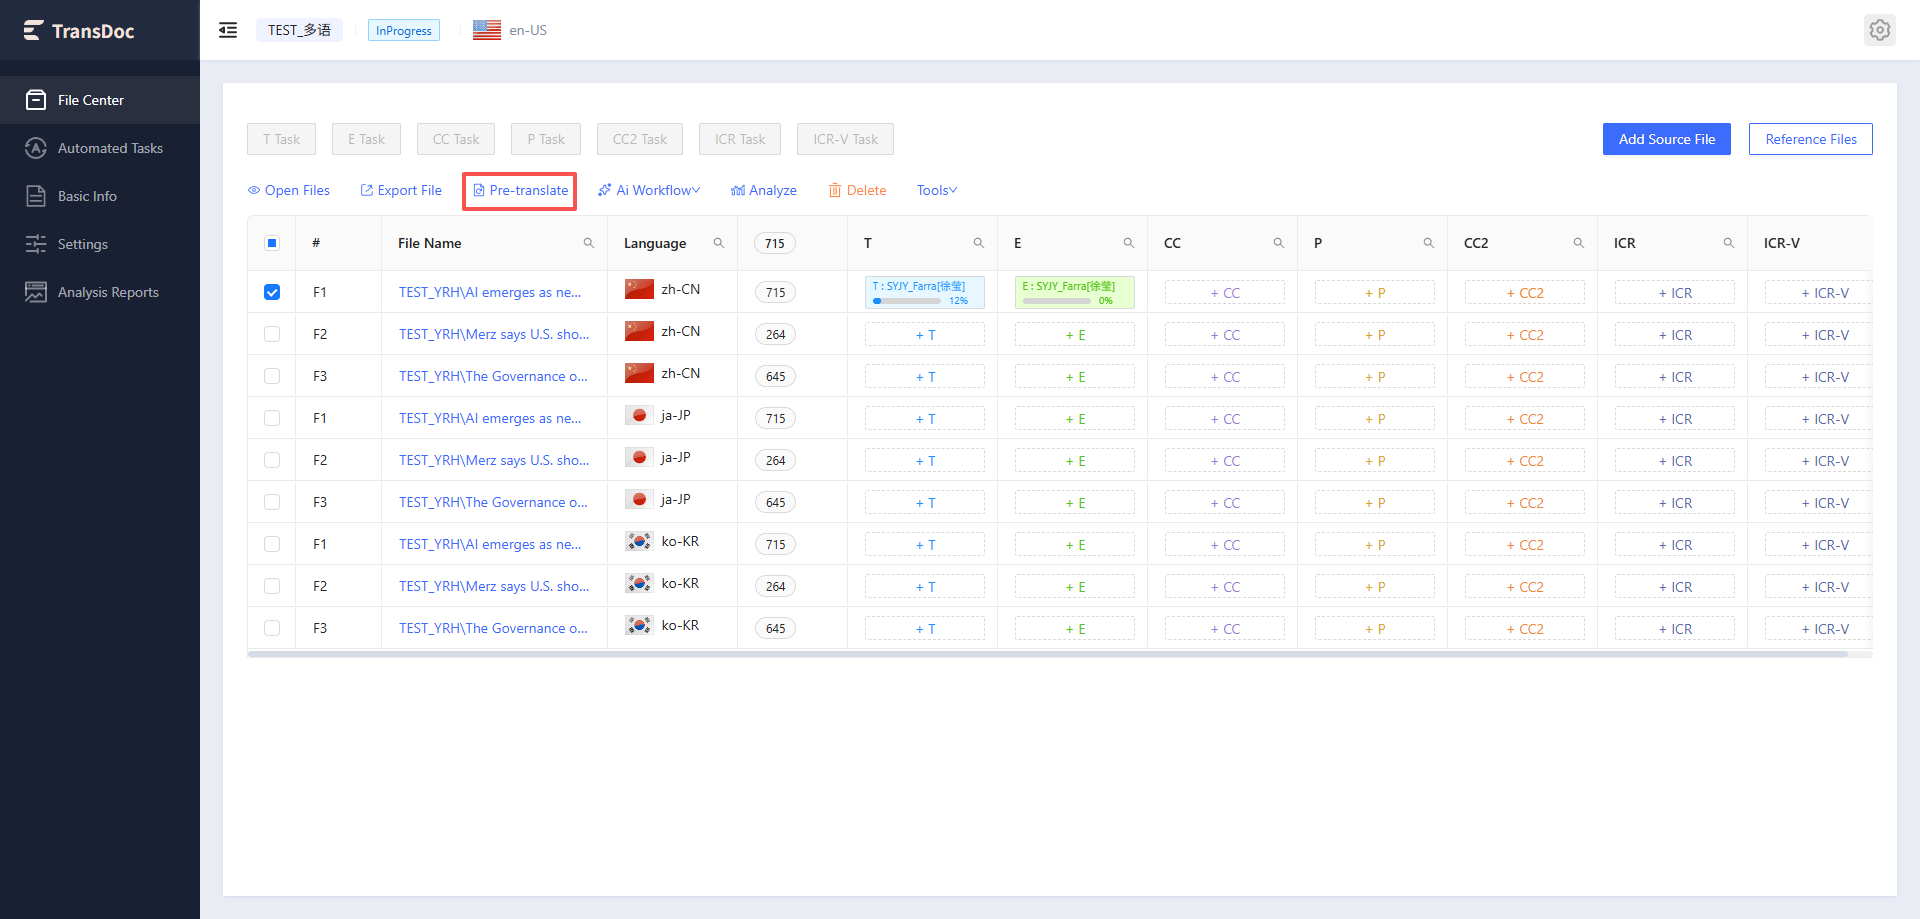
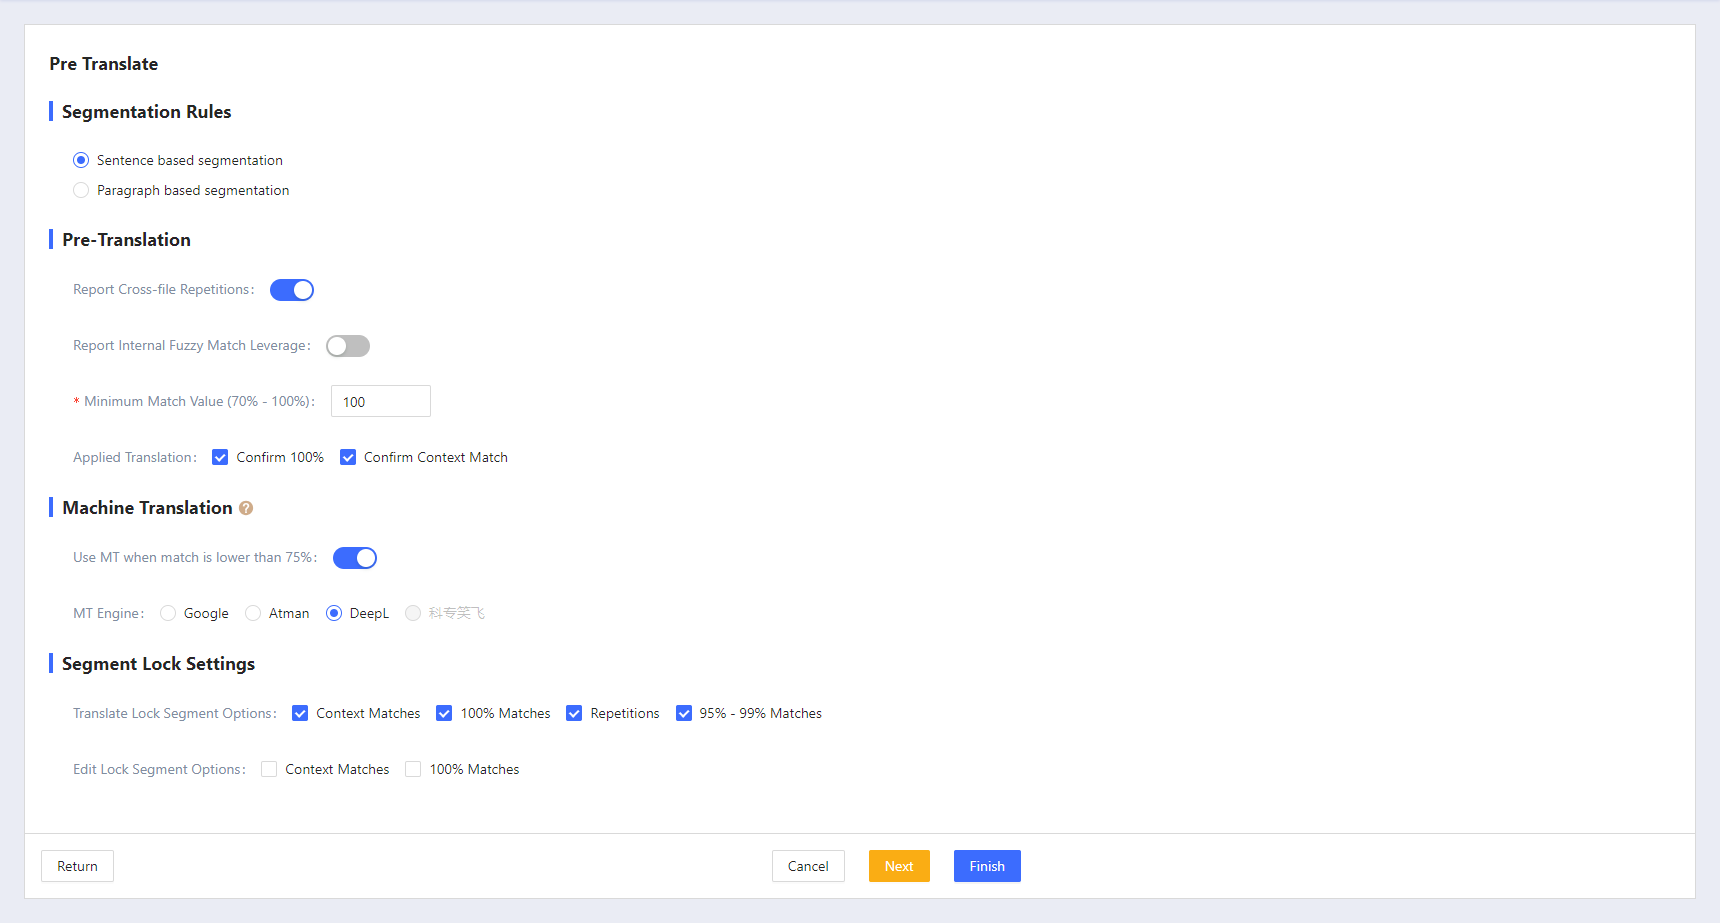
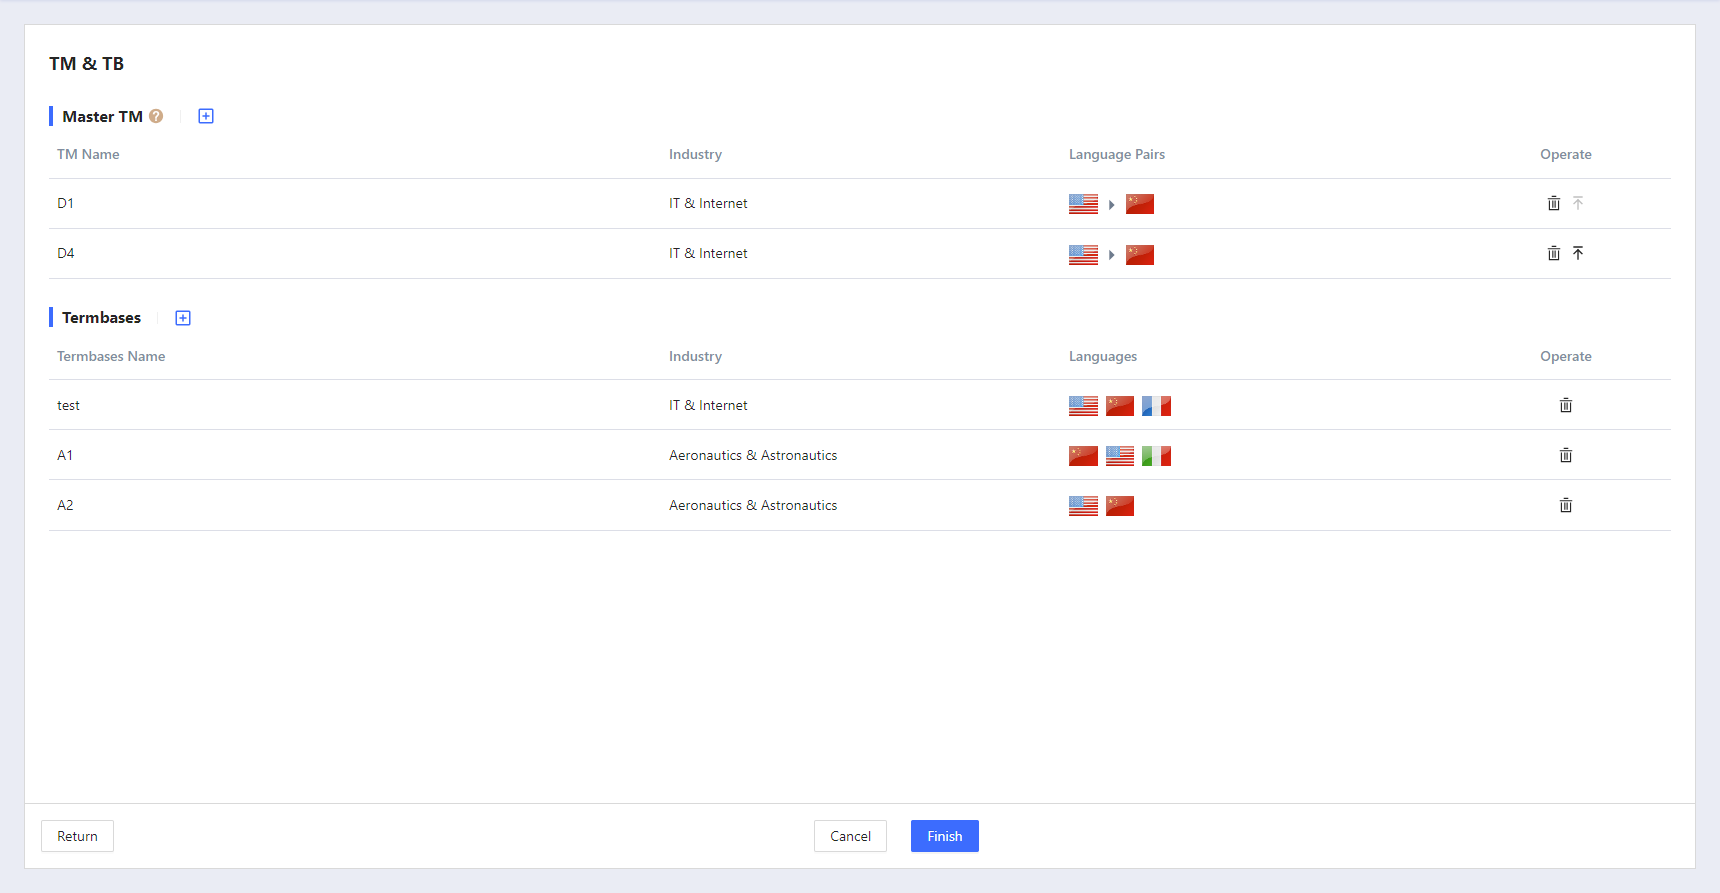
Select the file and click the Pre-translate button to re-pre-translate. The pre-translation settings are the same as file uploading. Click the Next or Finish button to proceed. Once completed, the word count analysis report will be updated.
1.10 LLM Rewrite
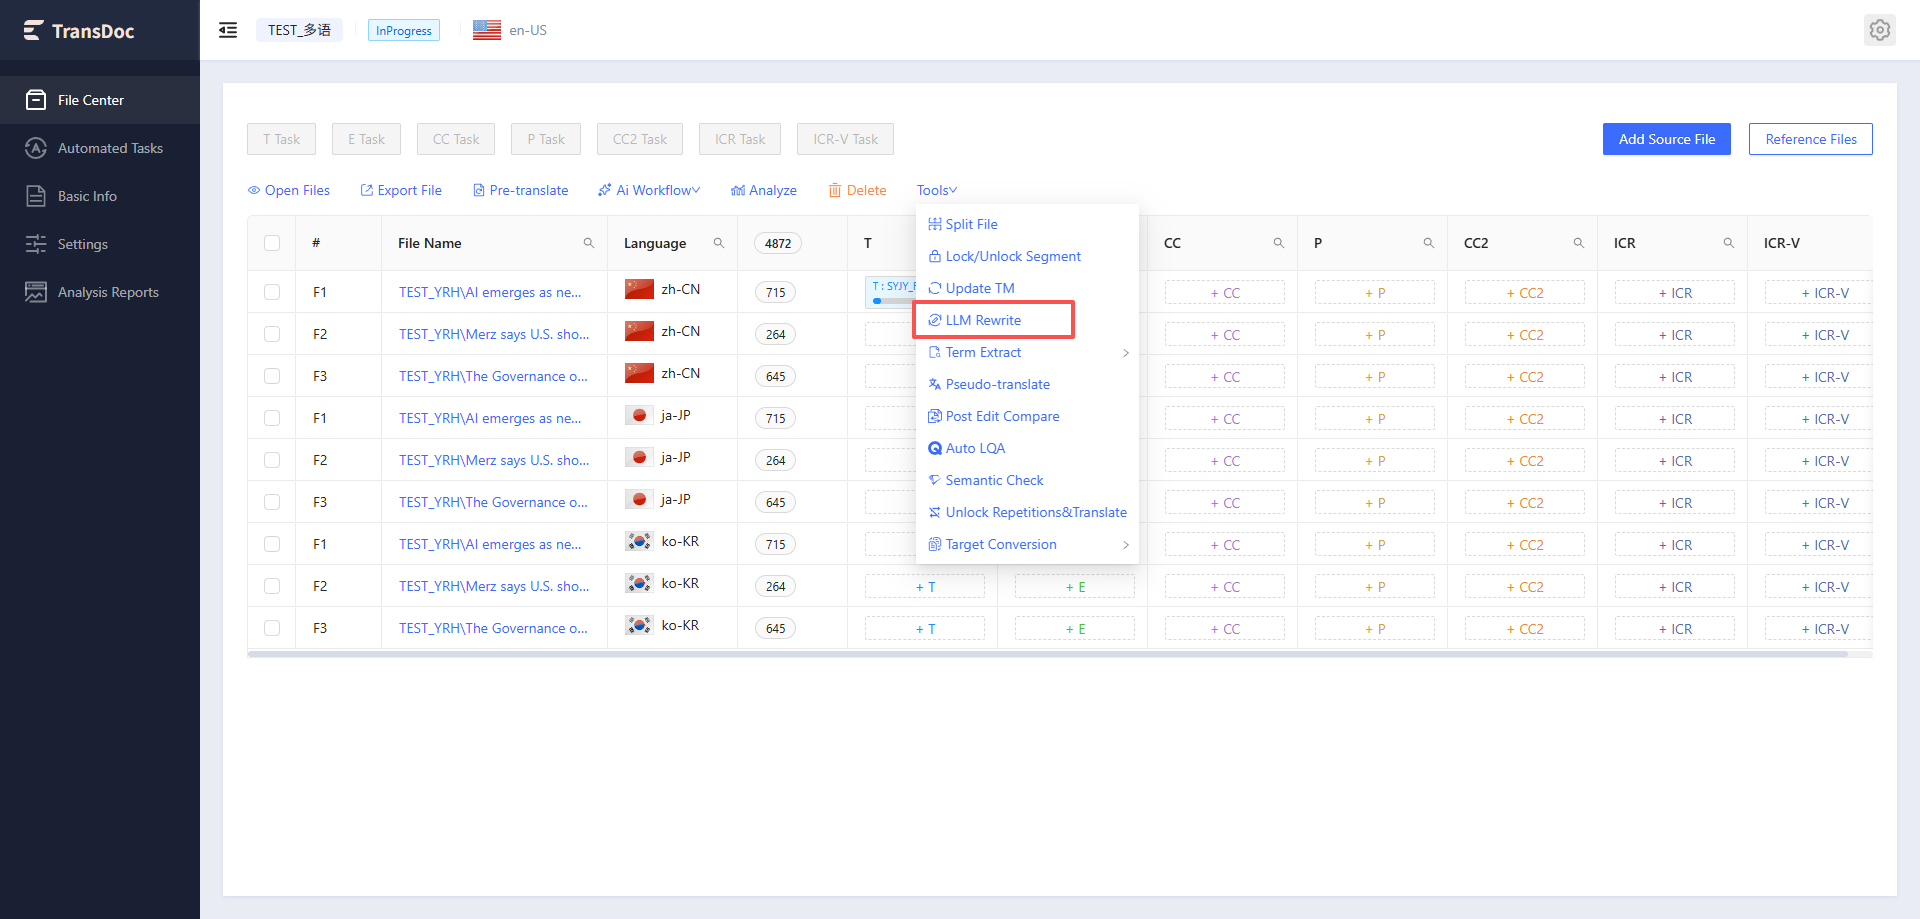
This feature can rewrite TM results. Check the files you want to rewrite and click [LLM Rewrite].
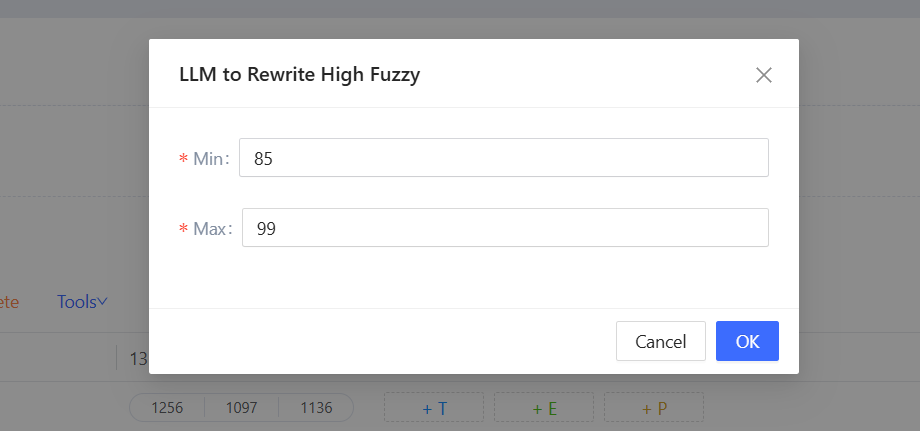
 The TM range setting item will pop up. This function will only rewrite TM results within the range. The range is 85-99. Click [OK] to start rewriting the file.
Note:
Files being rewritten cannot be used for other operations.
Locked segments will not be rewritten.
1.11 Pseudo-translation
This feature uses the pseudo-translation function to confirm the translation scope. Select the files to be pseudo-translated, click the Pseudo-translate button, and the pseudo-translation settings interface will pop up.
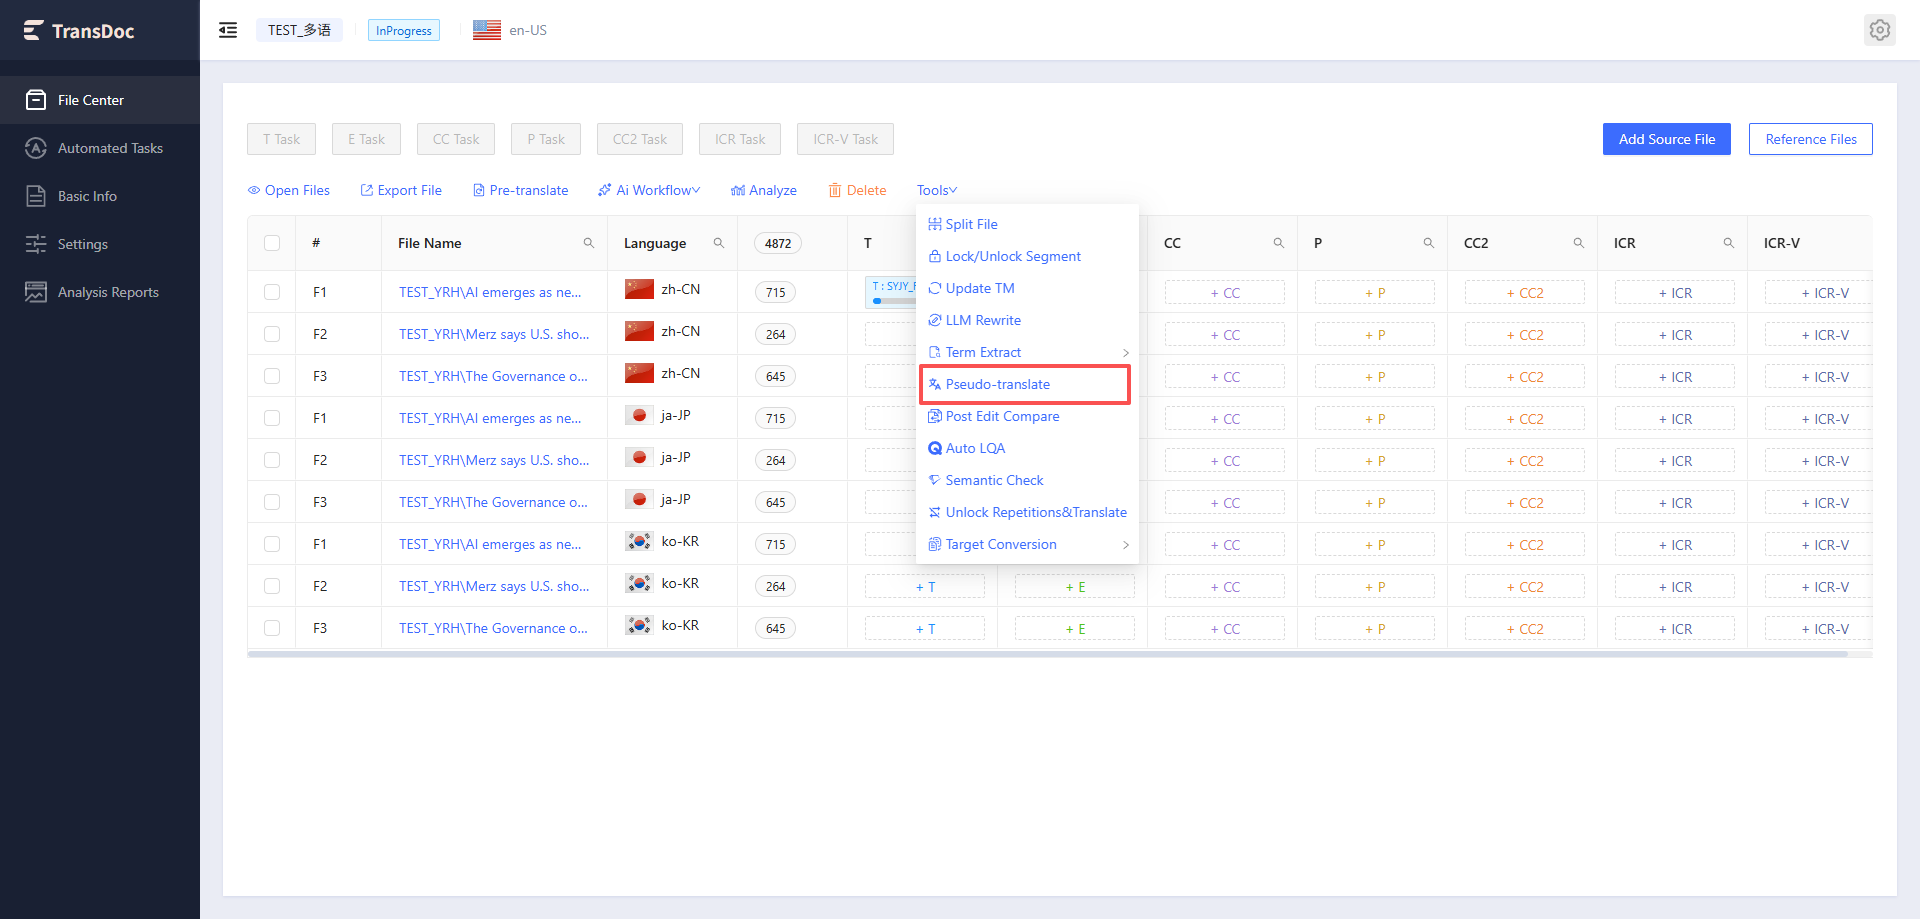
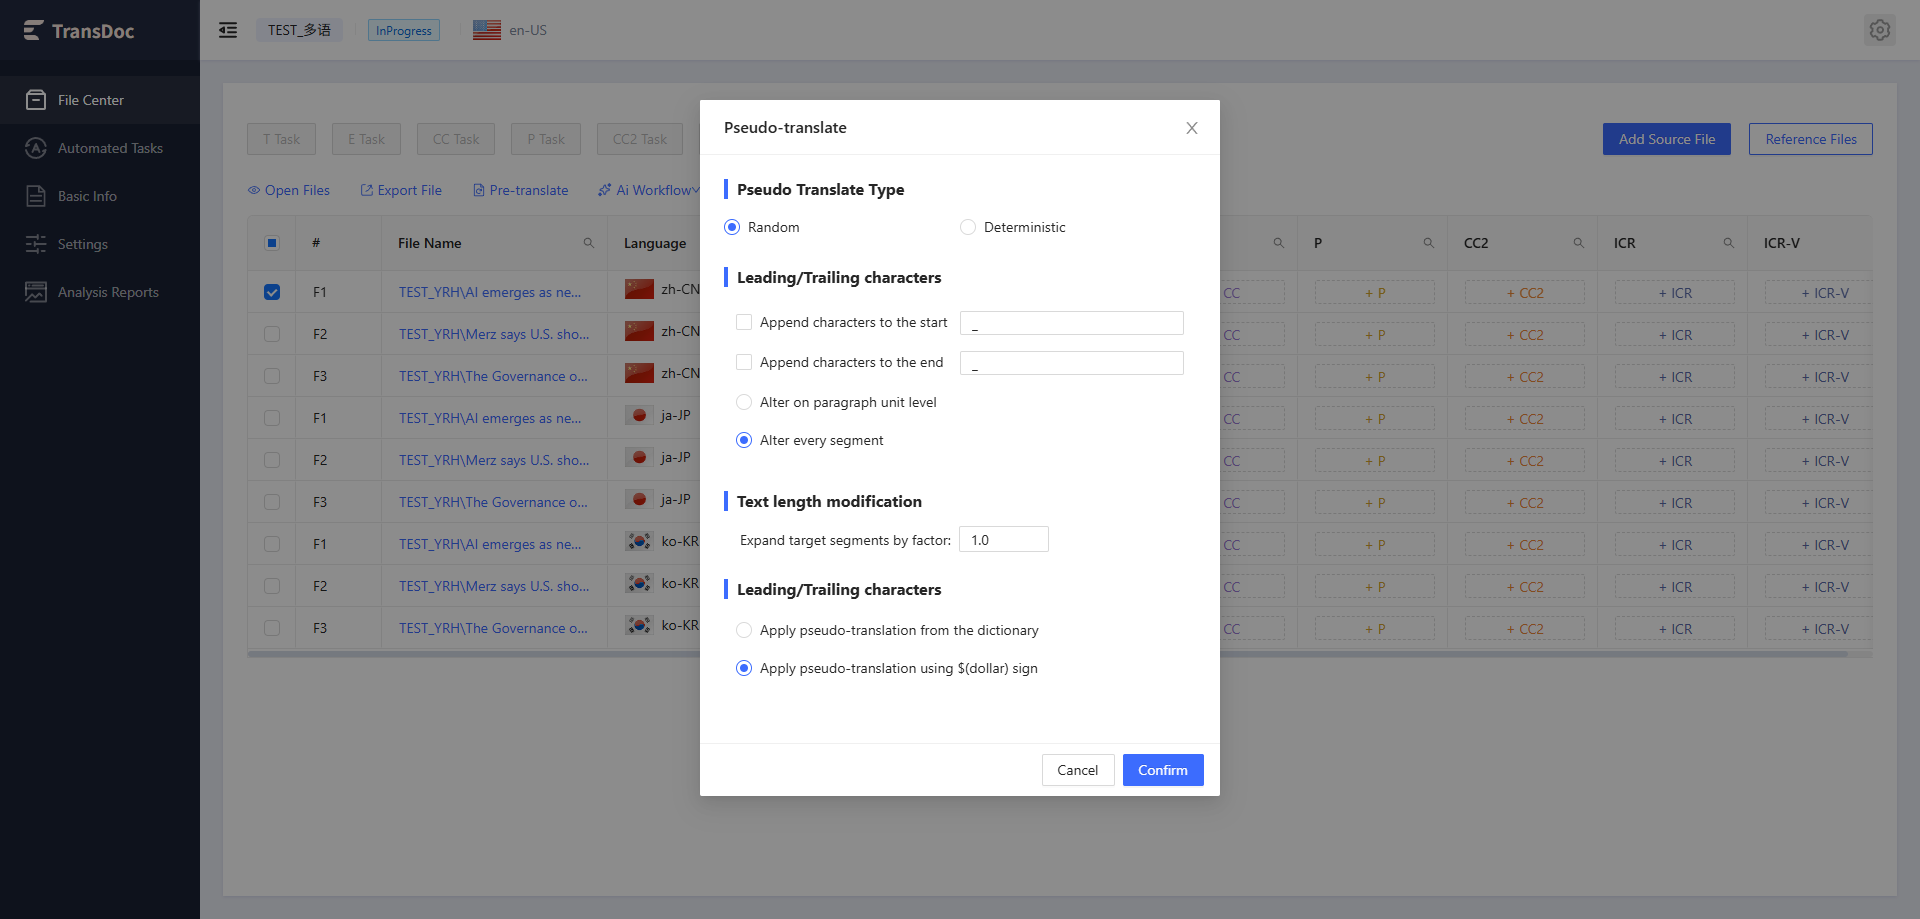
After setting the parameters, click the OK button to start pseudo-translation. After completion, the system will send a notification via message. You can also download the pseudo-translation results in Automated Tasks.
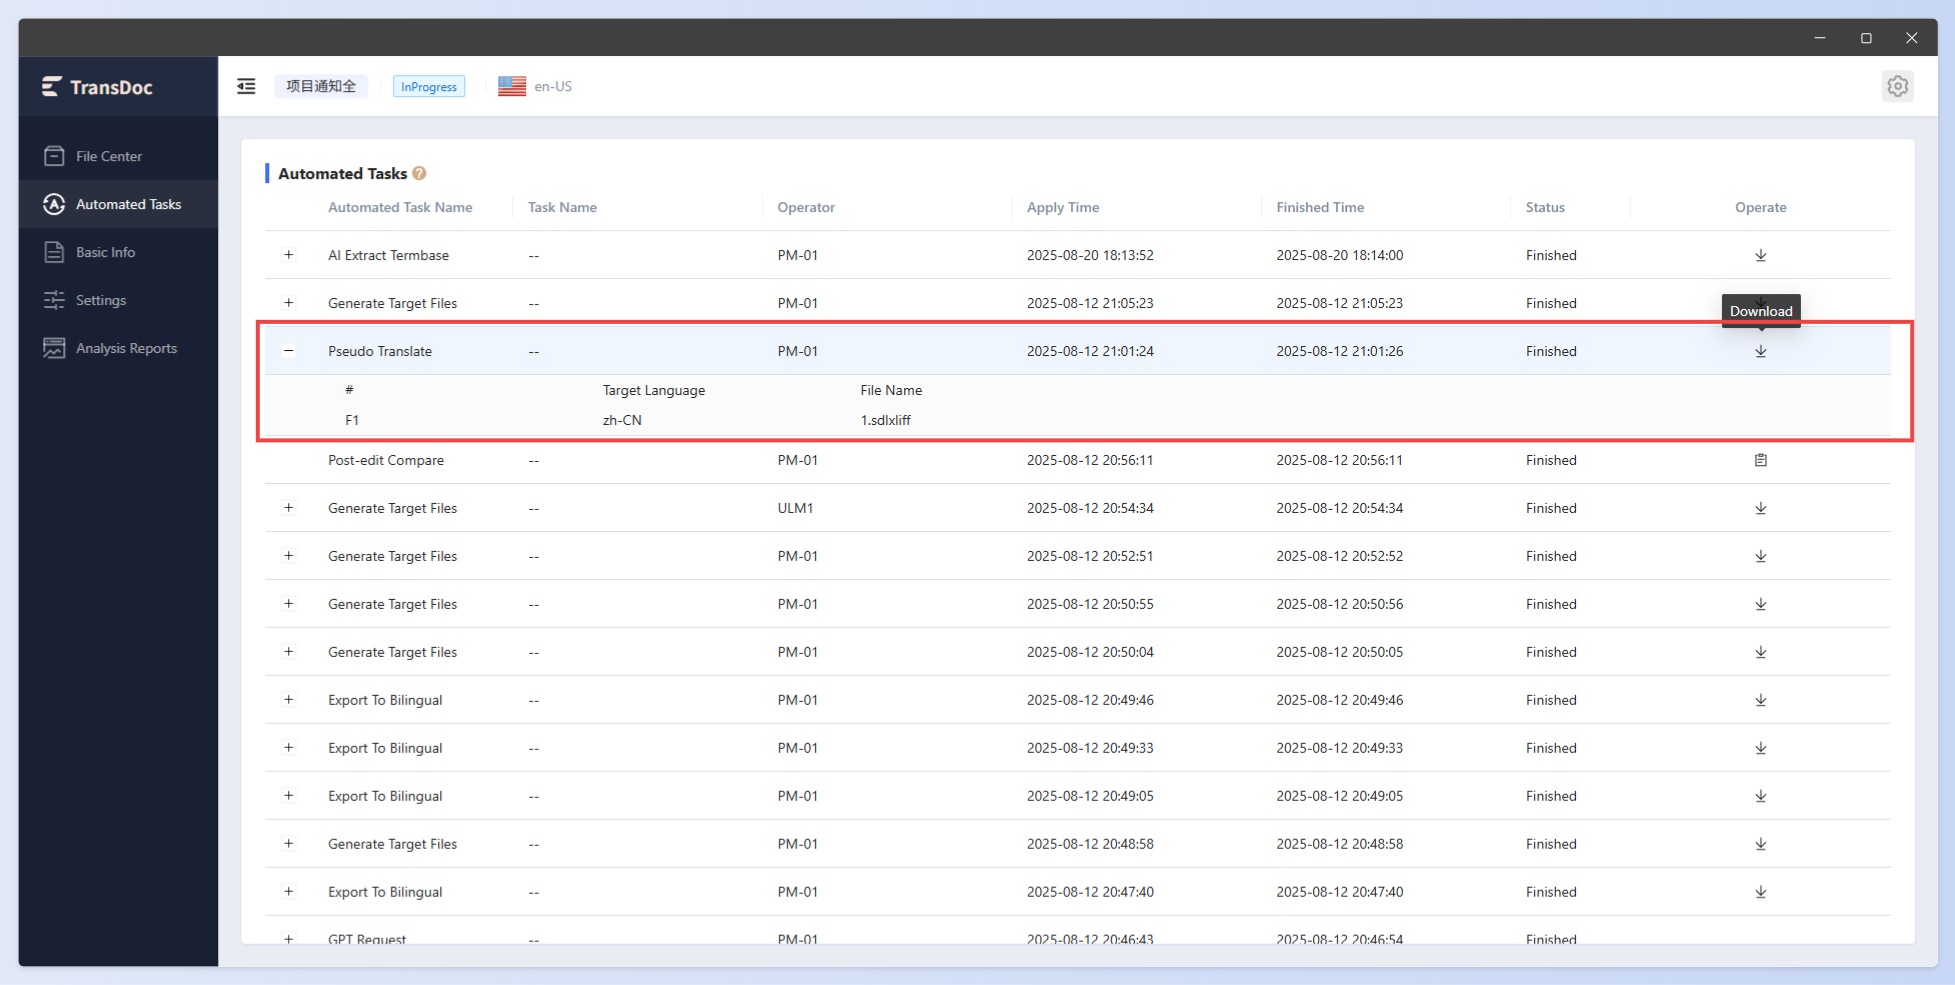
After downloading, the compressed package contains pseudo-translated translations and bilingual files. You can determine the translation scope by checking the files.
1.12 Post-Edit Comparison
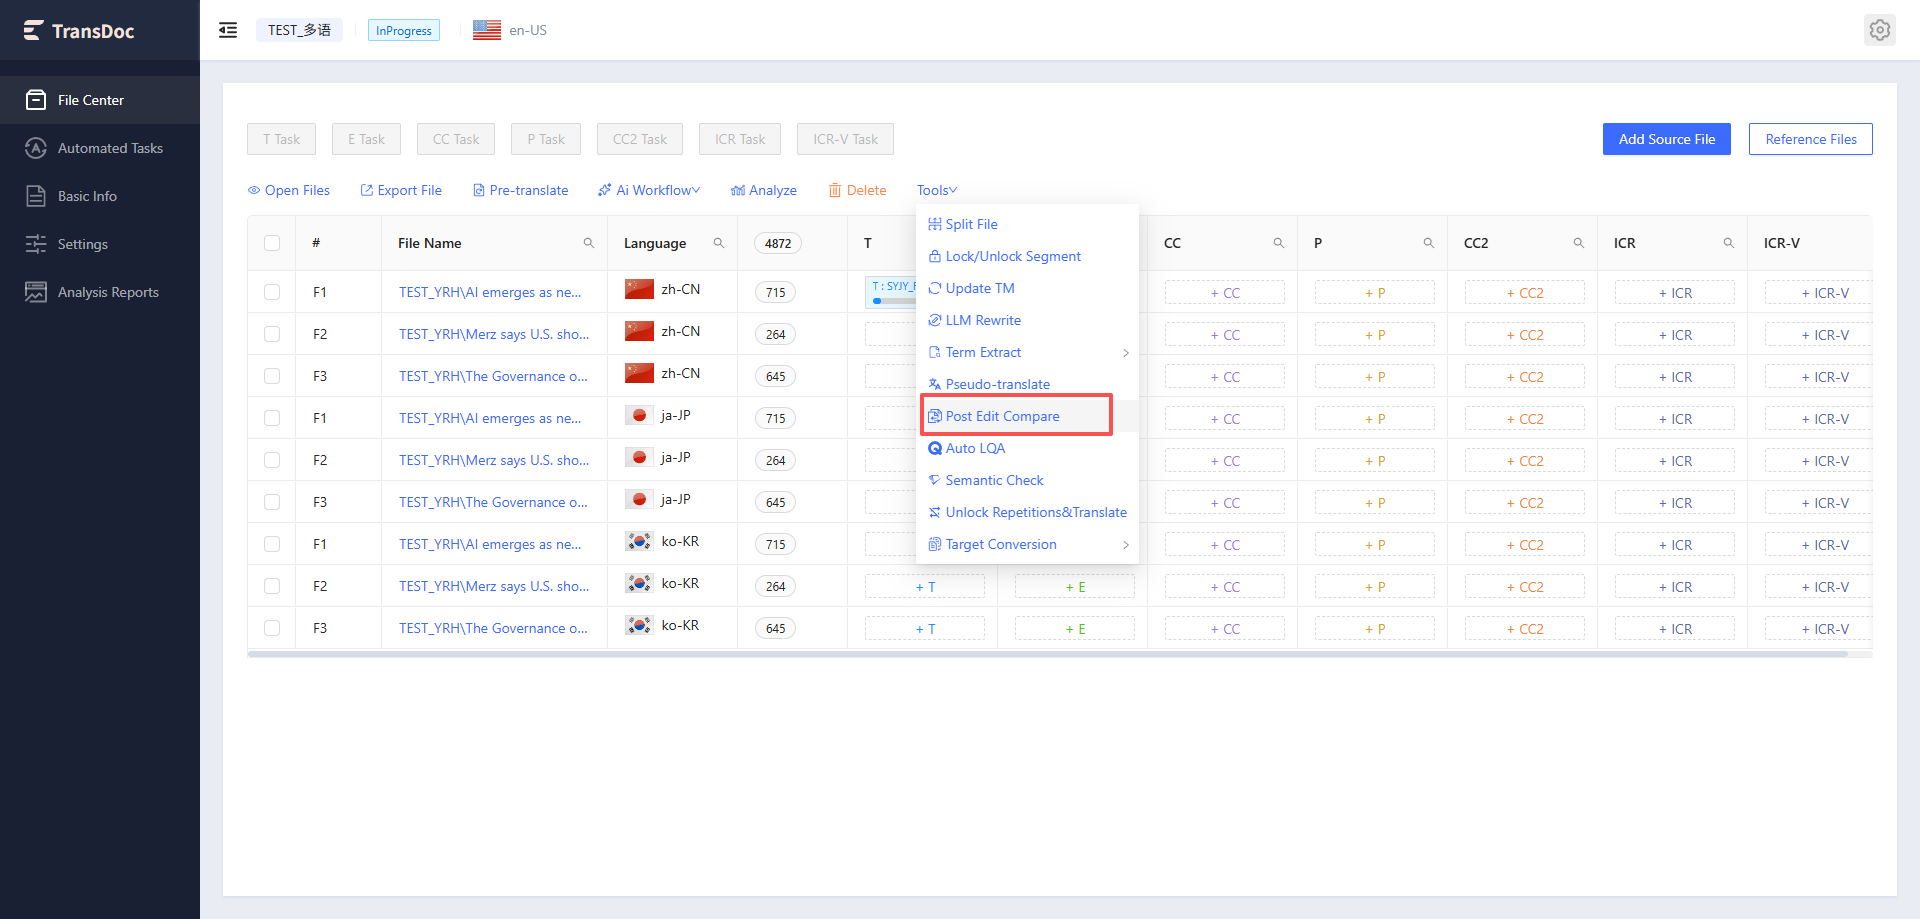
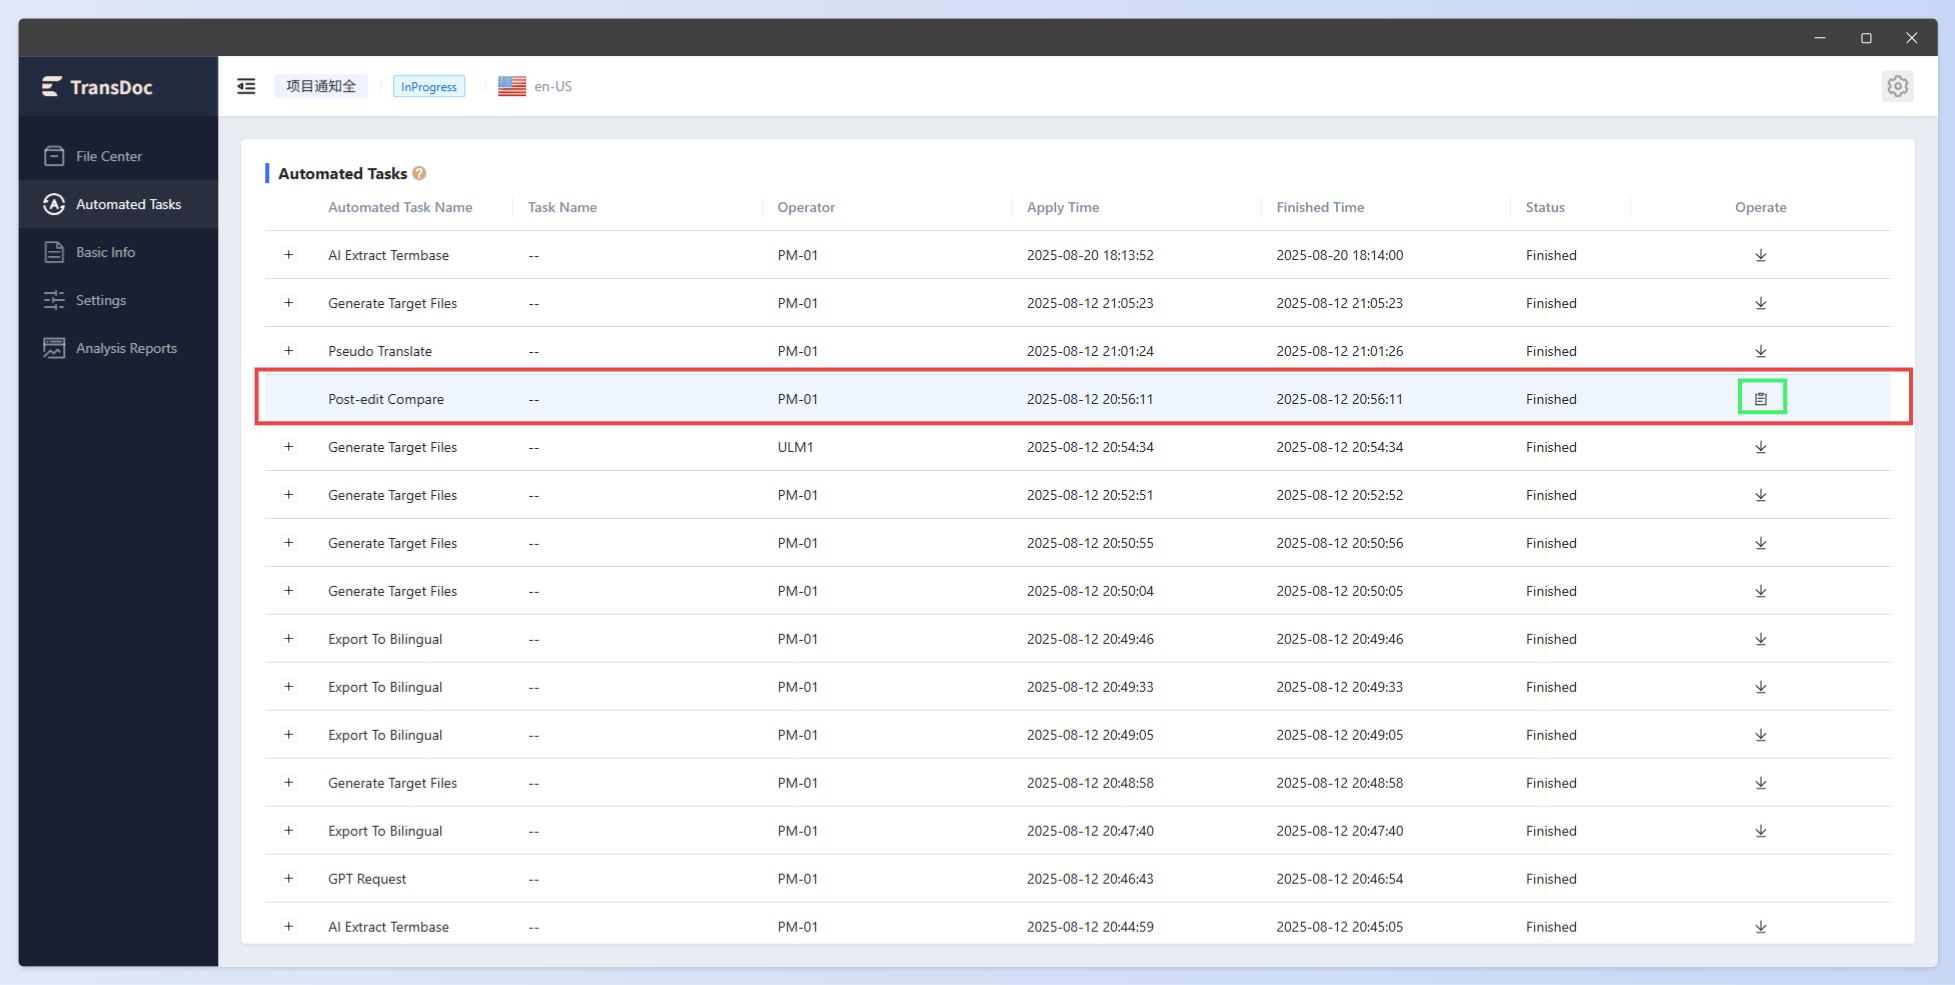
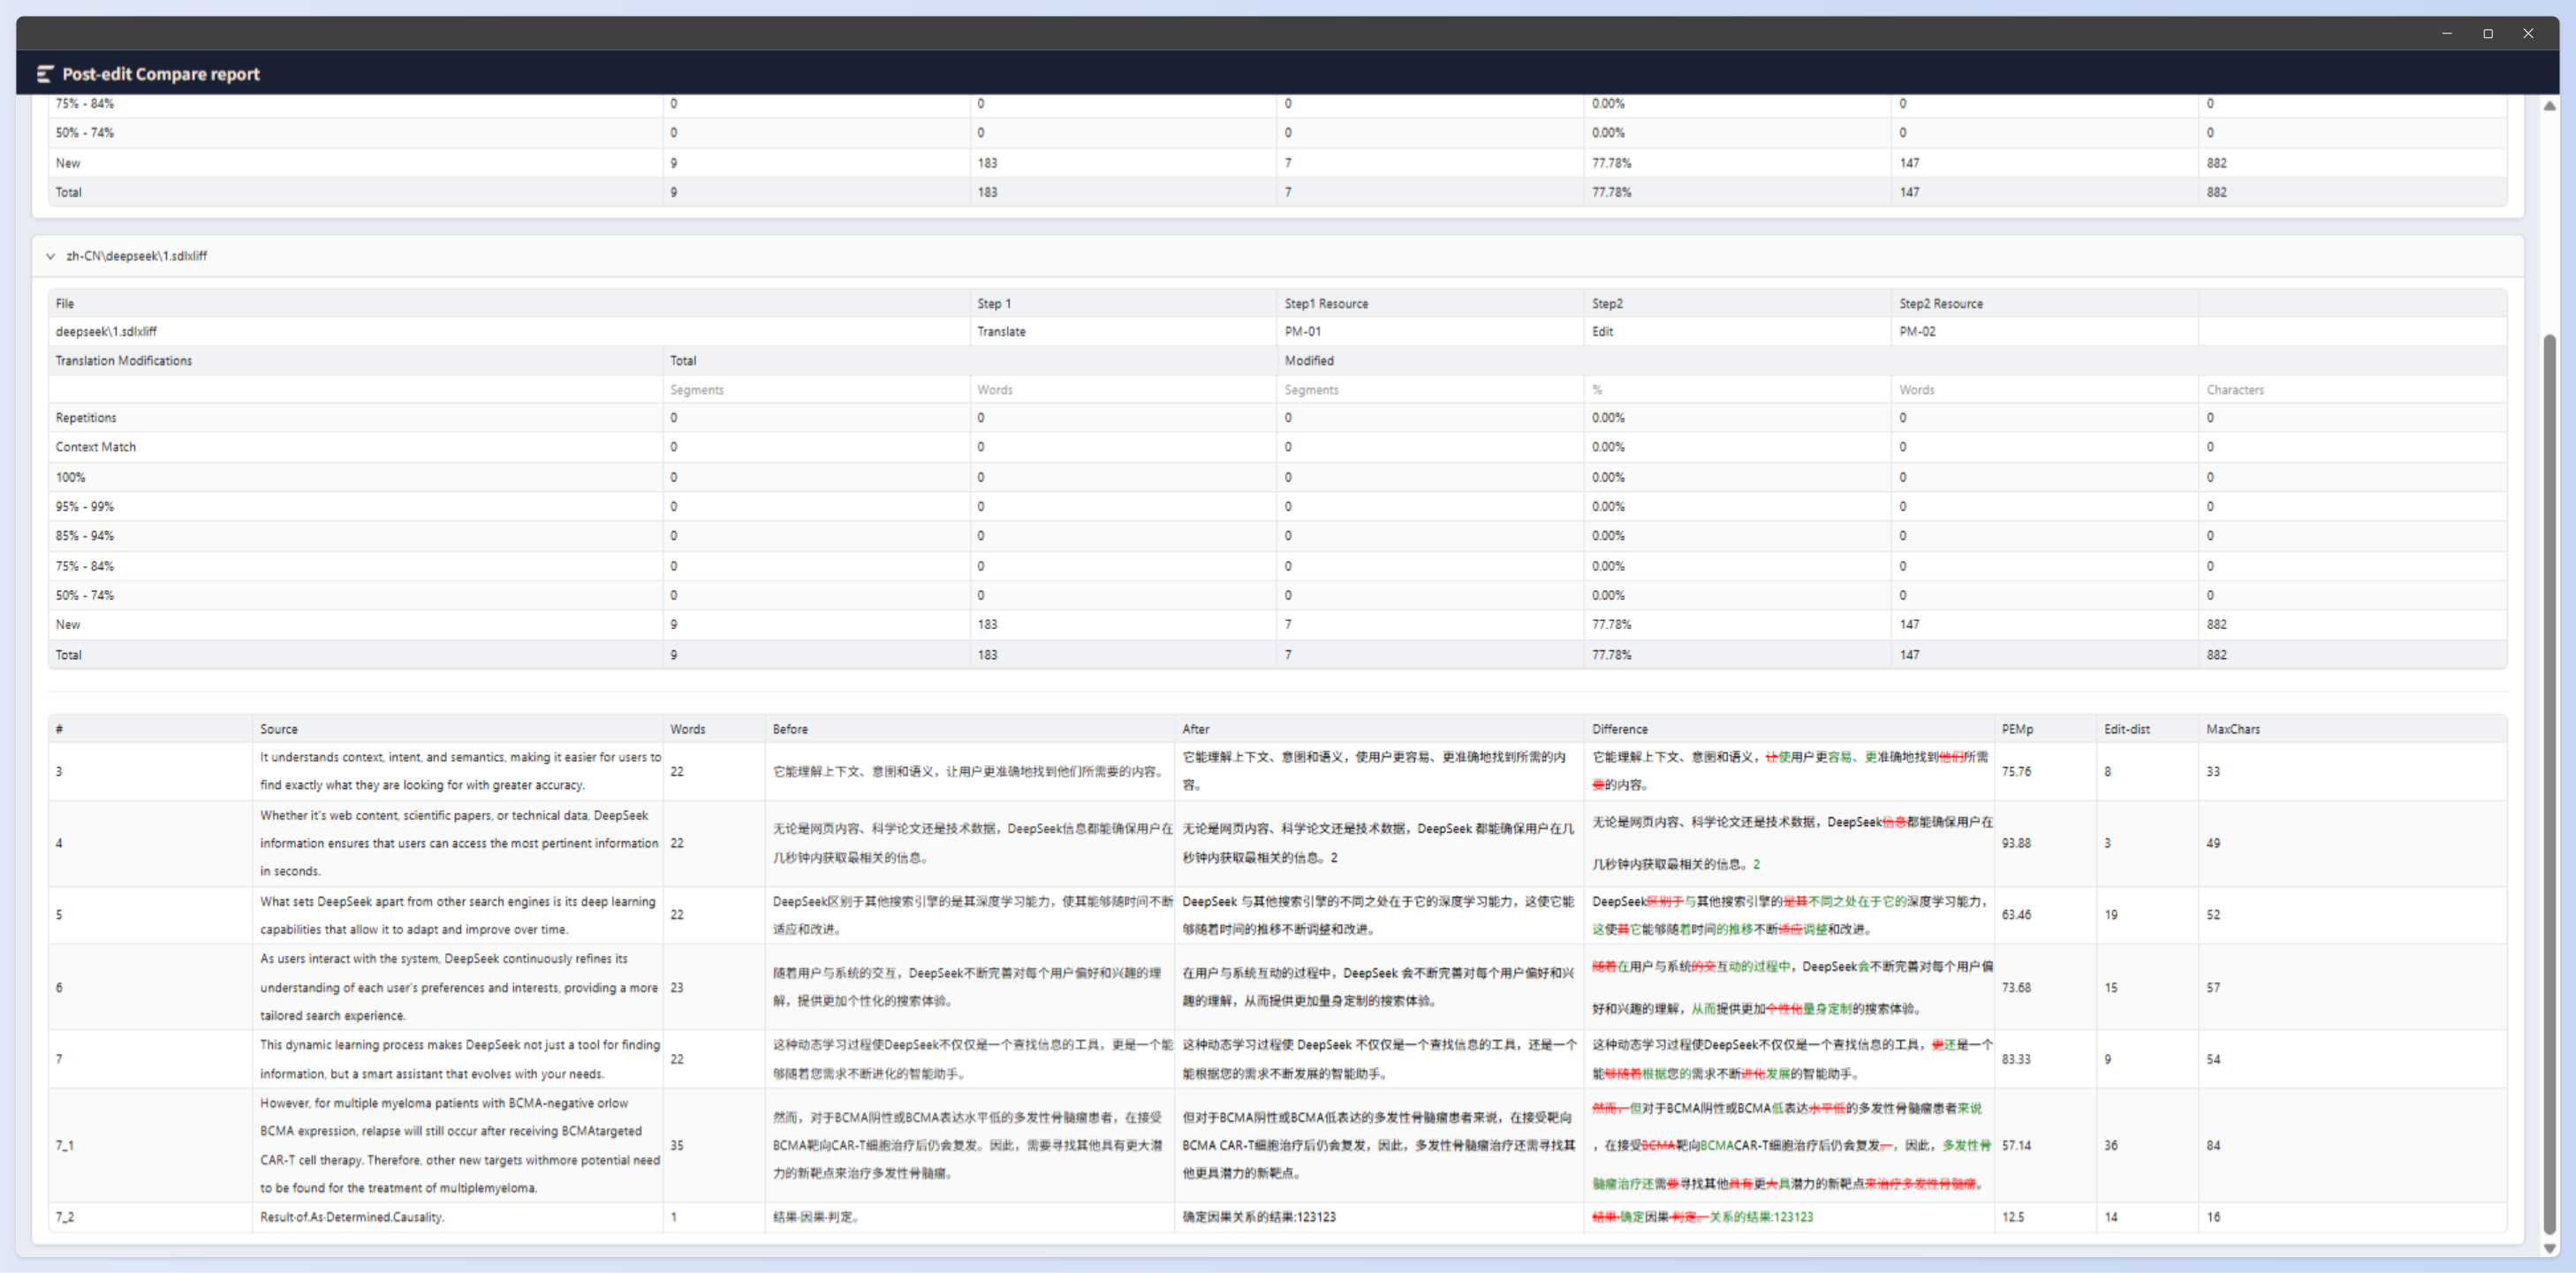
You can specifically view the edit distance between different workflows. Select the files and click the Post Edit Compare button to open the Settings interface.
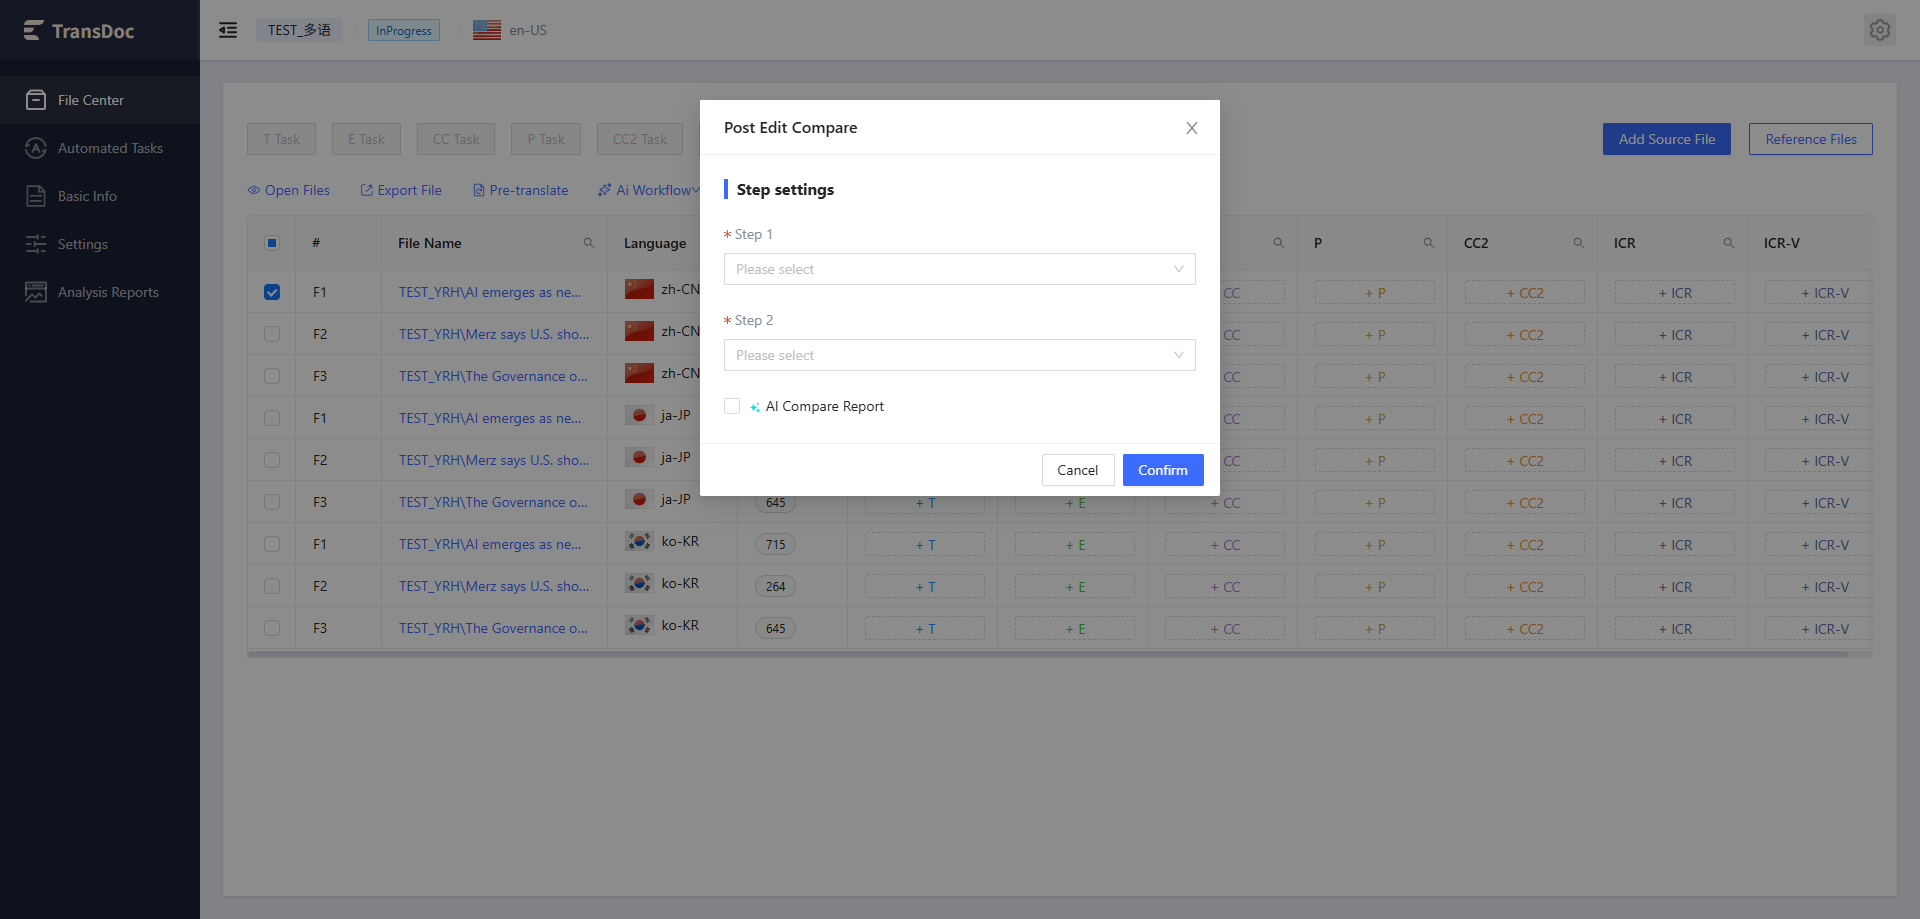
Select the two steps to analyze., and the large model comparison feature has been added. Click OK to perform the edit distance analysis. Note: The two steps cannot be the same. After the edit distance analysis is completed, the system will send a notification via message. You can also view the results in Automated Tasks.
1.13 Word Count Analysis
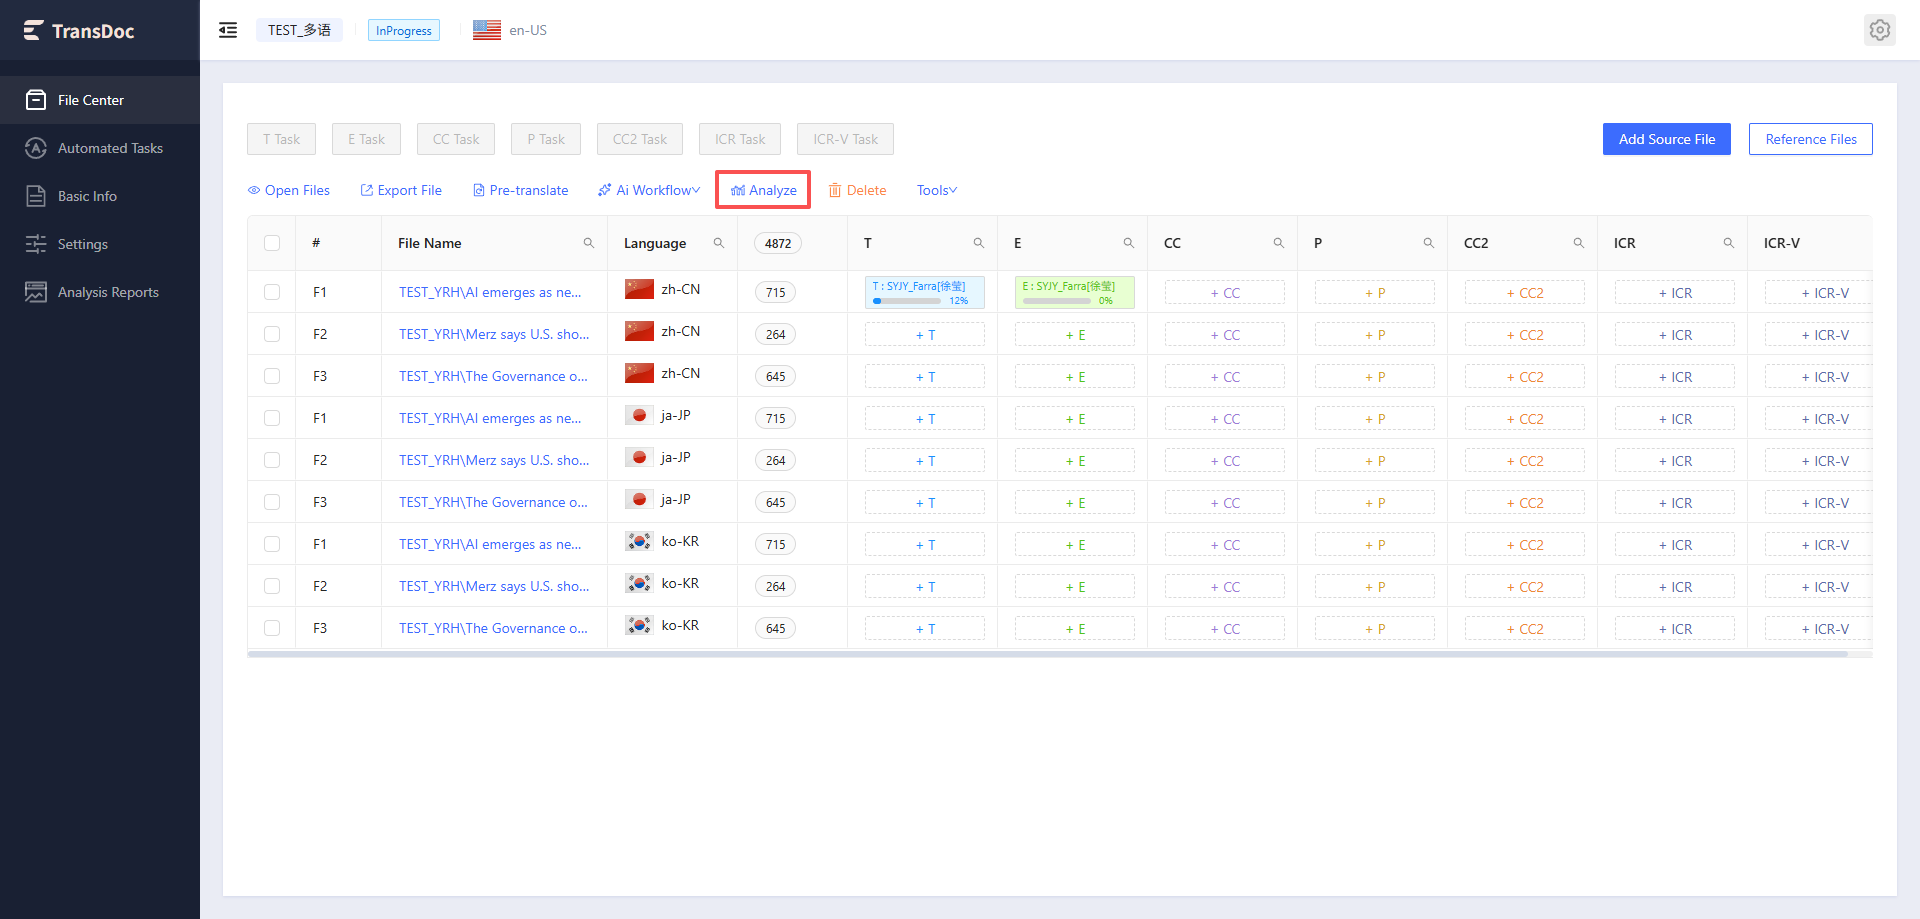
This feature is mainly designed to help PMs quickly analyze word counts for workload estimation and quotation preparation. It eliminates the need for engineering operations such as MT and pre-translation, thereby improving analysis efficiency.
You can select one or multiple files and click the Analyze button to analyze word counts. After clicking, the settings interface will pop up for configuration.
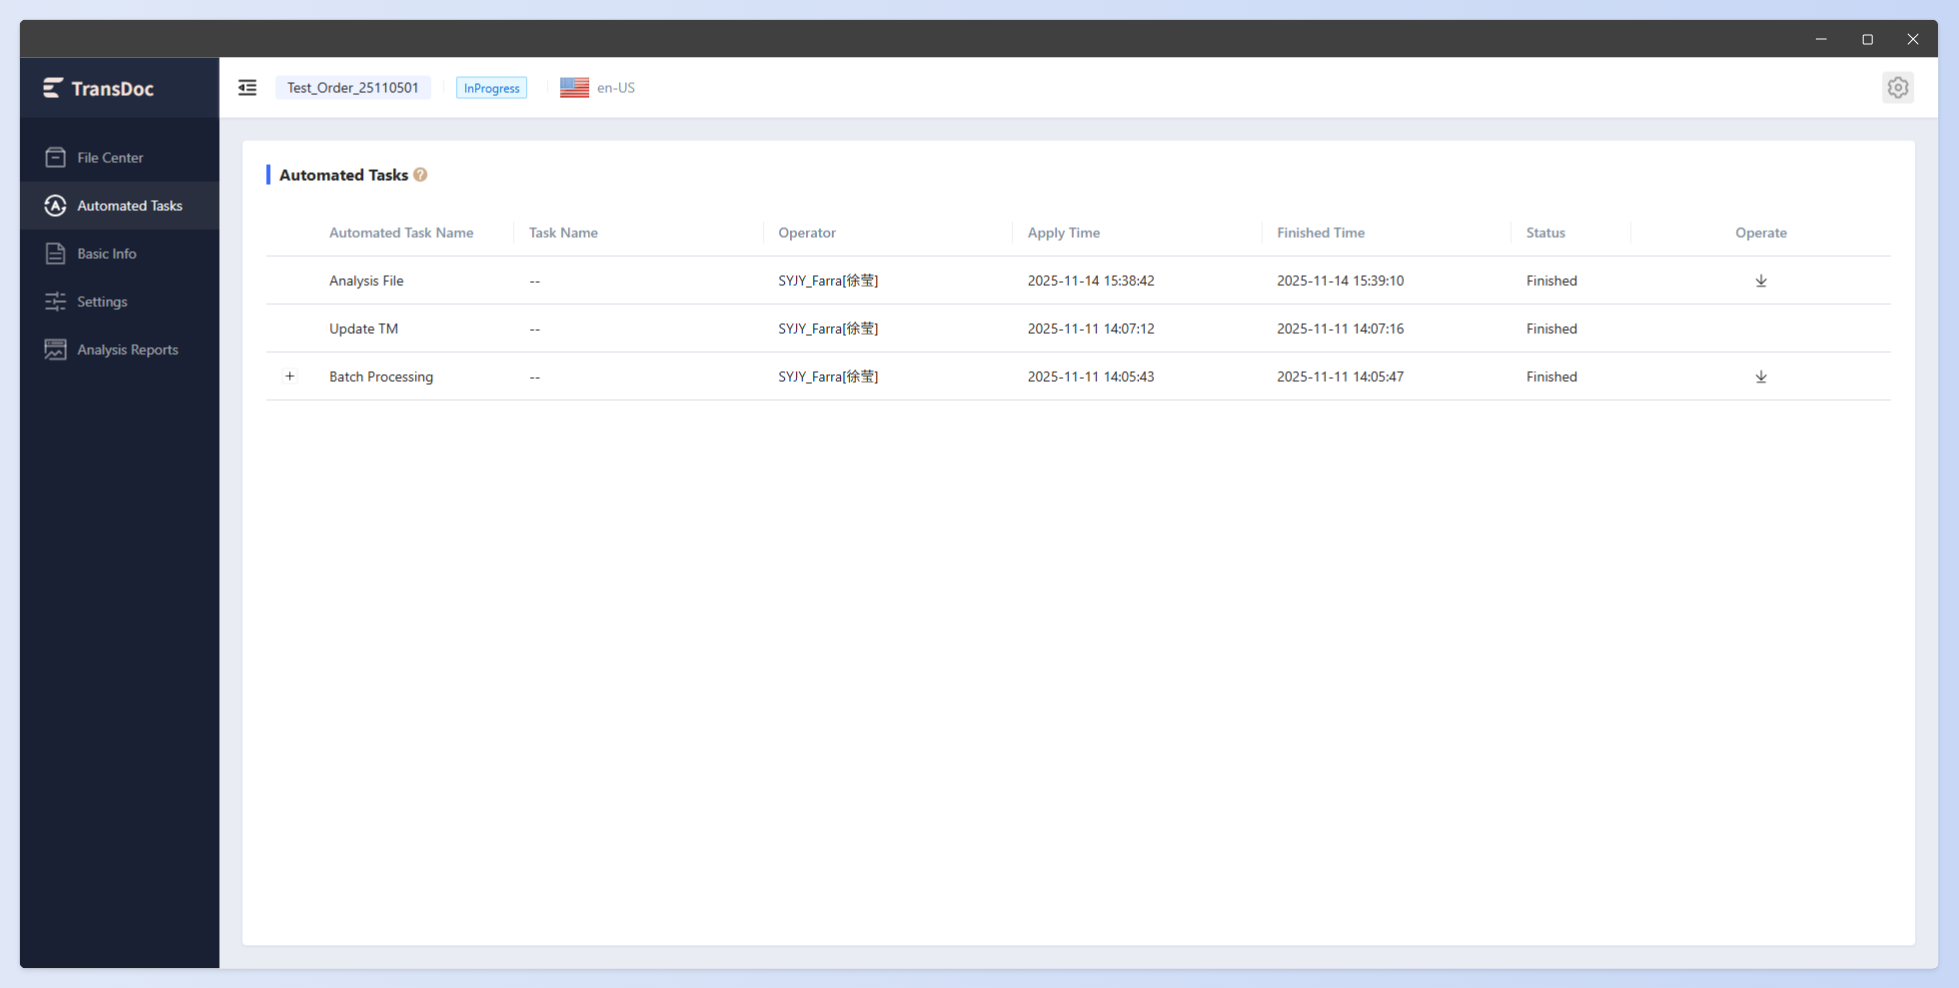
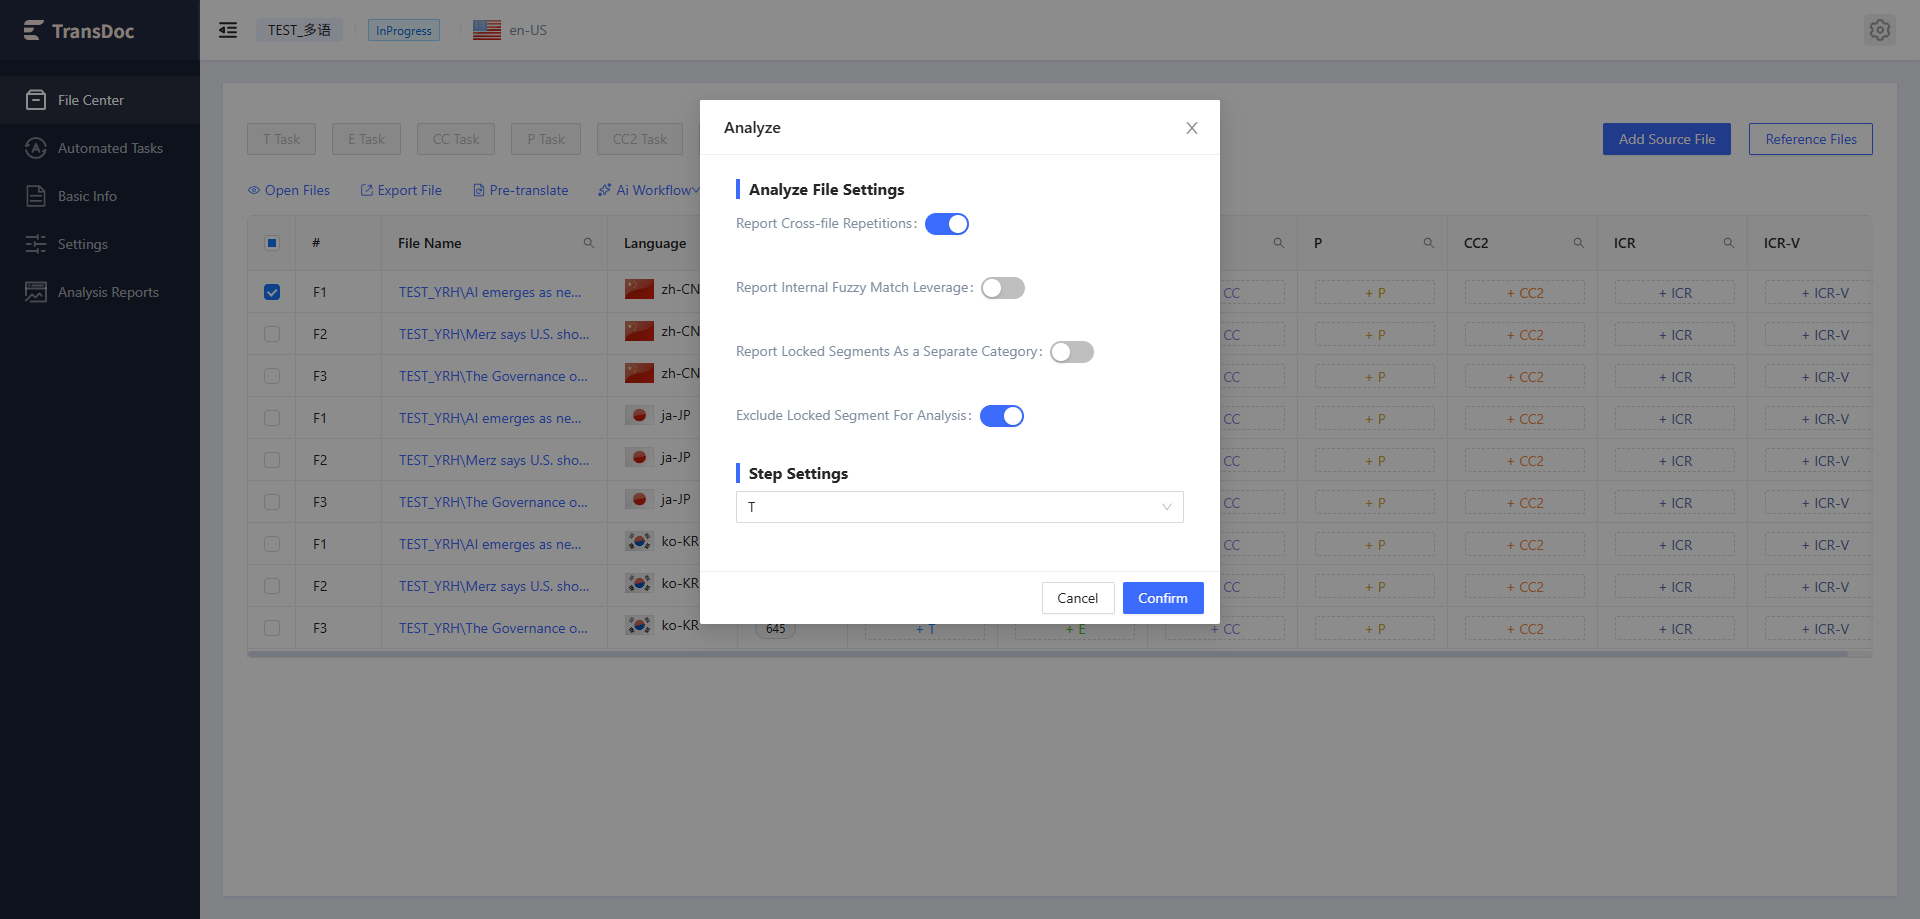 After setting up, click the button and the system will analyze the word count. After the analysis is complete, you can view the analysis results in Automatic Task and download the log file.
1.14 Task Management
1.14.1 Assign Tasks
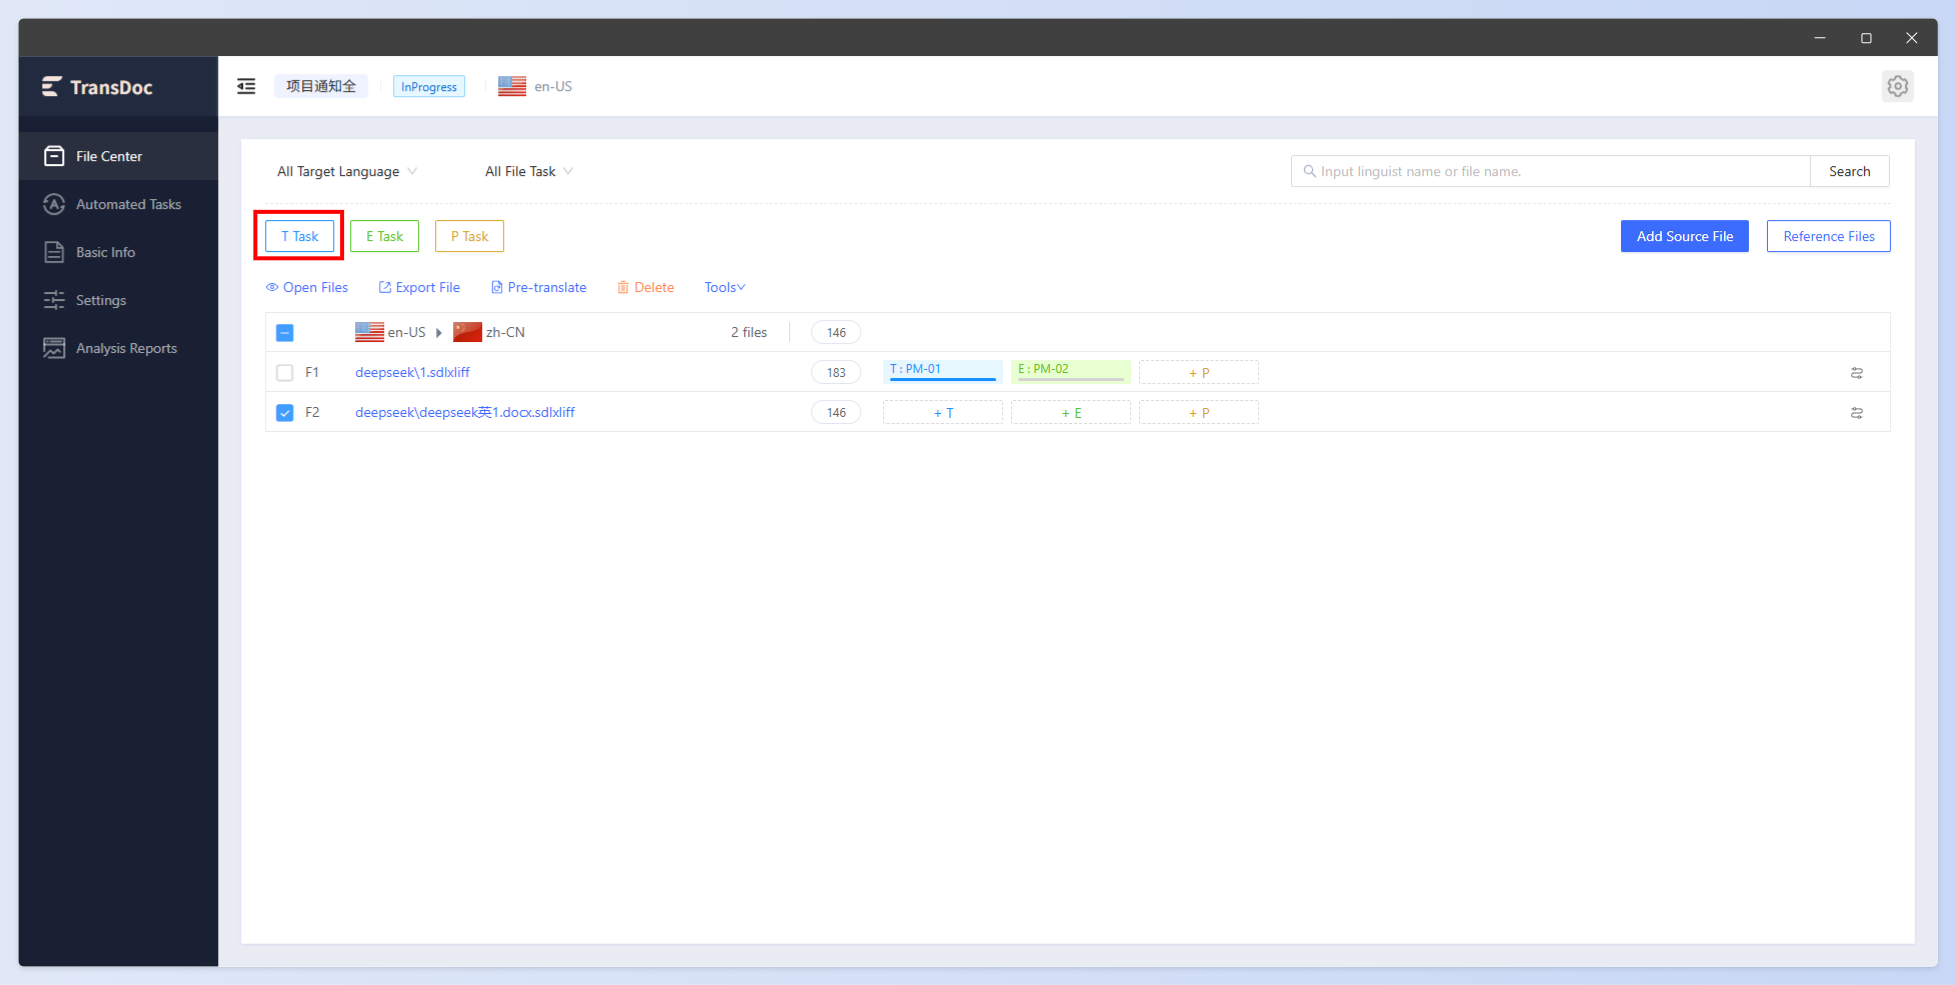
You can select one or multiple files and click the Task button to assign tasks.
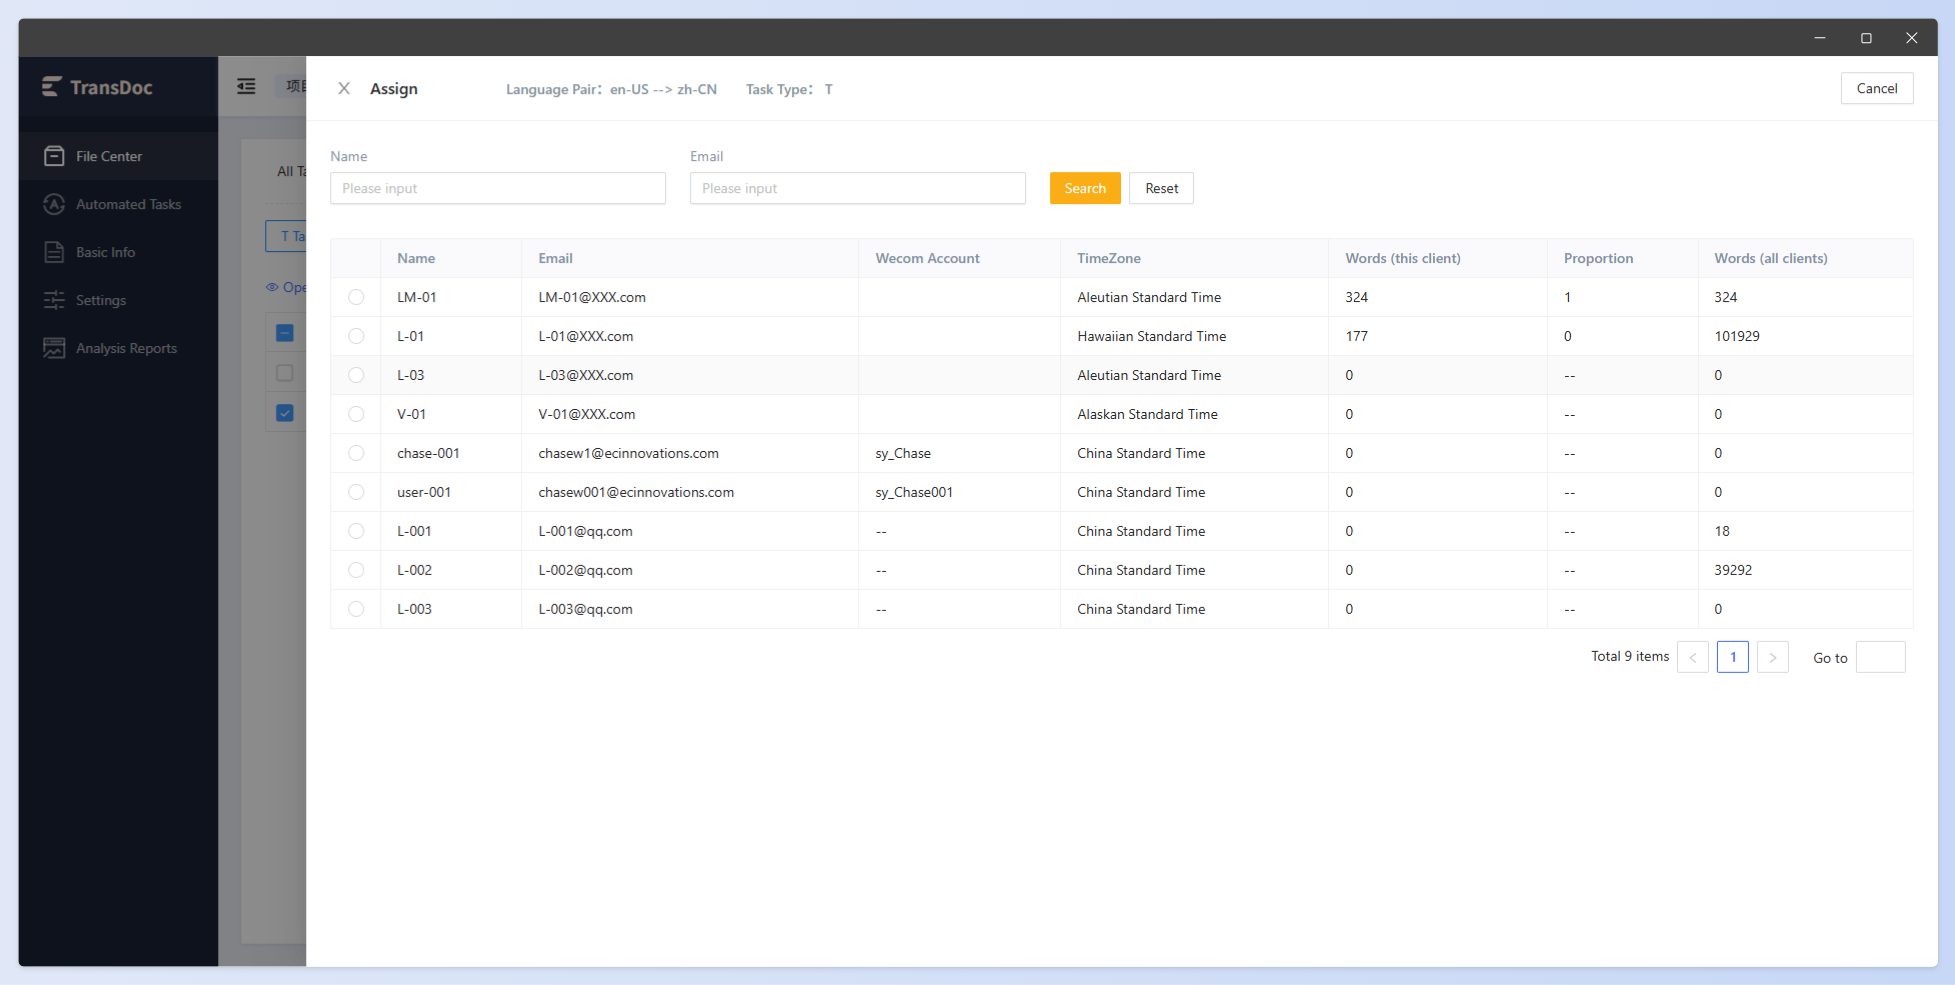
After clicking the button, the personnel selection page will pop up. Select the personnel to assign the task to.
1.14.2 Remove Linguists
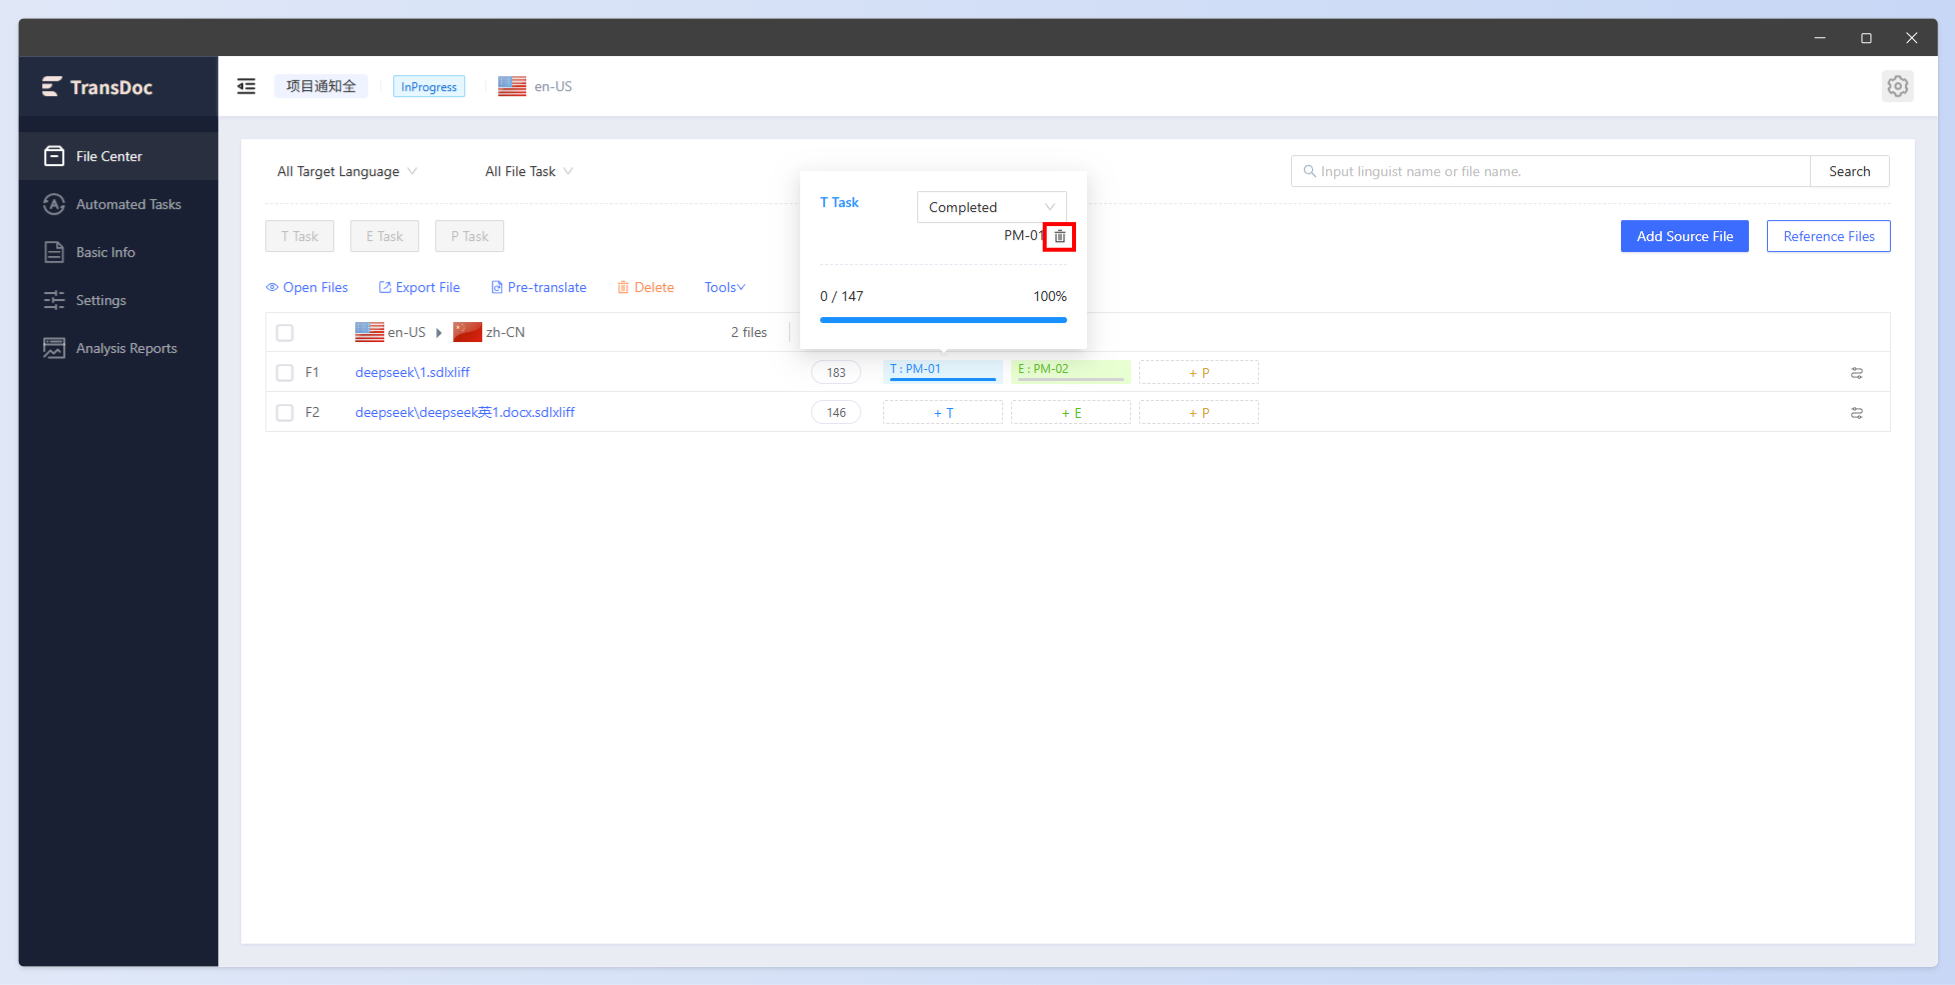
A linguist who is unable to complete the assigned task can be removed. After removal, a reassignment can be made. Hover the mouse over the step that the linguist to be removed was assigned, and click the Delete button to remove the linguist.
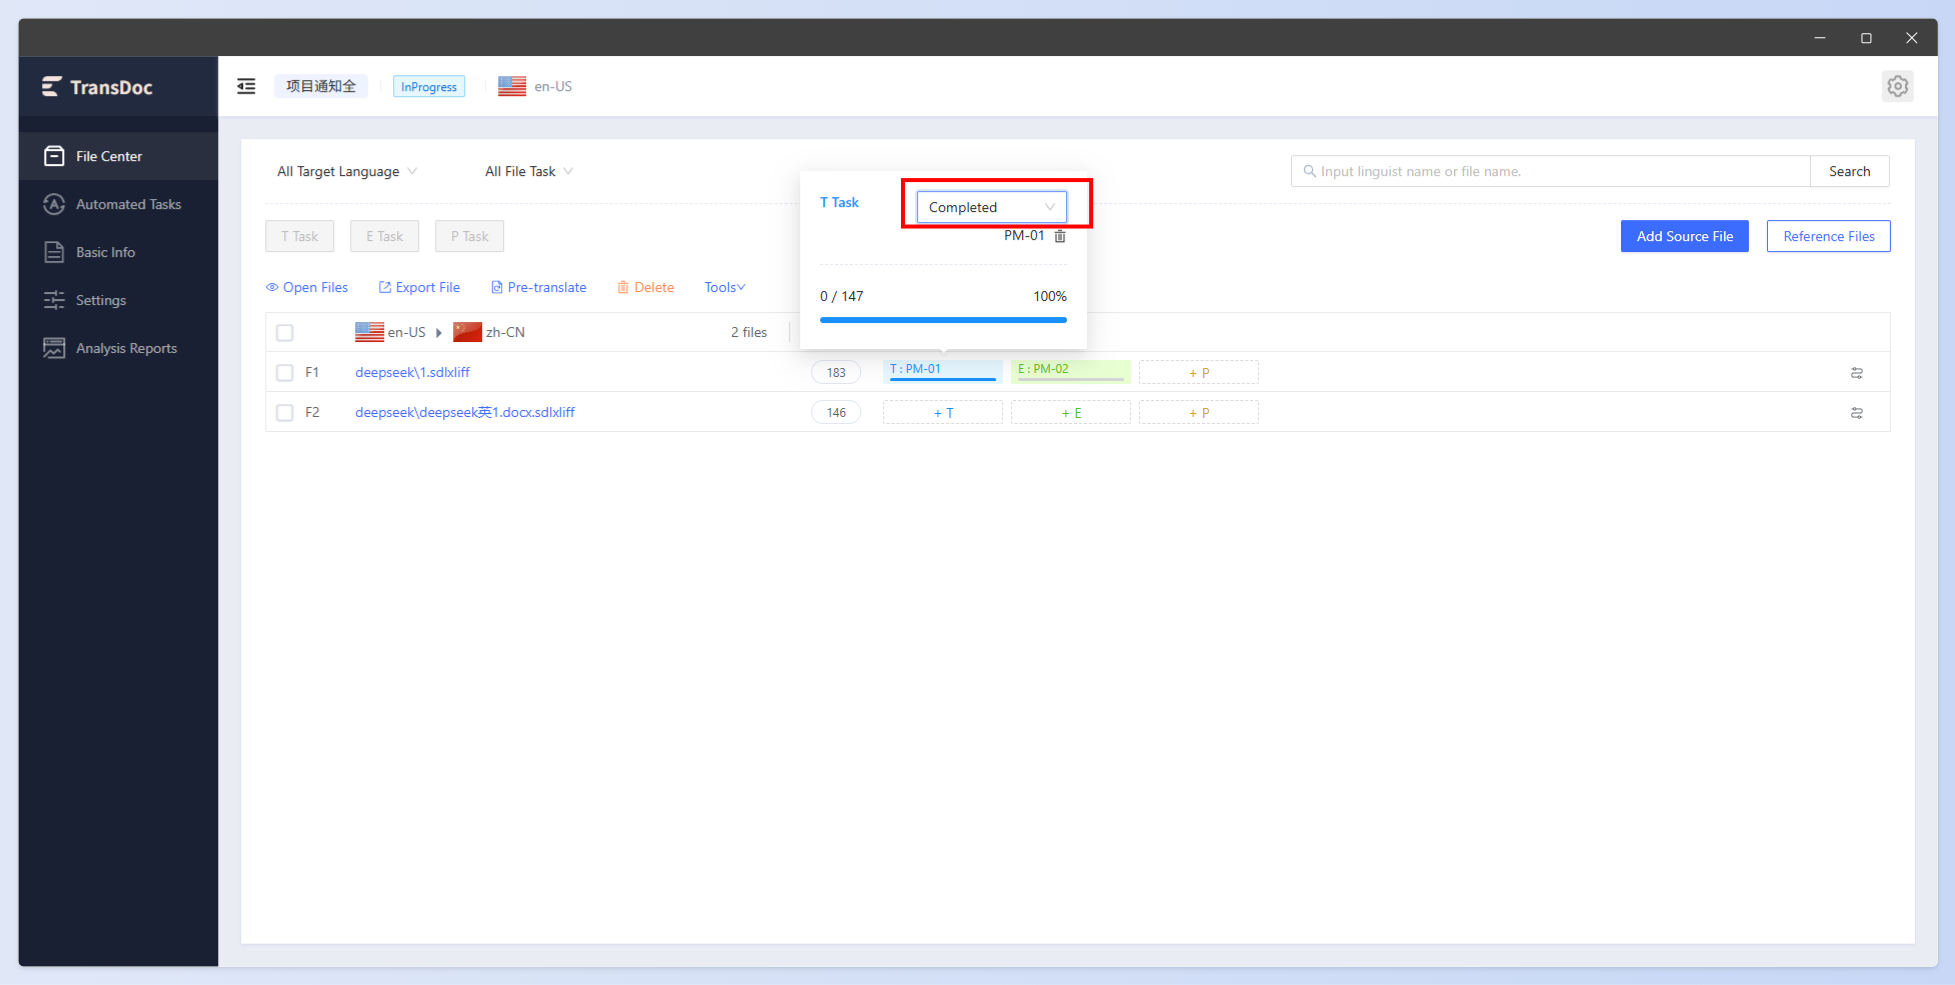
1.14.3 Change Task Status
When a linguist completes a task, if the result is unsatisfactory, you can directly change the status to have the linguist rework it. Hover the mouse over the step to be changed, select the corresponding status from the status dropdown list, and the change will be applied.
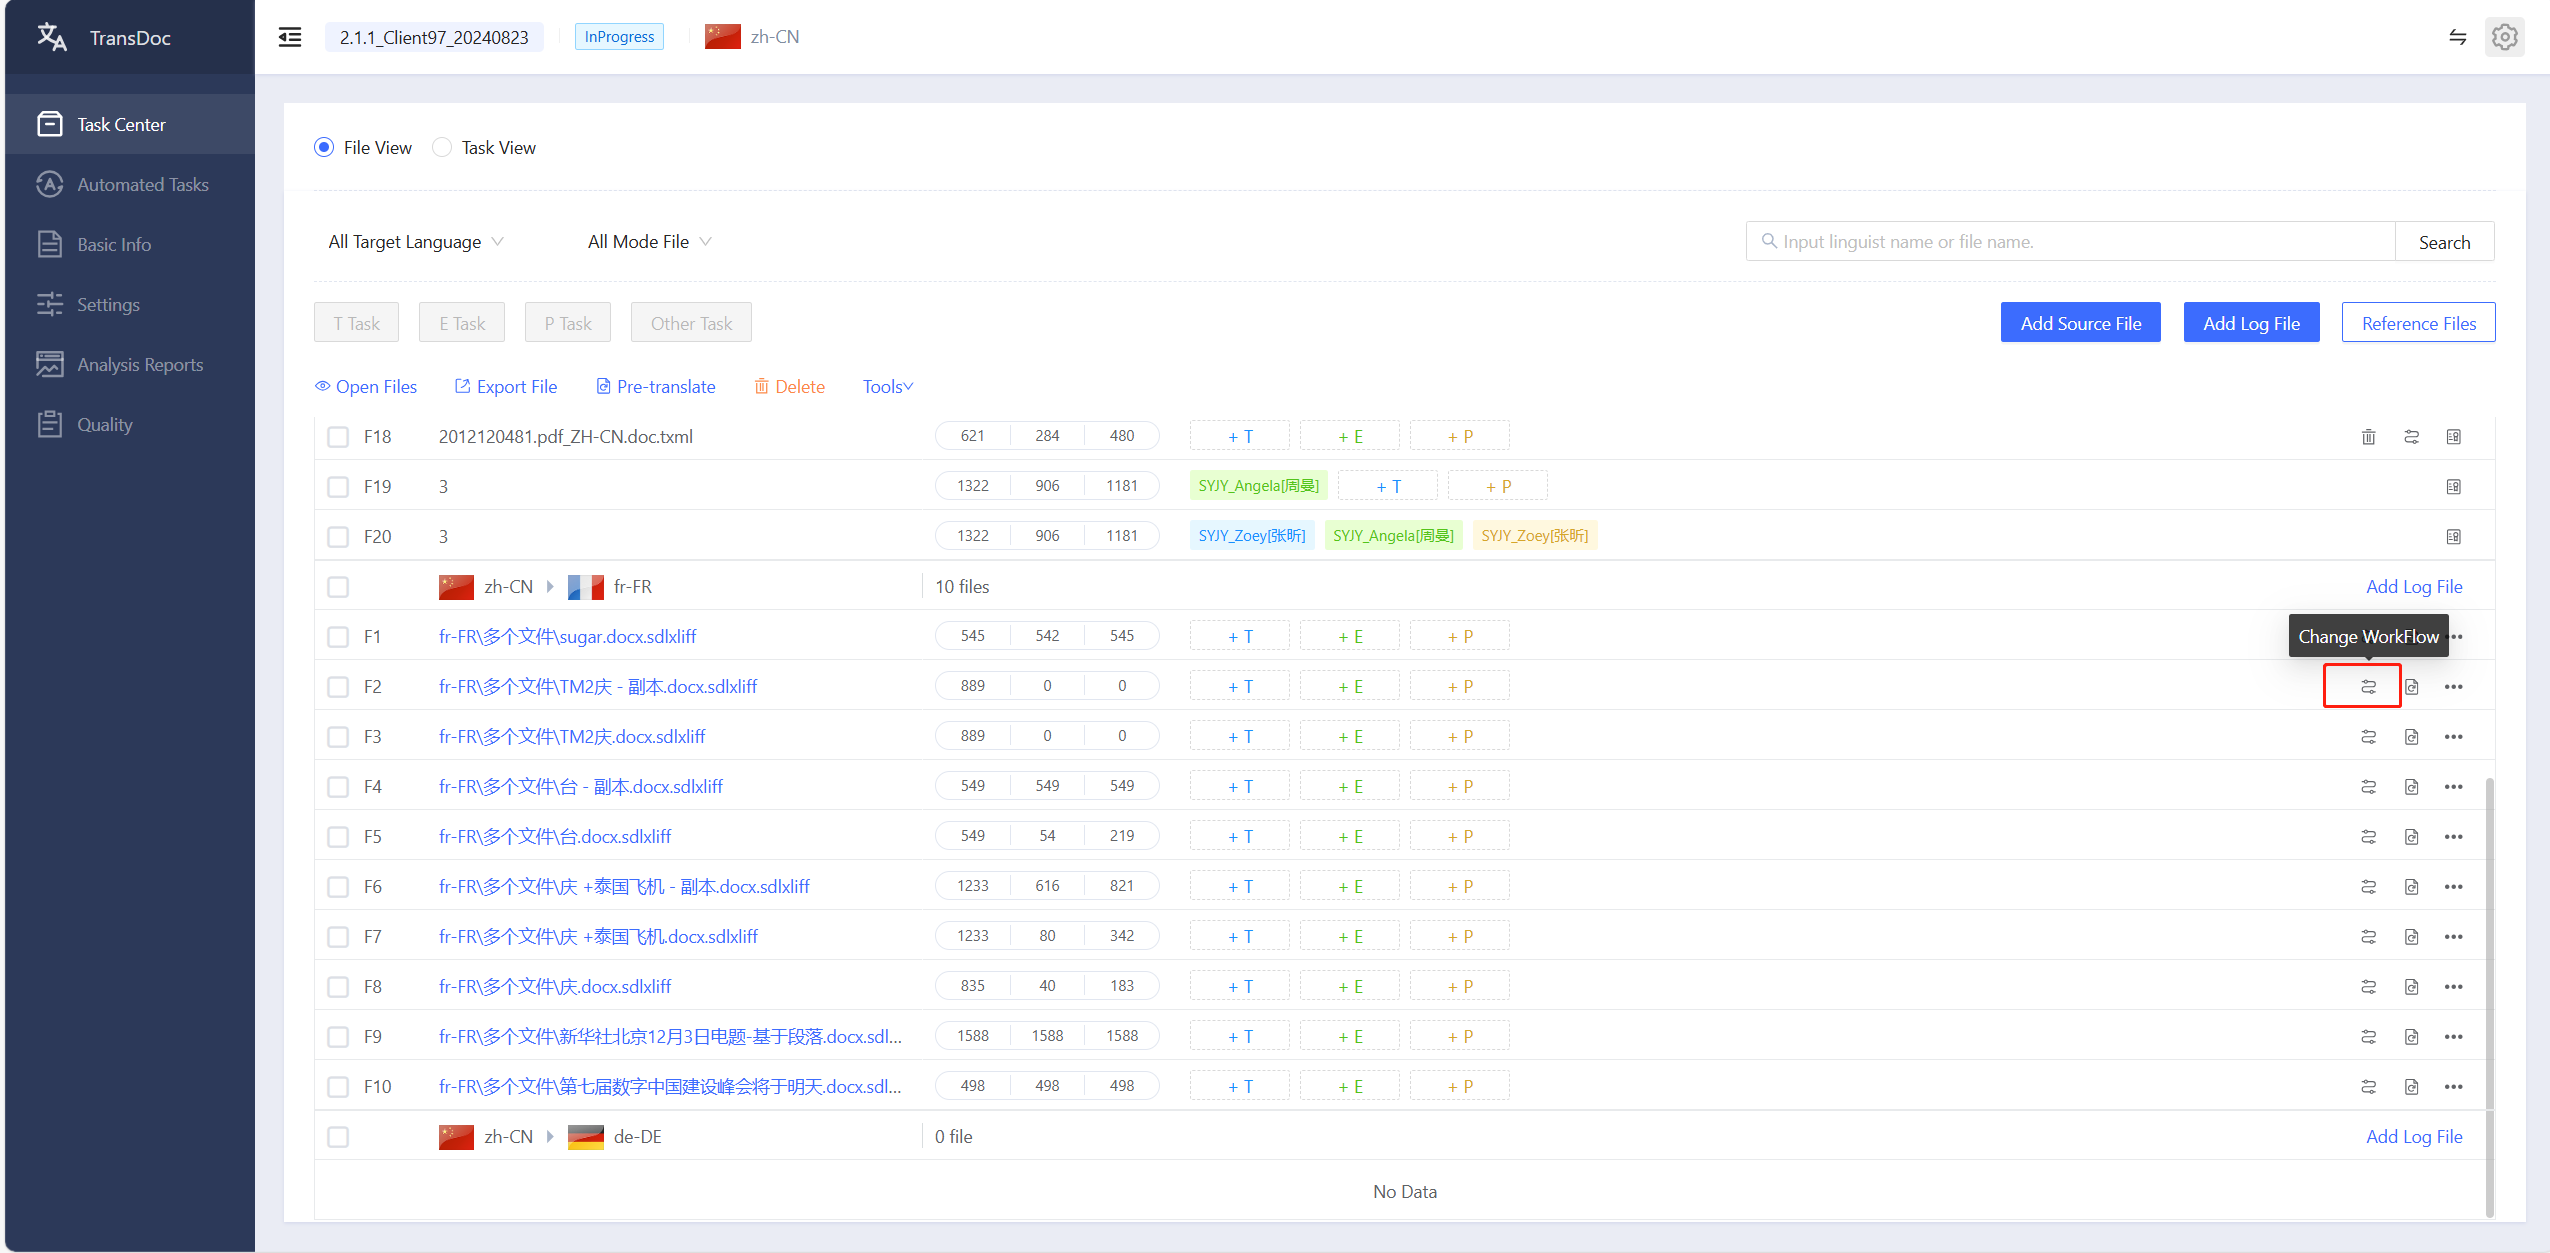
1.15 Custom File Workflow
When the workflow of an individual file in the project is inconsistent with the project workflow, the PM can customize the workflow for that file by clicking the custom workflow icon beside the file.
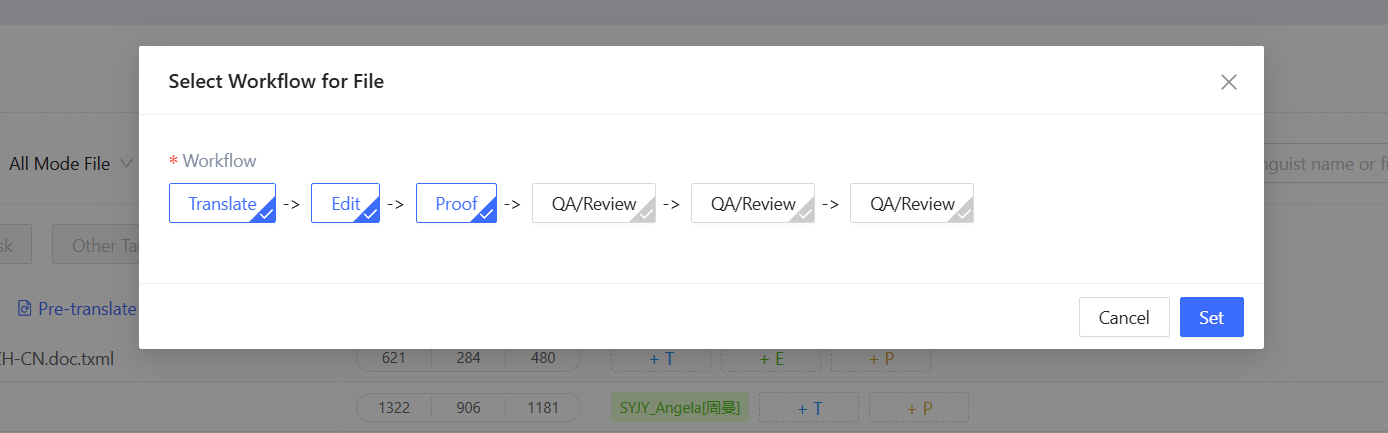
A process settings window will pop up. After making adjustments, click Set.
Note:
① Workflows of files with tasks created cannot be customized.
② Workflows of split files cannot be customized. If a file with a customized workflow is split, each split file will follow the original file's workflow.
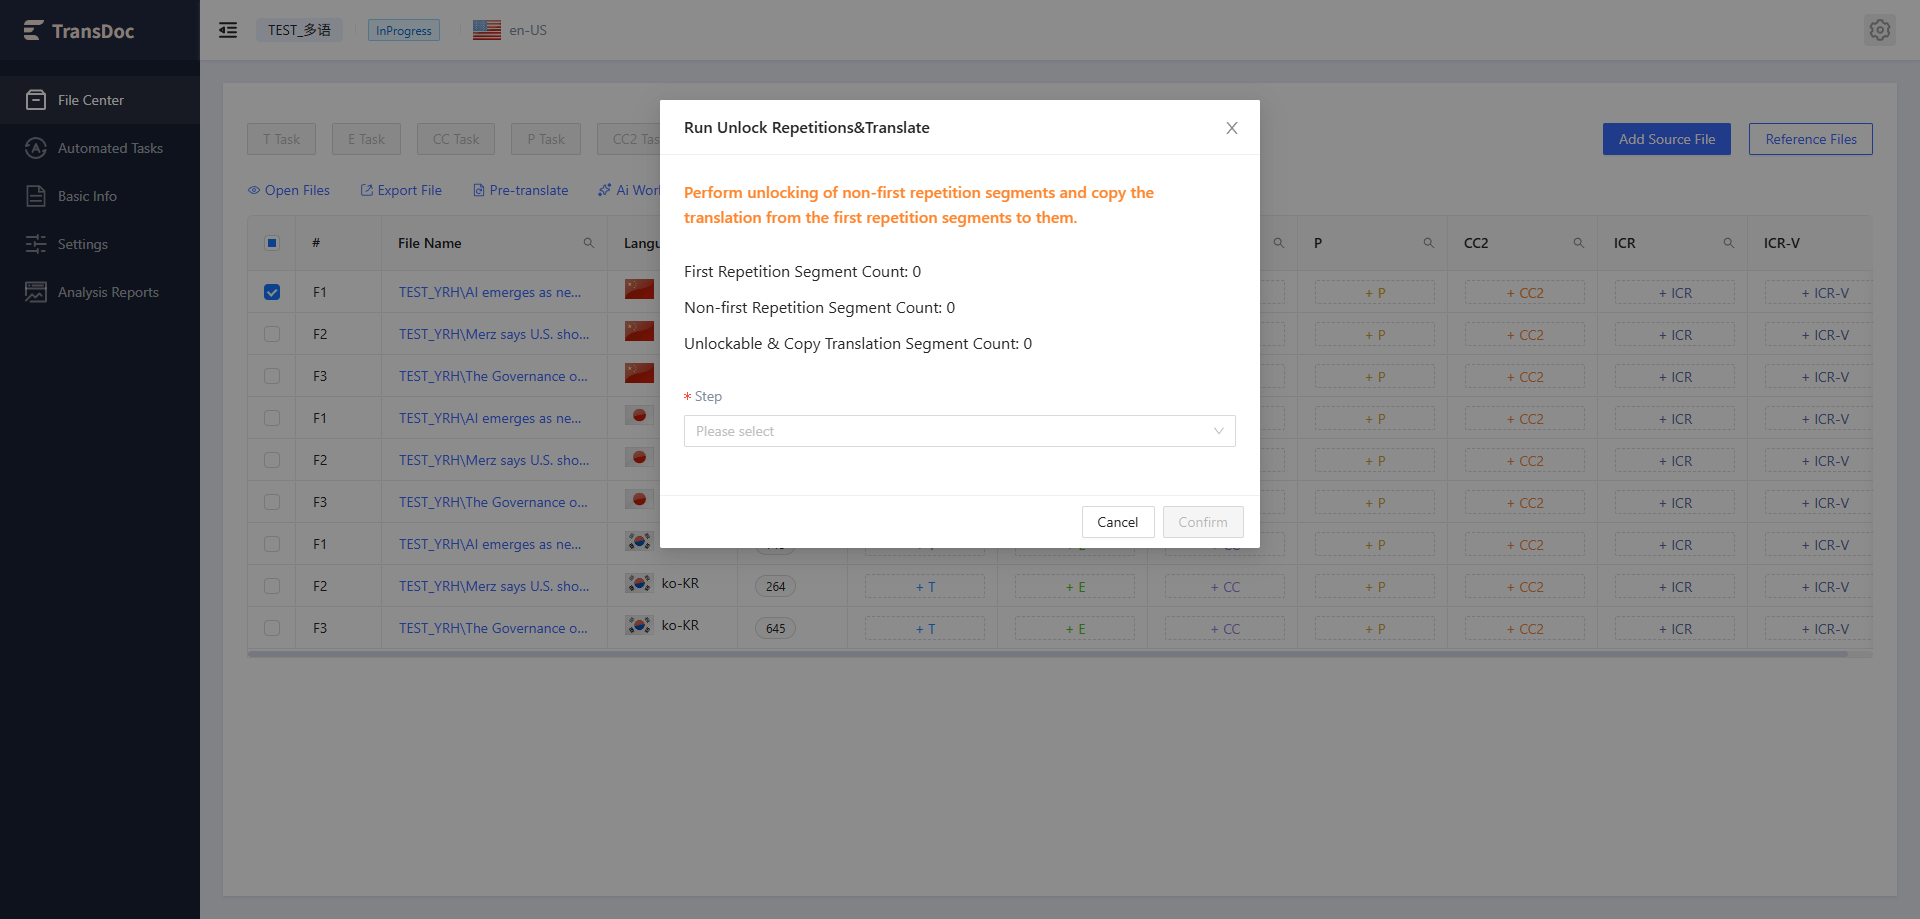
1.16 Unlock Repetition Segments
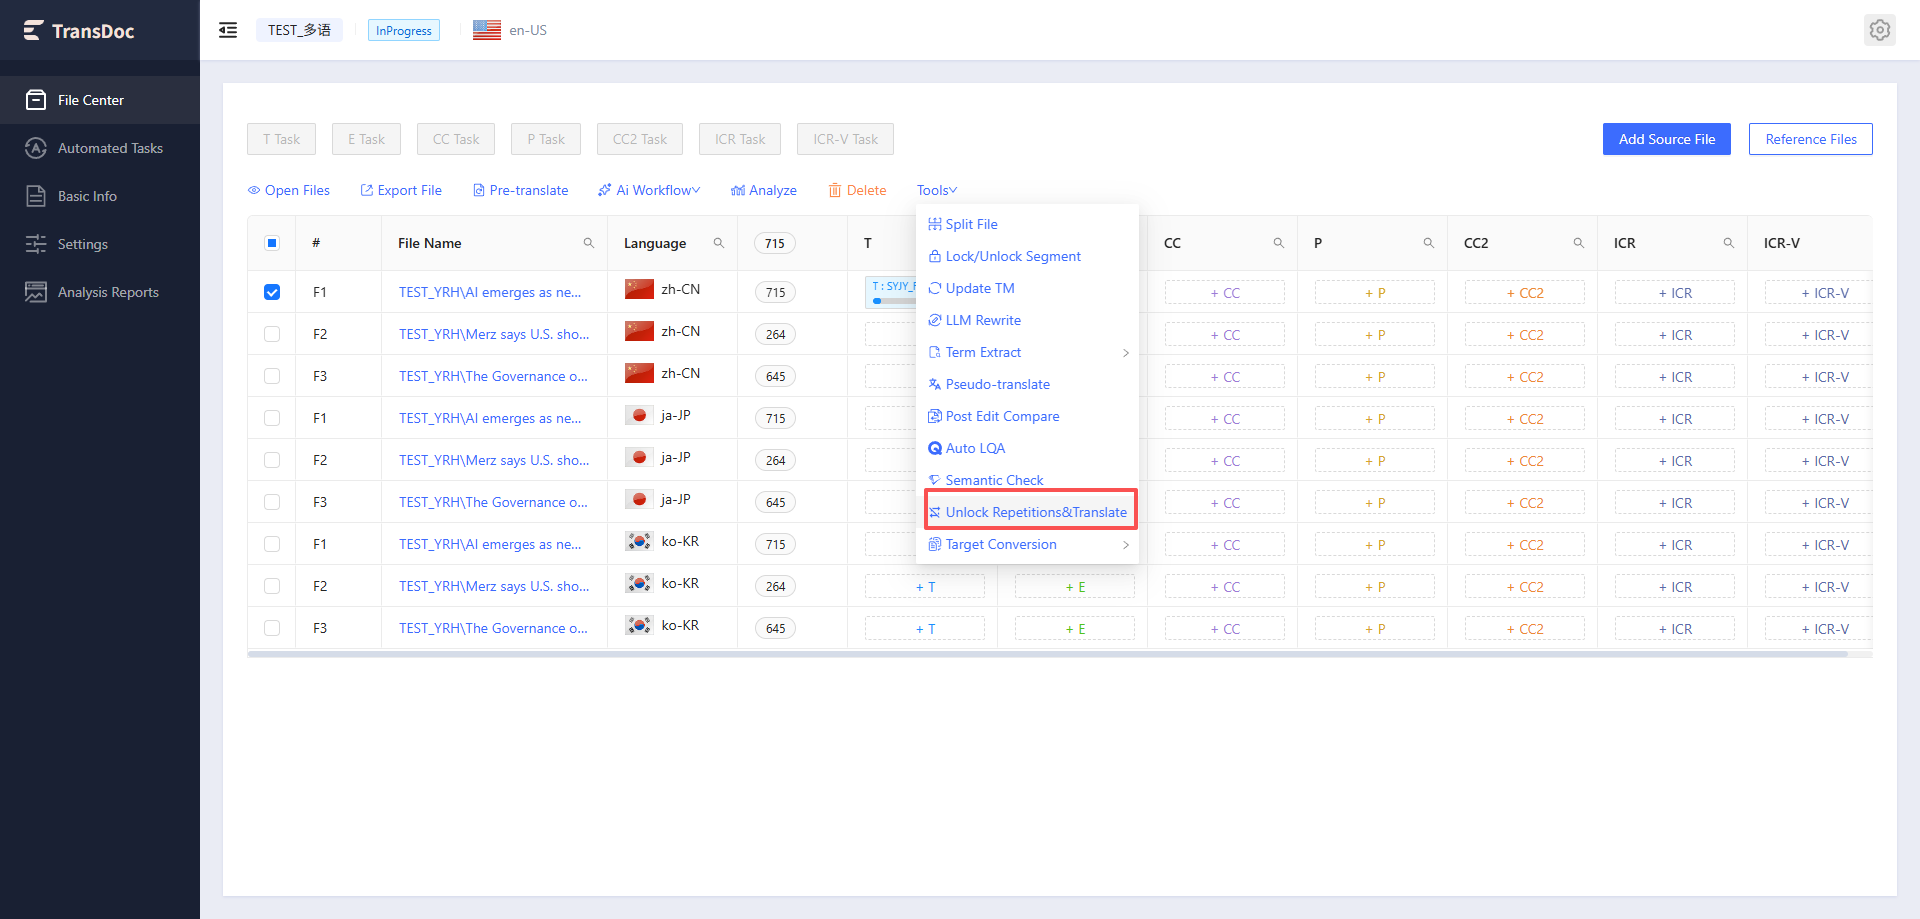
After clicking the button, the settings page will pop up. Click Confirm to unlock non-first-occurrence repetition segments and copy the translation of the first-occurrence repetition segment to the non-first-occurrence repetition segments.
1.17 Translation Conversion
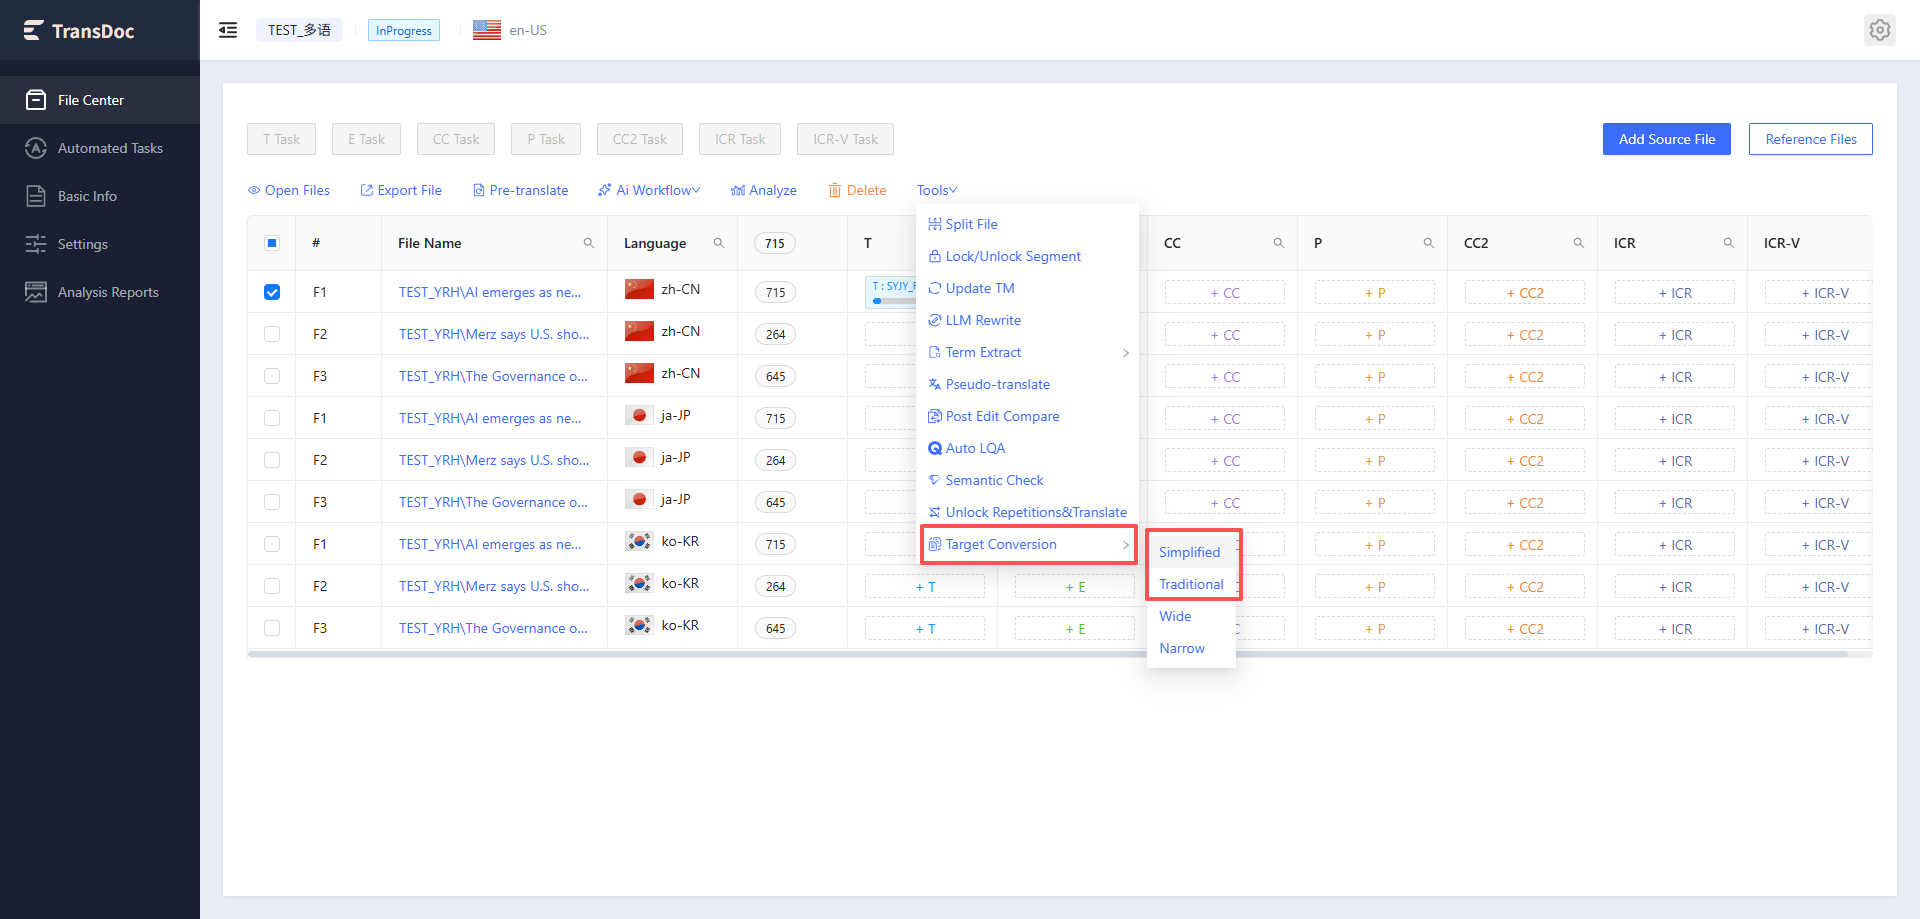
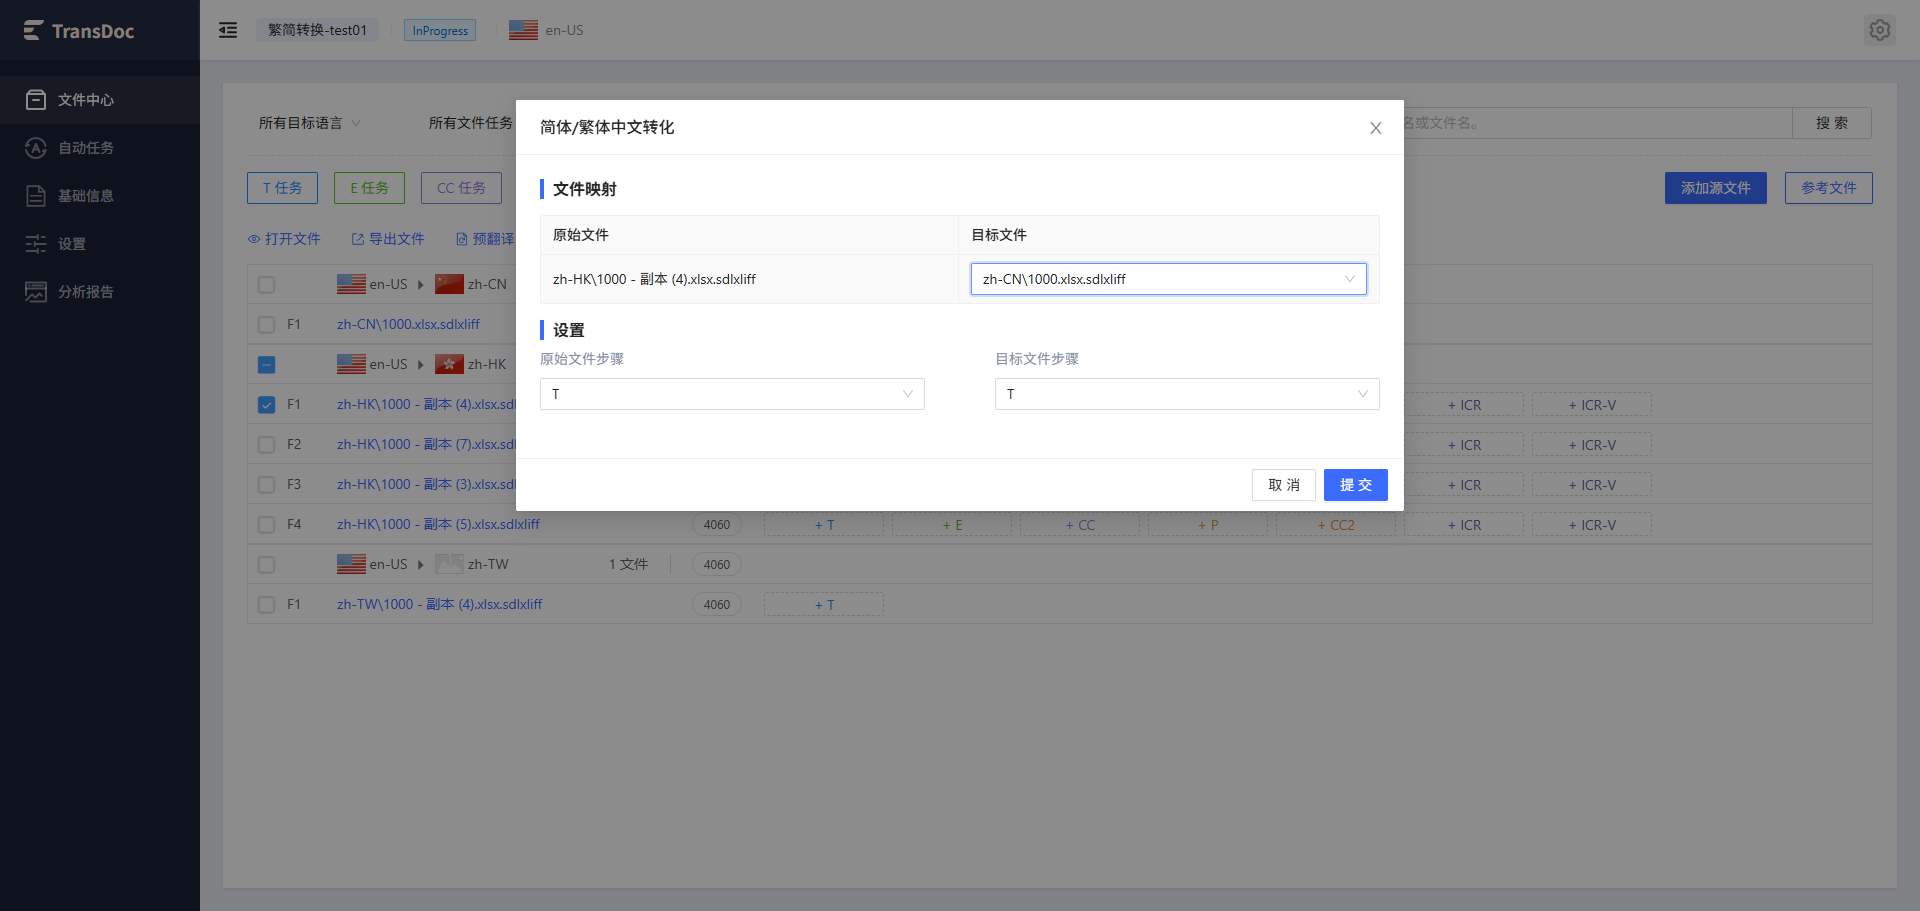
- Simplified: Select a Traditional Chinese file and use the Simplified Conversion function to copy the translation from the Traditional Chinese file into a Simplified Chinese file, converting the Traditional Chinese translation into Simplified Chinese.
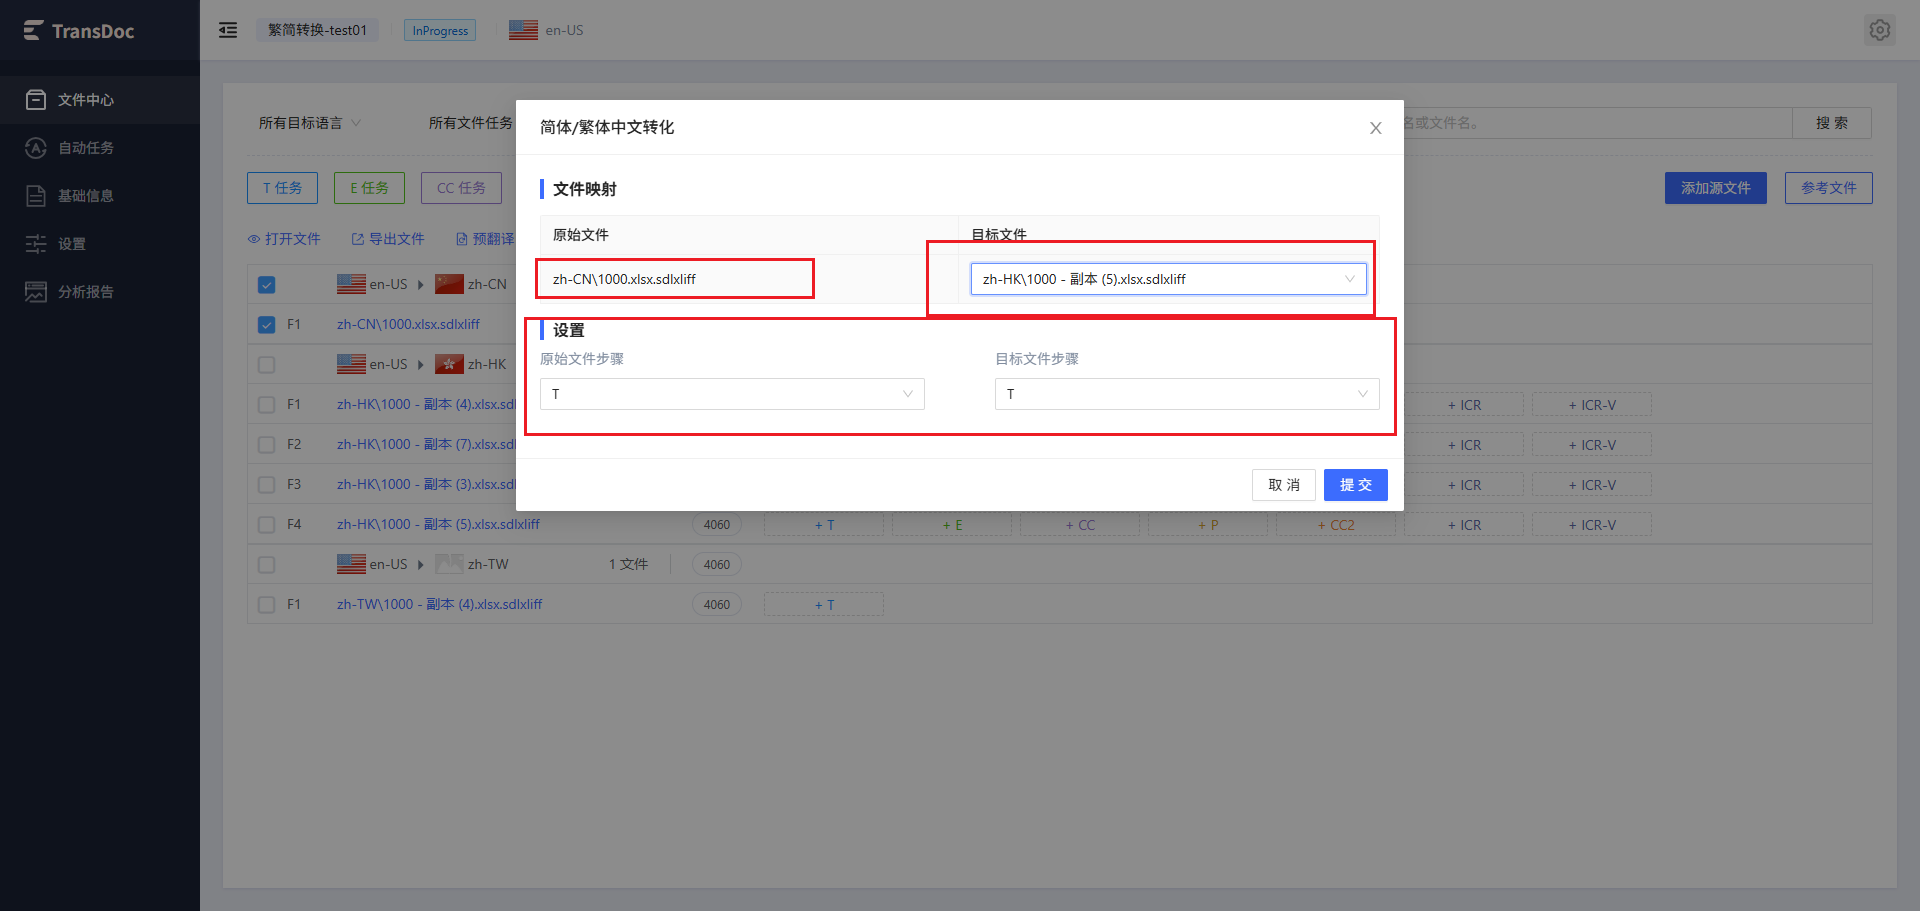
- Traditional: Select a Simplified Chinese file and use the Traditional Chinese conversion function to copy the translations from the Simplified Chinese file into a Traditional Chinese file, converting the Simplified Chinese translations to Traditional Chinese.
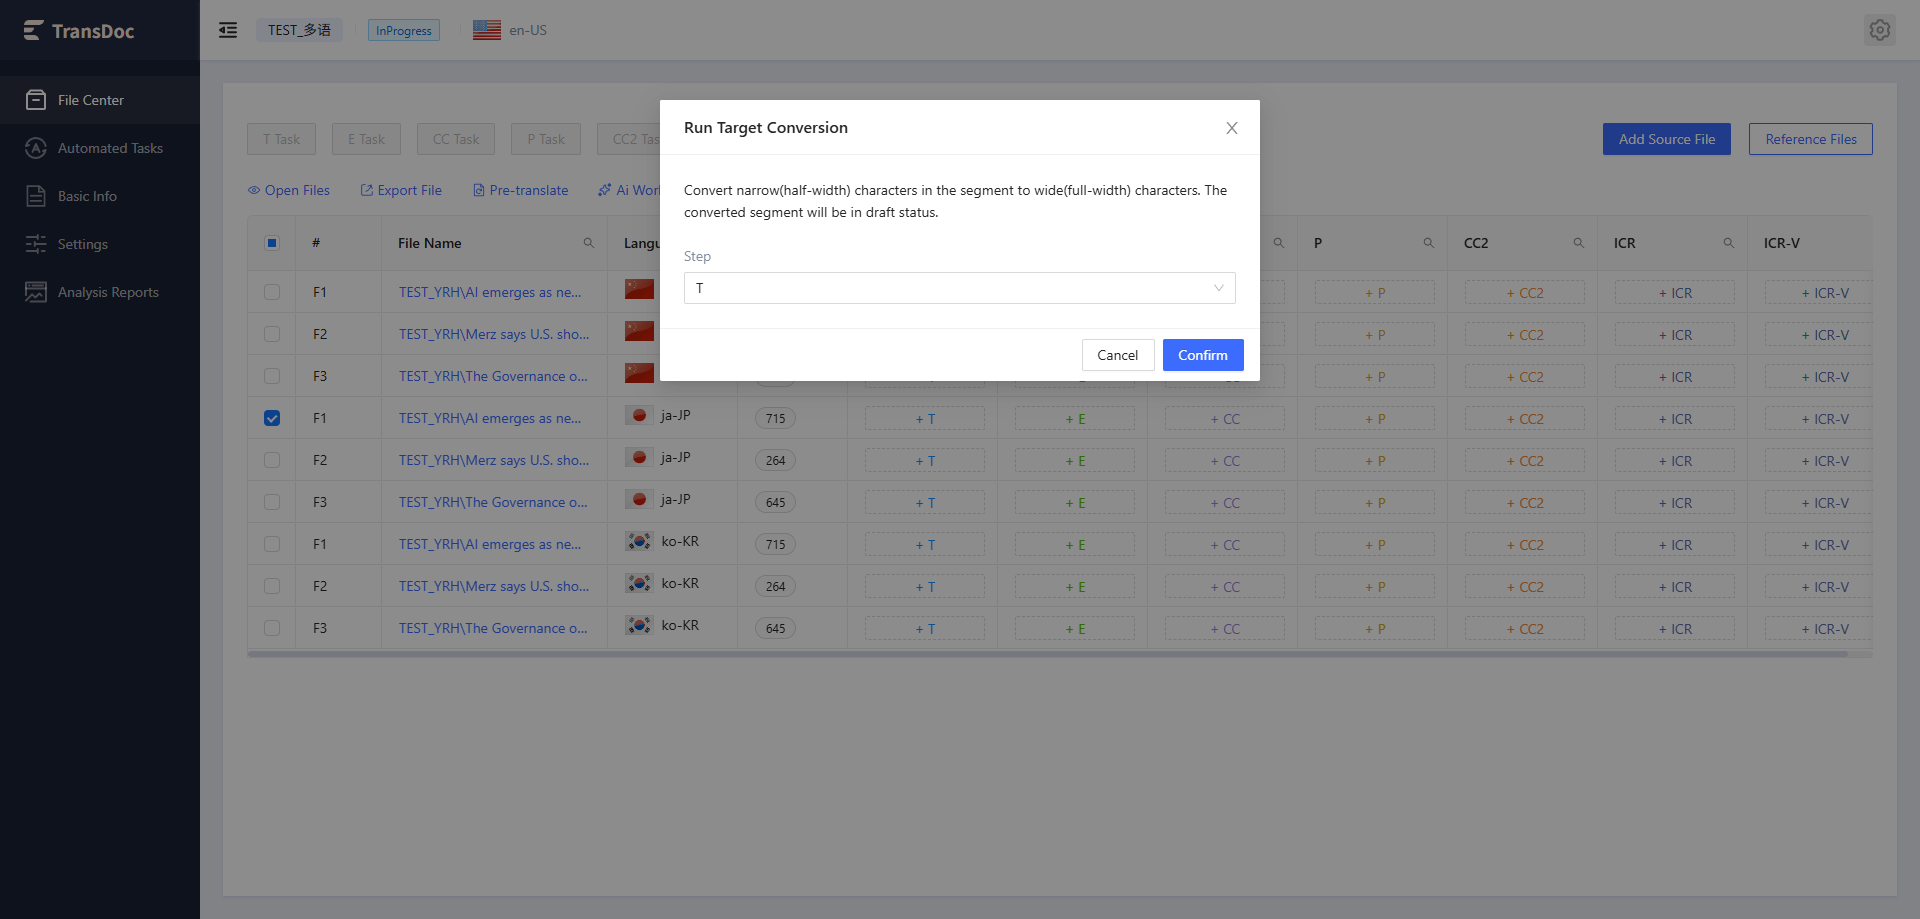
- Japanese Full-Width: Select a Japanese file to convert narrow(half-width) characters in segments to wide(full-width) characters. The converted segments will be marked as Draft.
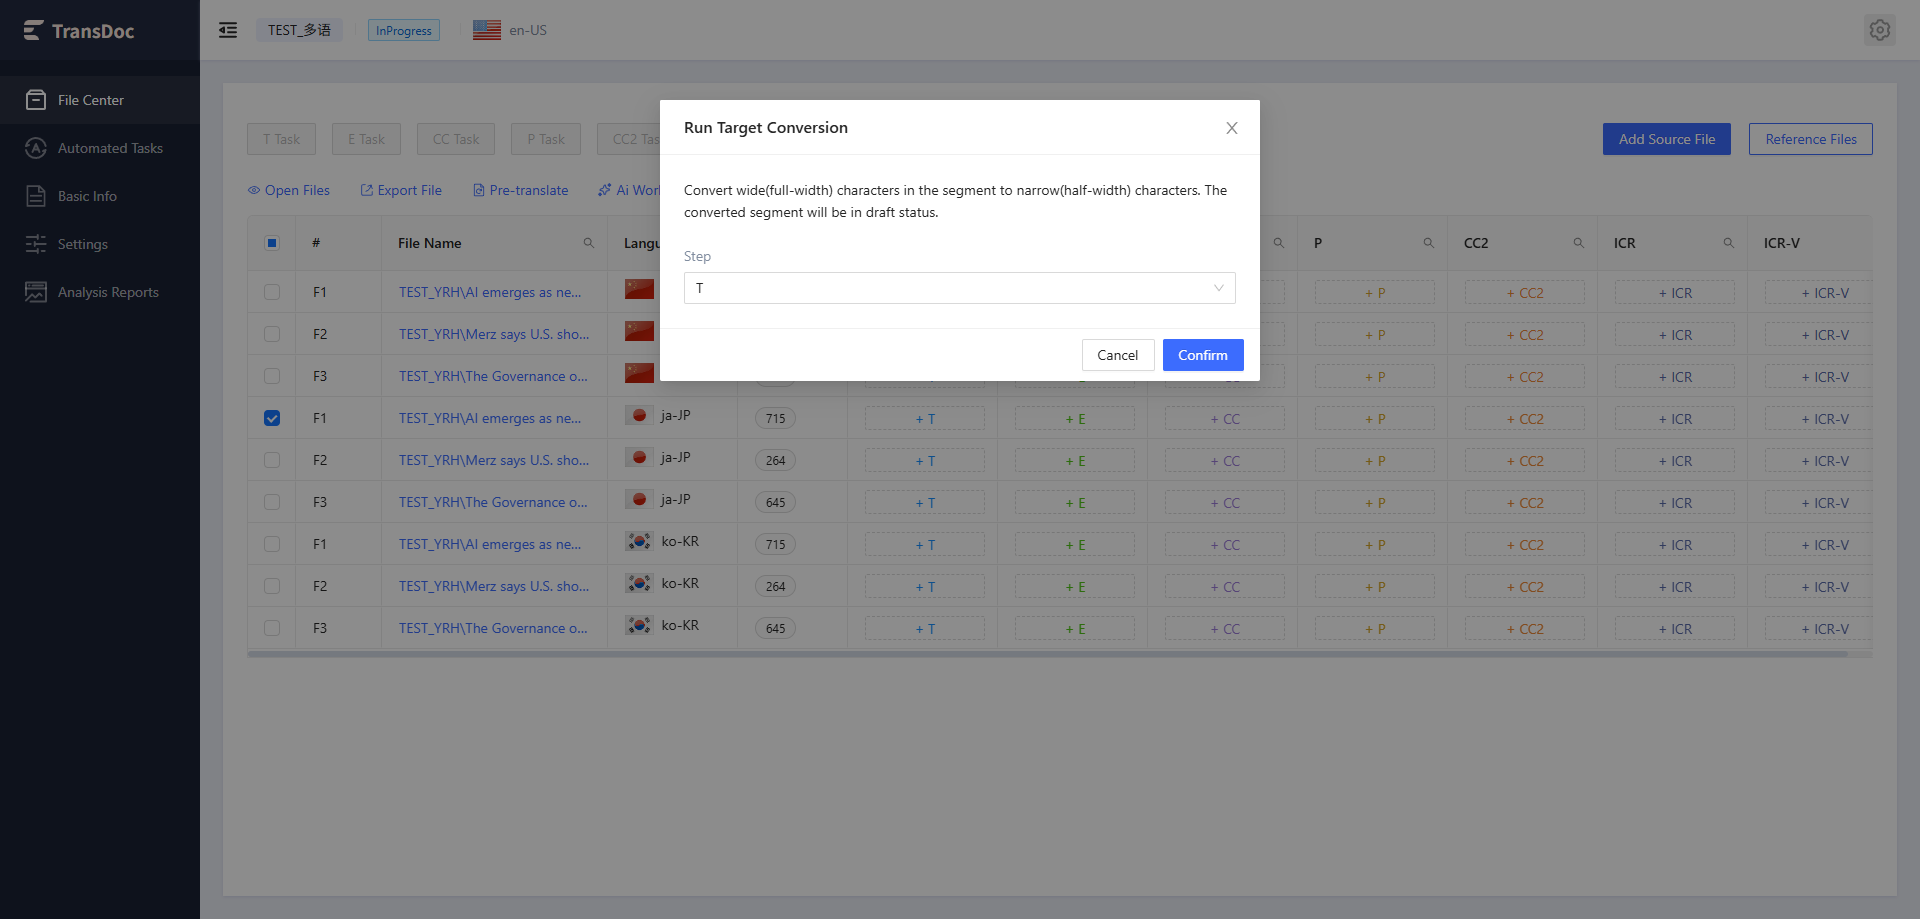
- Japanese Half-Width: Select a Japanese file to convert wide(full-width) characters in the segment to narrow(half-width) characters. The converted segment will be marked as Draft.
1.18 AI Workflow
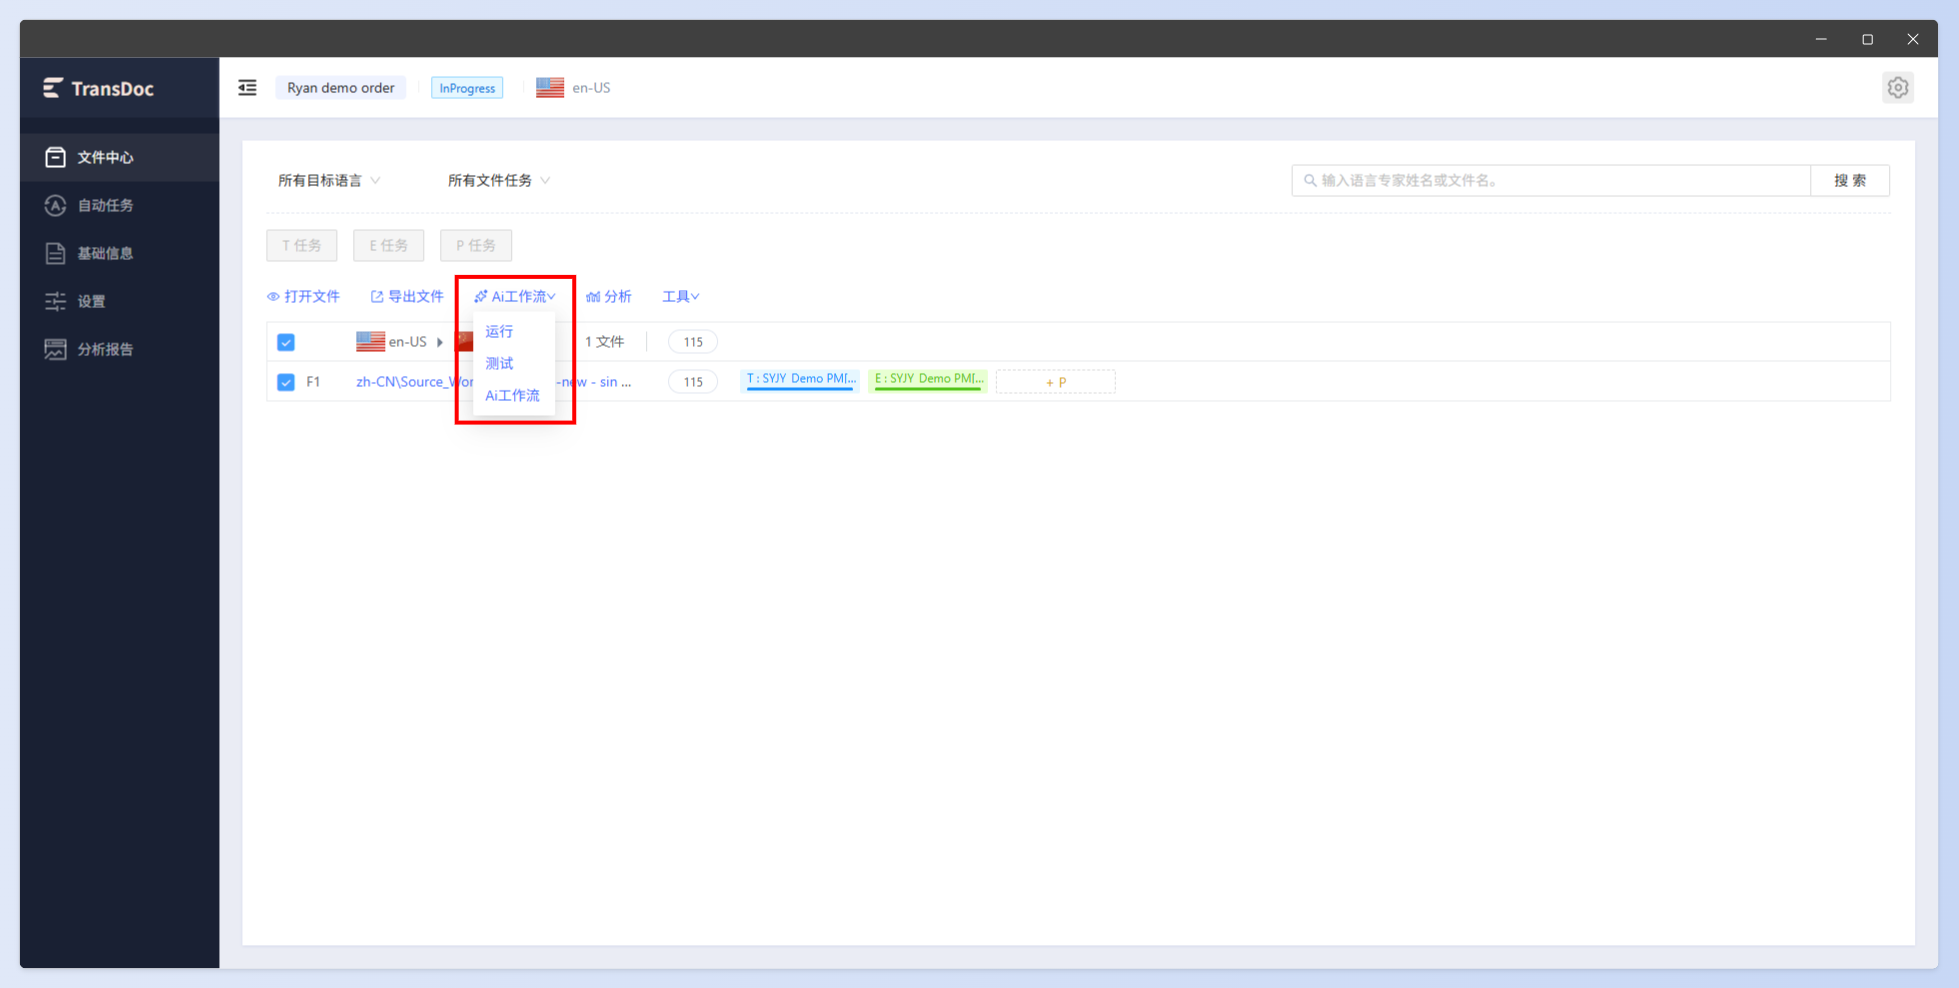
- Run
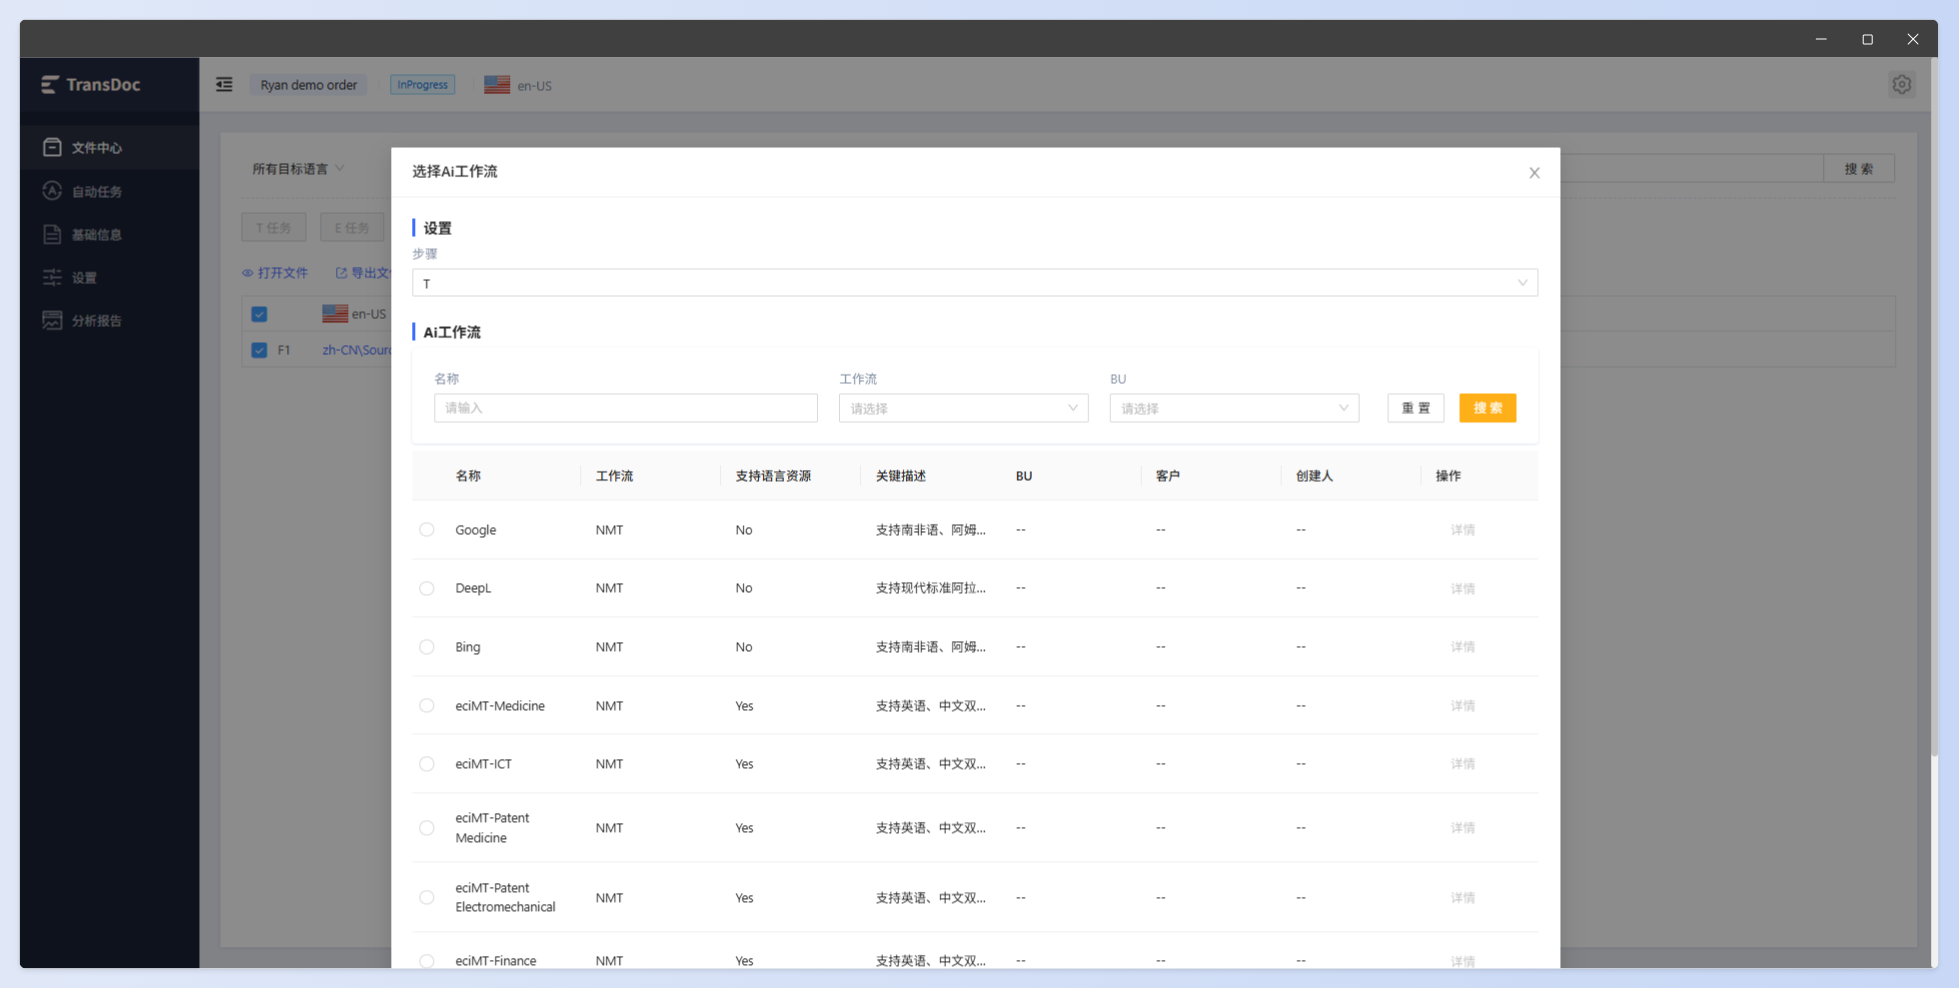
Select one or more files to run the AI Workflow. The selection page will pop up, and after the selection is complete, the AI Workflow will be executed. The AI results will be written into the current workflow.
- Test
Select one or more files to test the AI Workflow.
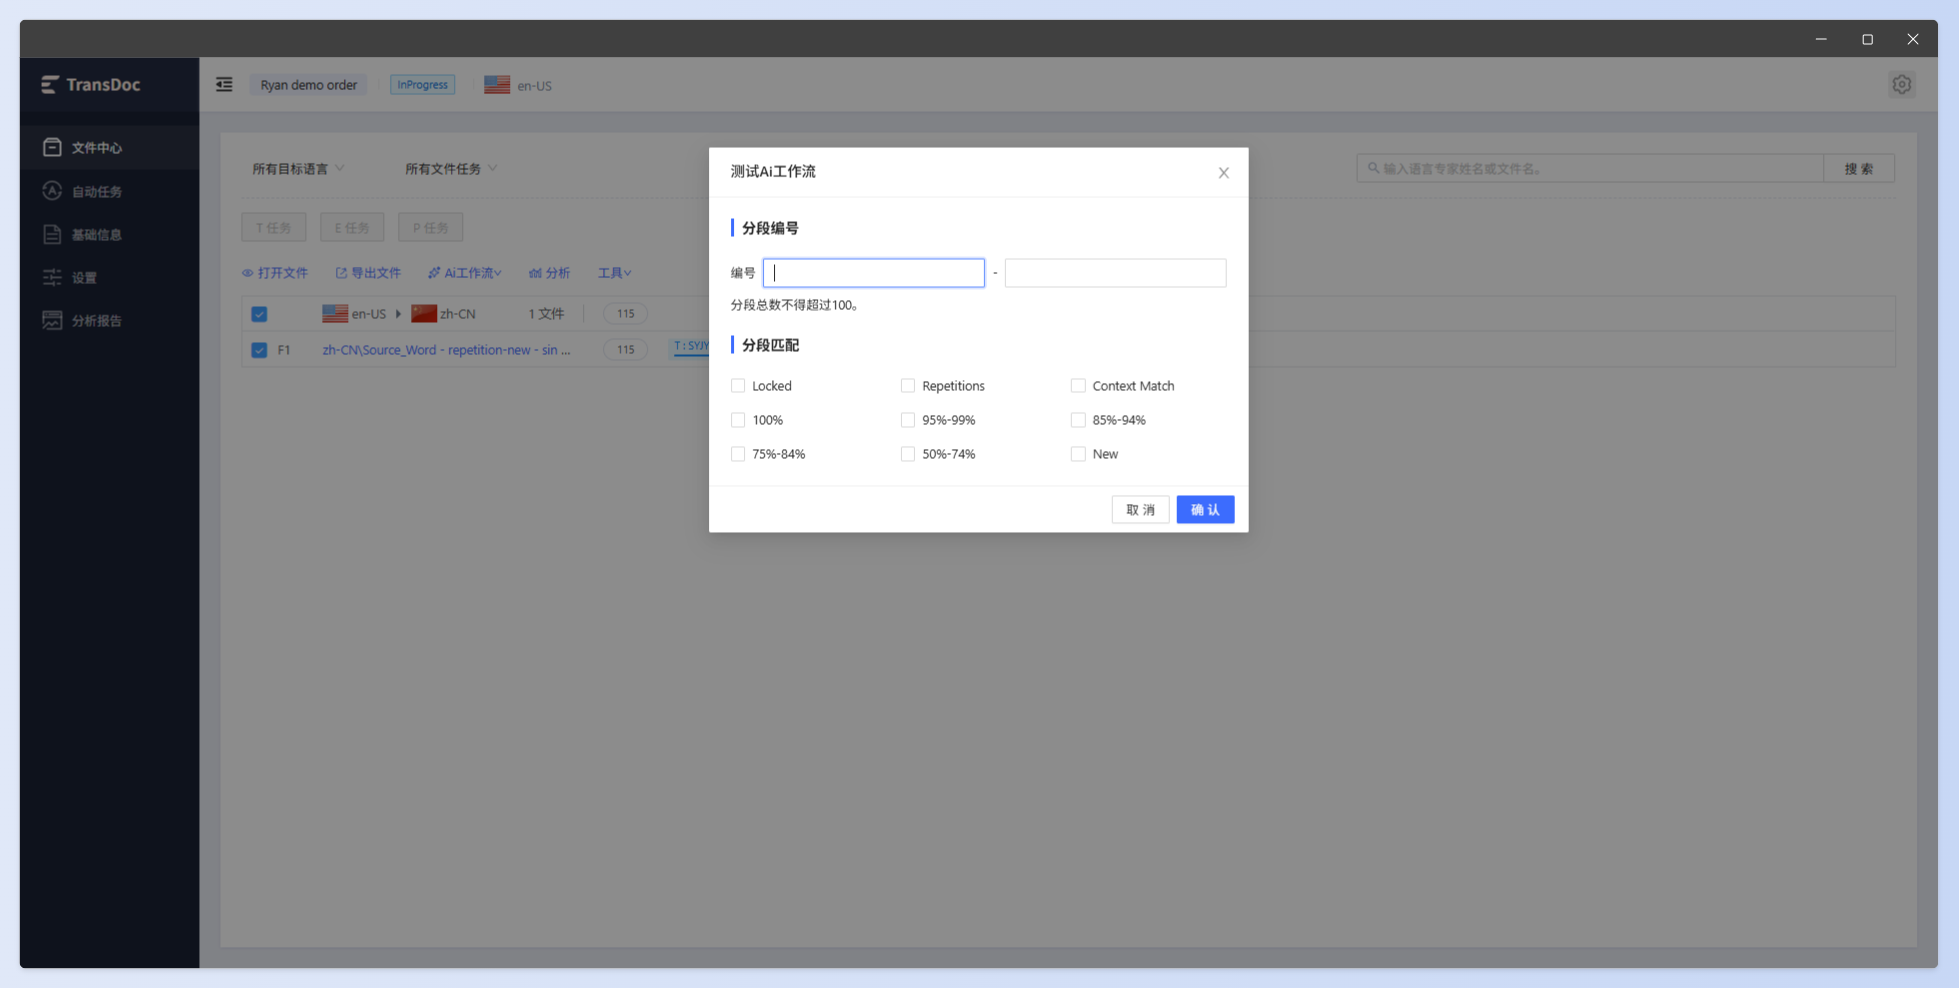
The data will be sent to the AI Workflow platform to test models, prompts, and other functions.
- AI Workflow
Go to the AI Workflow platform